- Table of contents
There are two steps to this process. First, you need to prepare a CSV file for import. Second, you have to carry out the import. We’ll cover both in this guide.
1. Preparing the CSV file
You need to export your contacts in the CSV format. Most contact databases provide one way or another to do so. If you're managing addresses using Excel sheets, you can create a CSV file by clicking on File → Save As… and then selecting Comma Separated Values as the format from the drop-down menu.
Your CSV file can have the following headers. You’ll find a sample CSV file here: example.csv. Each row corresponds to a newly created contact.
| Values | Notes |
|---|---|
| Company fields | |
| Name | Enter the company name of a company, which is already stored within your Planio project. This field is optional. Alternatively, you may select a pre-existing company for all new contacts when configuring the import. |
| Contact fields | |
| Gender/Salutation | Use either m of f to indicate the person's gender. Alternatively provide commonly used salutations like "Mr." or "Mrs." |
| First name | Enter the contact's first name |
| Last name | This field contains the family name of the person. |
| Email address(es) | You may provide up to three separate columns of email addresses. |
| Phone Number(s) | Enter up to three phone/fax numbers. Enter the type of phone separately from the actual phone number. Planio knows the following kinds of phone numbers: "Work", "Home", "Mobile", "Work Fax", "Home Fax", "Pager", and "Other" |
If you wish to create companies along side contacts, you can select "Create missing values". Then you'll be able to also import further information about the company.
Please note: When importing companies, the importer will not overwrite information within existing companies. If the imported attributes differ from previously stored values, a new company with the same name will be created instead. You may later merge these duplicates, if need be.
2. Importing the CSV File
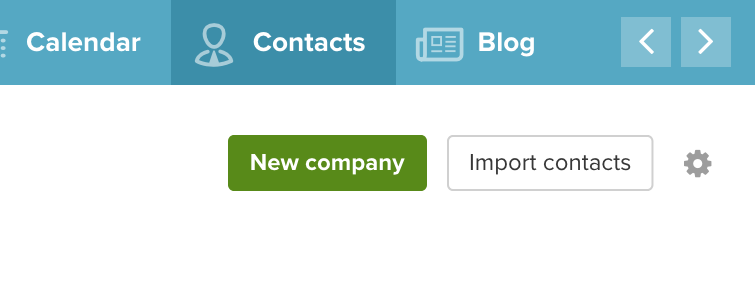
Now, you have a CSV file ready for import. The next step is to import it into Planio. You’ll find the button for the Import in the top right corner on the overall contacts page.
Then, select your CSV file using the file picker.

On the next page, you can select options for importing the CSV File
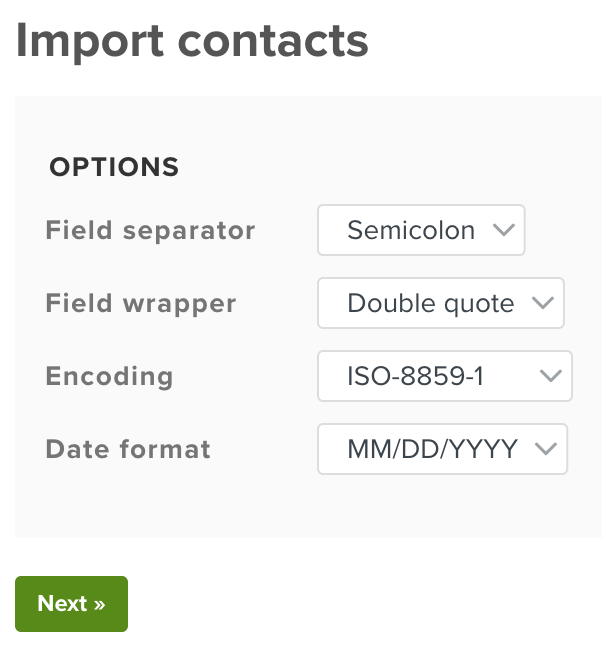
| Option | Notes |
|---|---|
| Field separator | You can select between comma separated values or semicolon separated values |
| Field wrapper | You can select between double quotes or single quotes. |
| Encoding | You can select the encoding for the CSV file |
| Date format | You can select one of five date formats (YYYY-MM-DD, DD/MM/YYYY, MM/DD/YYY, DD.MM.YYY or DD-MM-YYYY) |
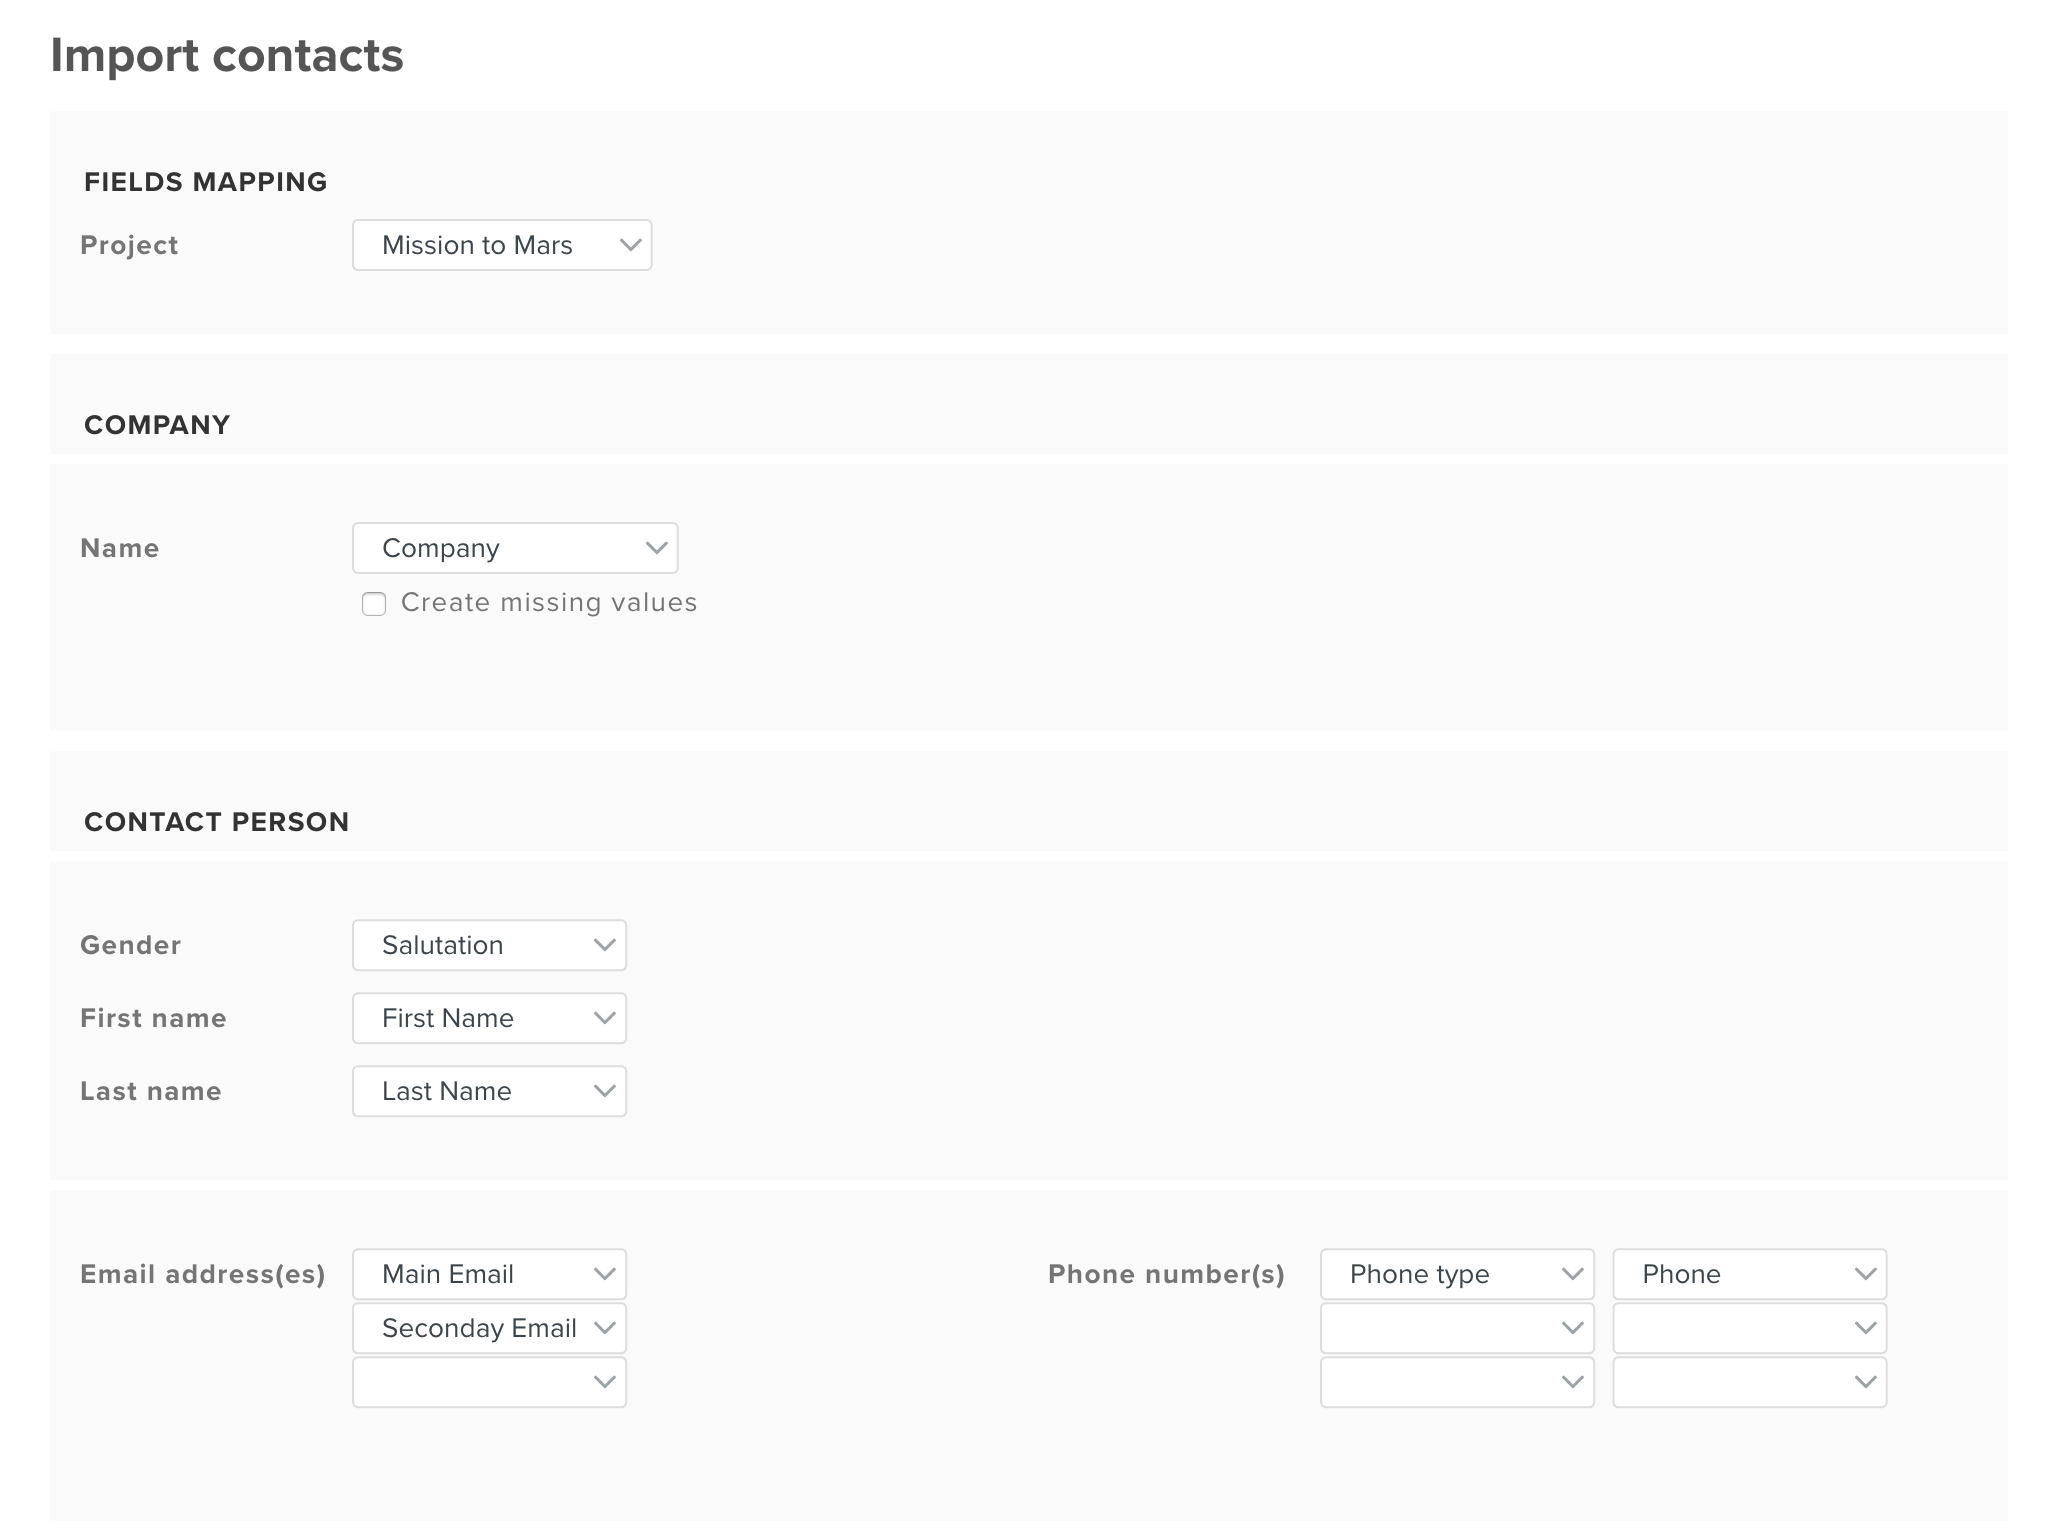
First you have to select a target project for the import. Then, you have to map the values from the CSV files to contact fields in Planio. You can select each value from the drop-down menu beside each attribute. You’ll also see a file content preview further down, so you can make sure you’re importing the right data.
Once you’re done assigning the values to each field, you can click on import to start the import.
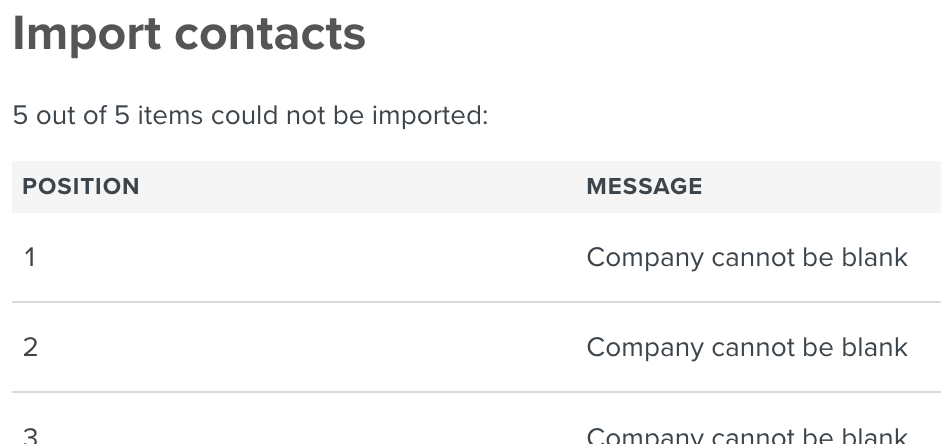
If you encounter any problems, you'll see a page with the errors and the import will not be carried out. You can restart the import once you've fixed the problems in the CSV file.
If all goes well, you’ll see a list of the imported contacts.

That's how you can import companies and contacts into Planio using the CSV importer.
Pas besoin de carte bancaire. L’inscription ne prend que 60 secondes.