- Table of contents
1. Steps for making one or more changes on multiple issues
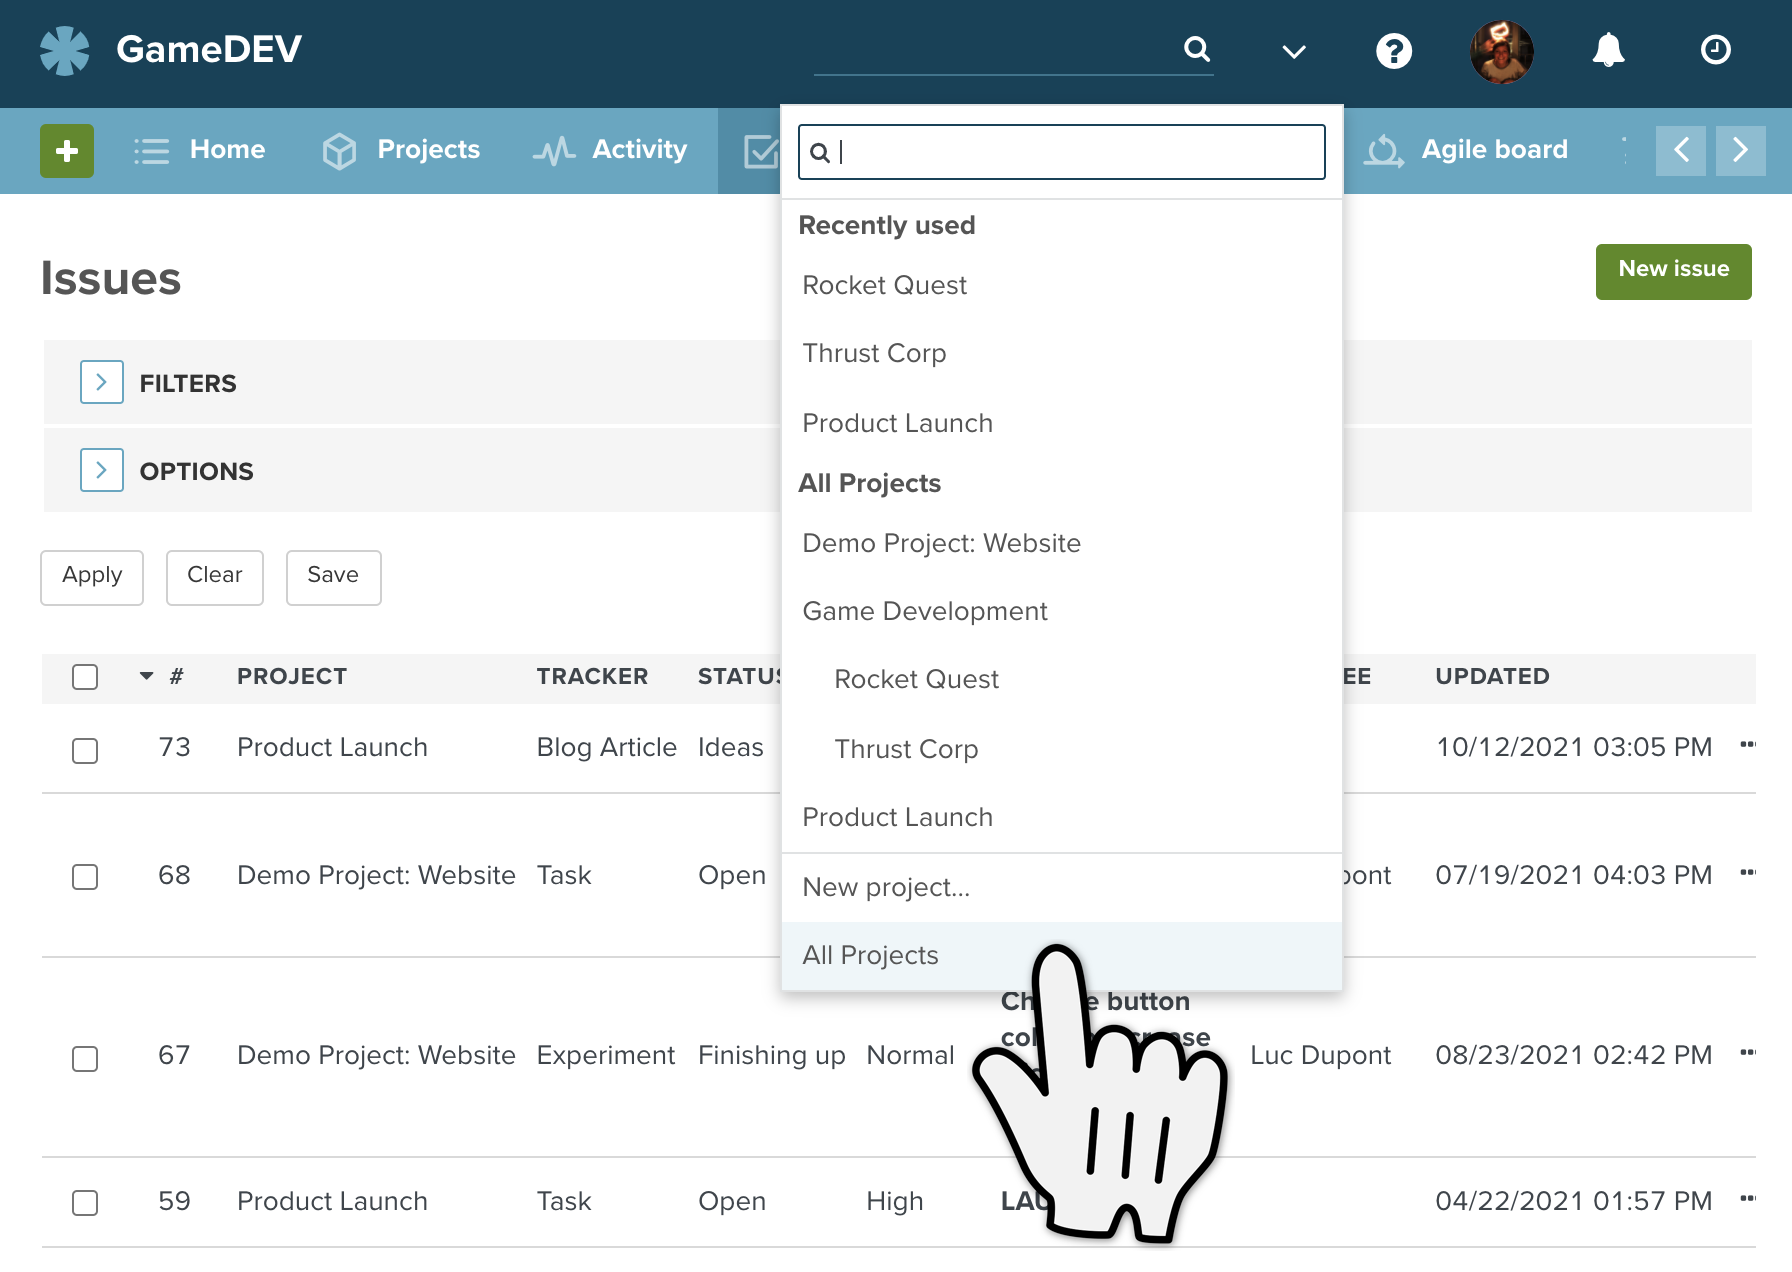
Navigate to your issue list
First, navigate to your issue list and make sure you can see all the issues you need to update. If you need to change issues in multiple projects, you can use the "All projects" option in the drop down menu.
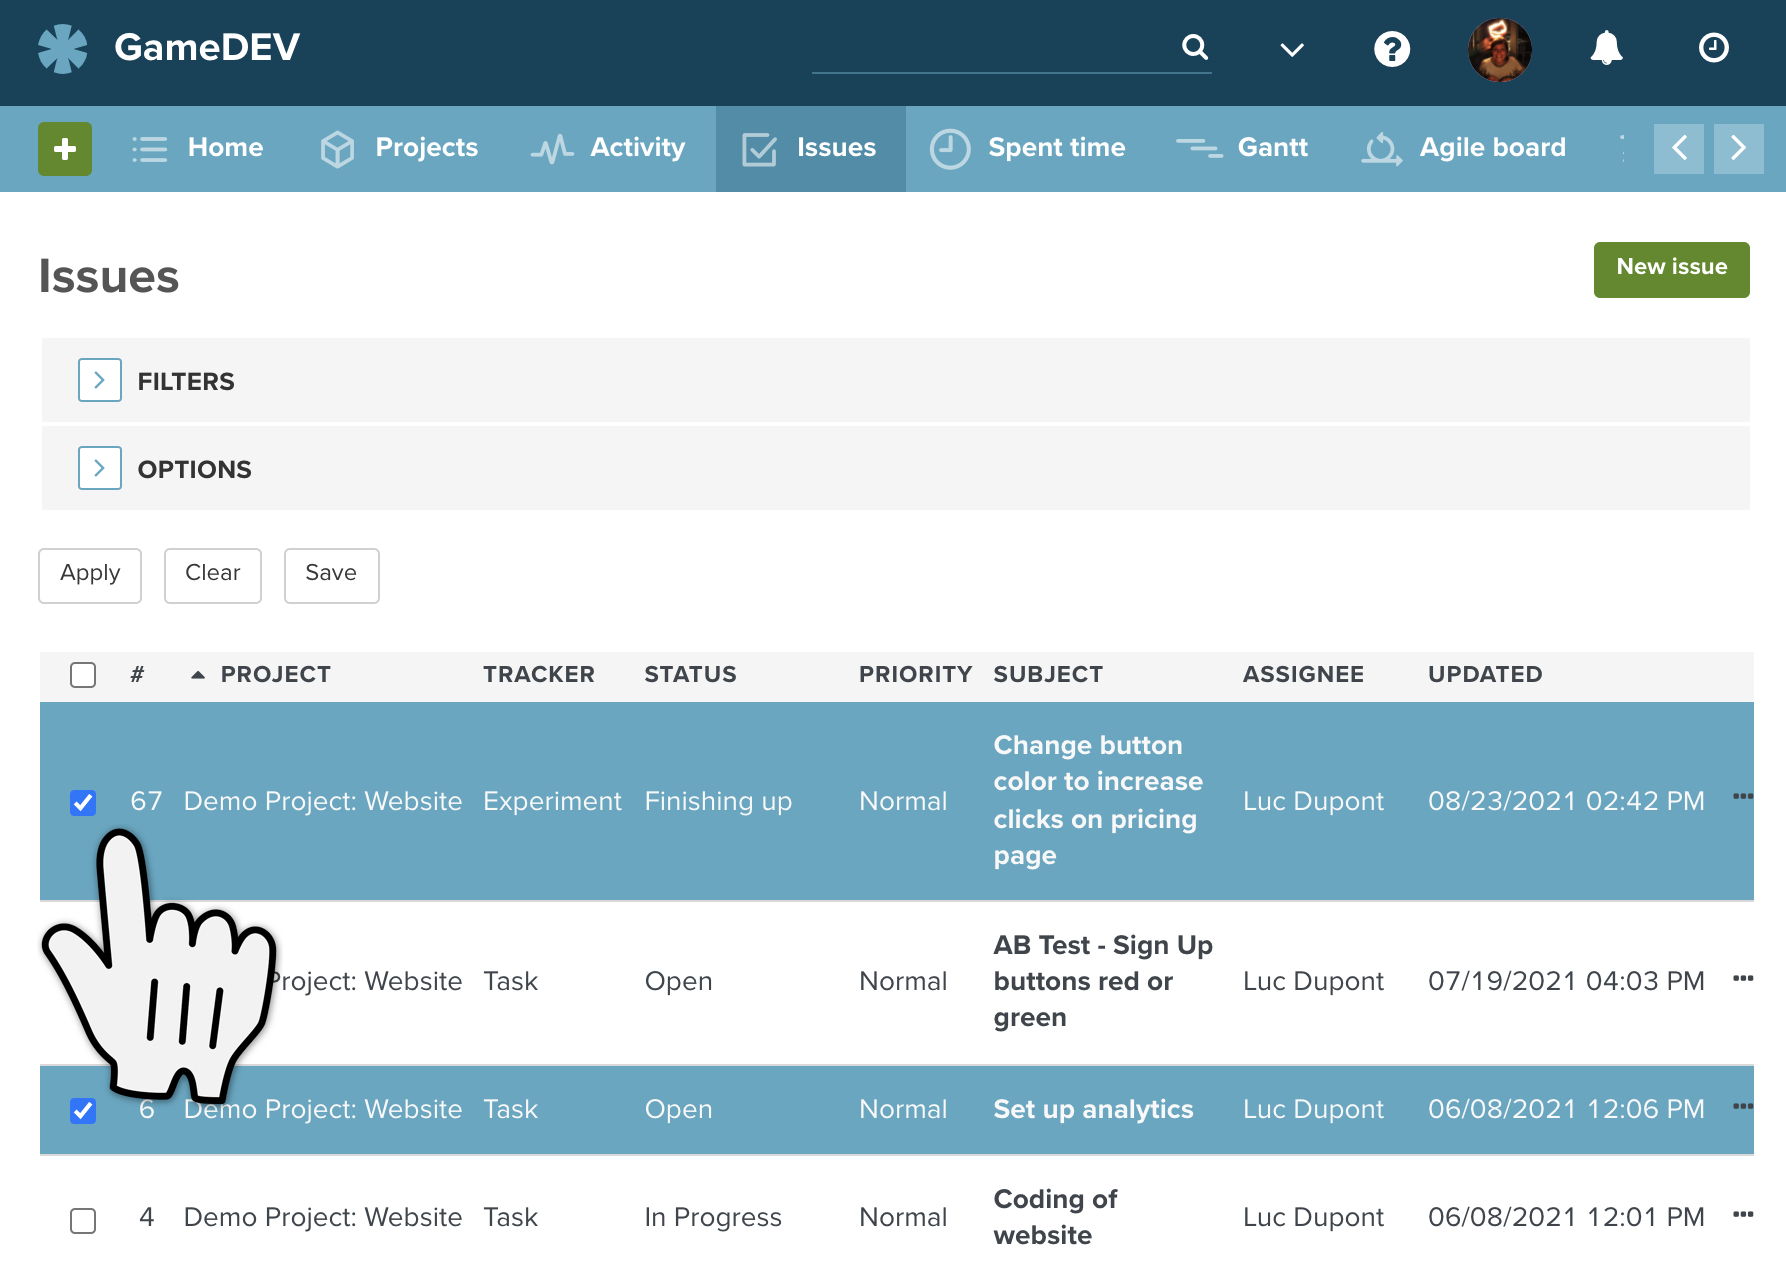
Highlight the relevant issues
Using the tick-box on the left hand side of each issue row in in the issue list, highlight the issues you want to change.
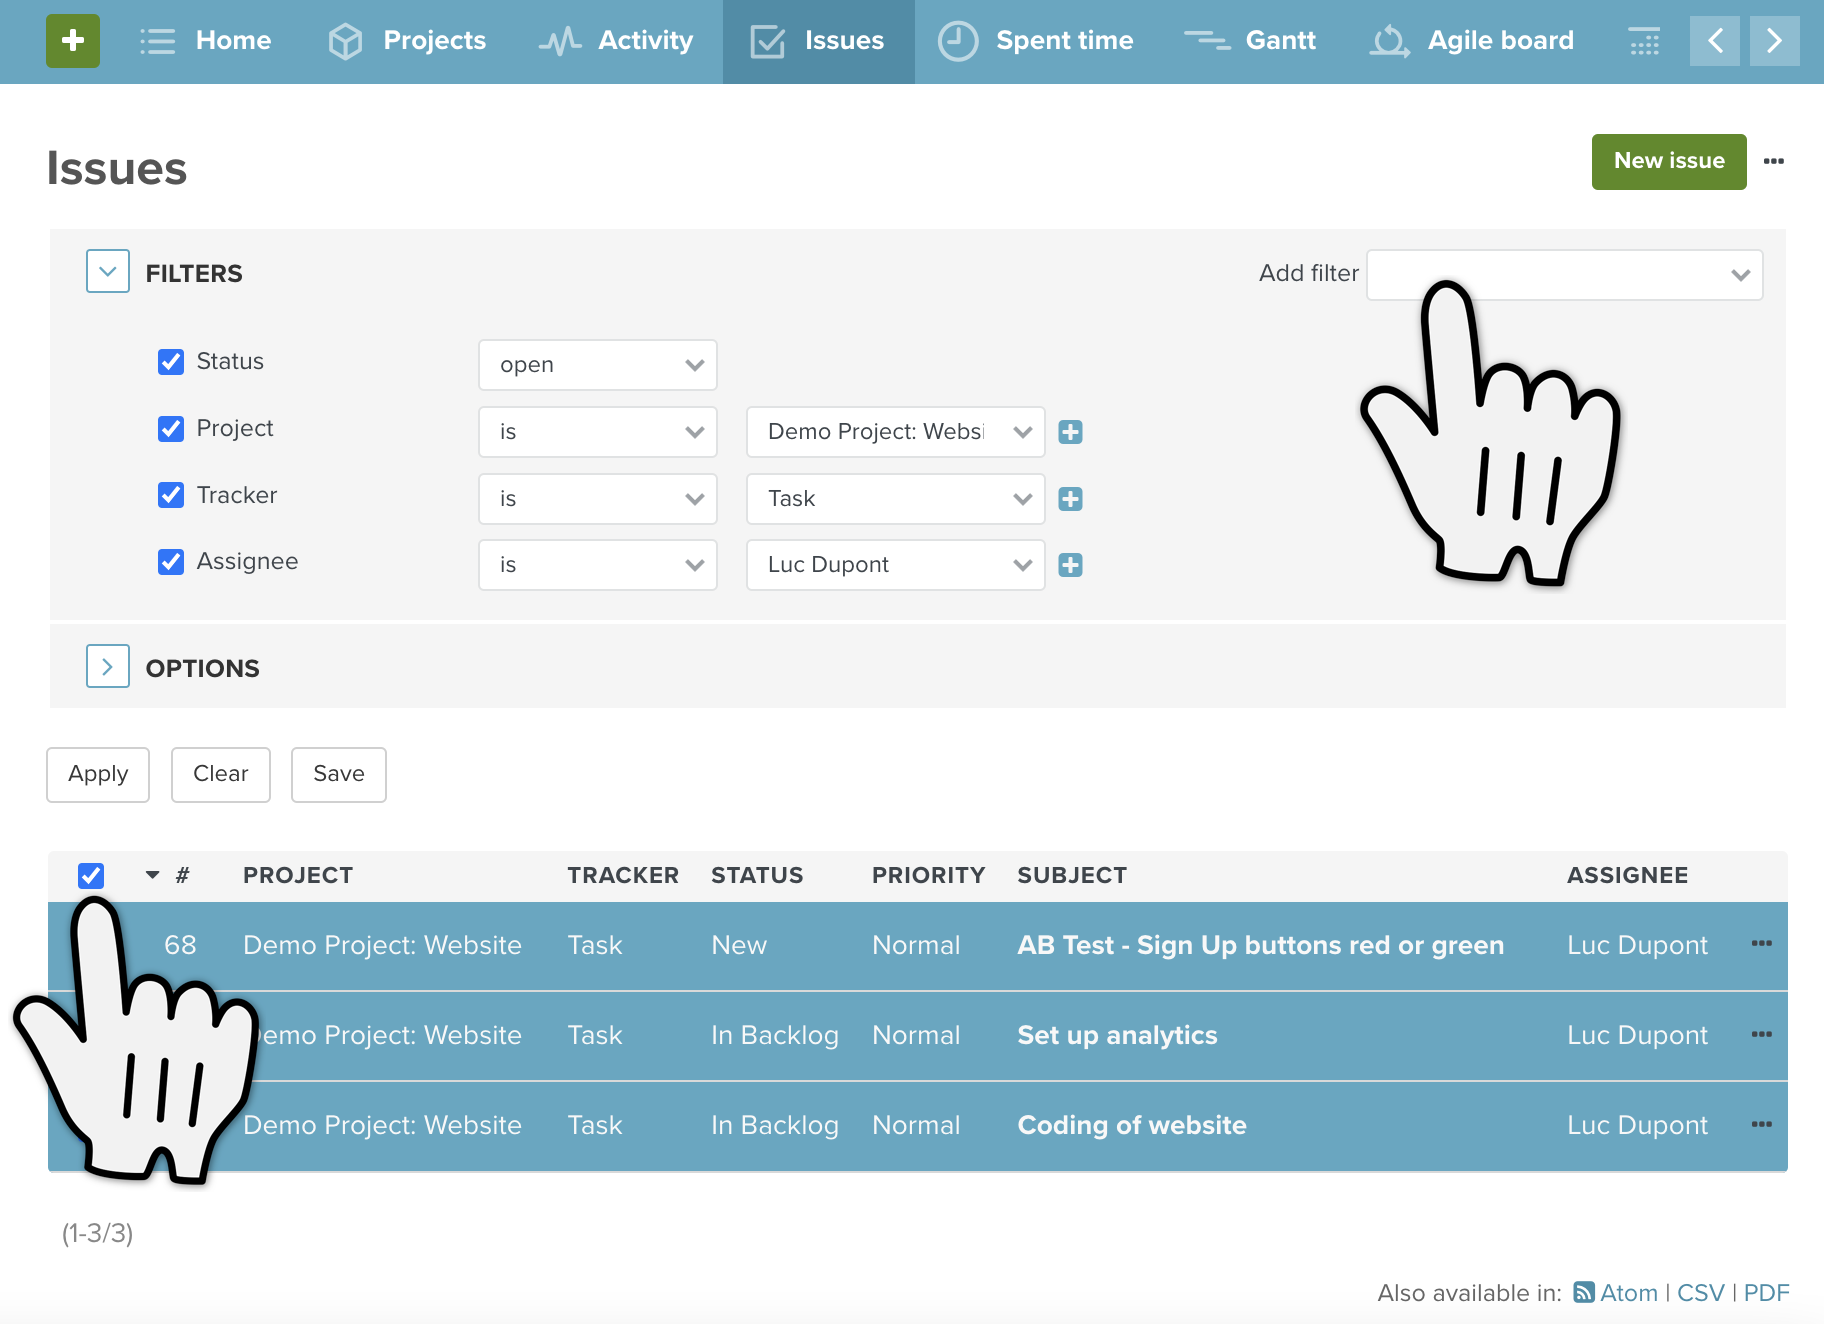
Using the filters, you can refine the issue list so that you can simply highlight the whole issue list instead of single issues if you want.
There is a tick box at the top of the issue list, which will highlight all the issues on that page at once.
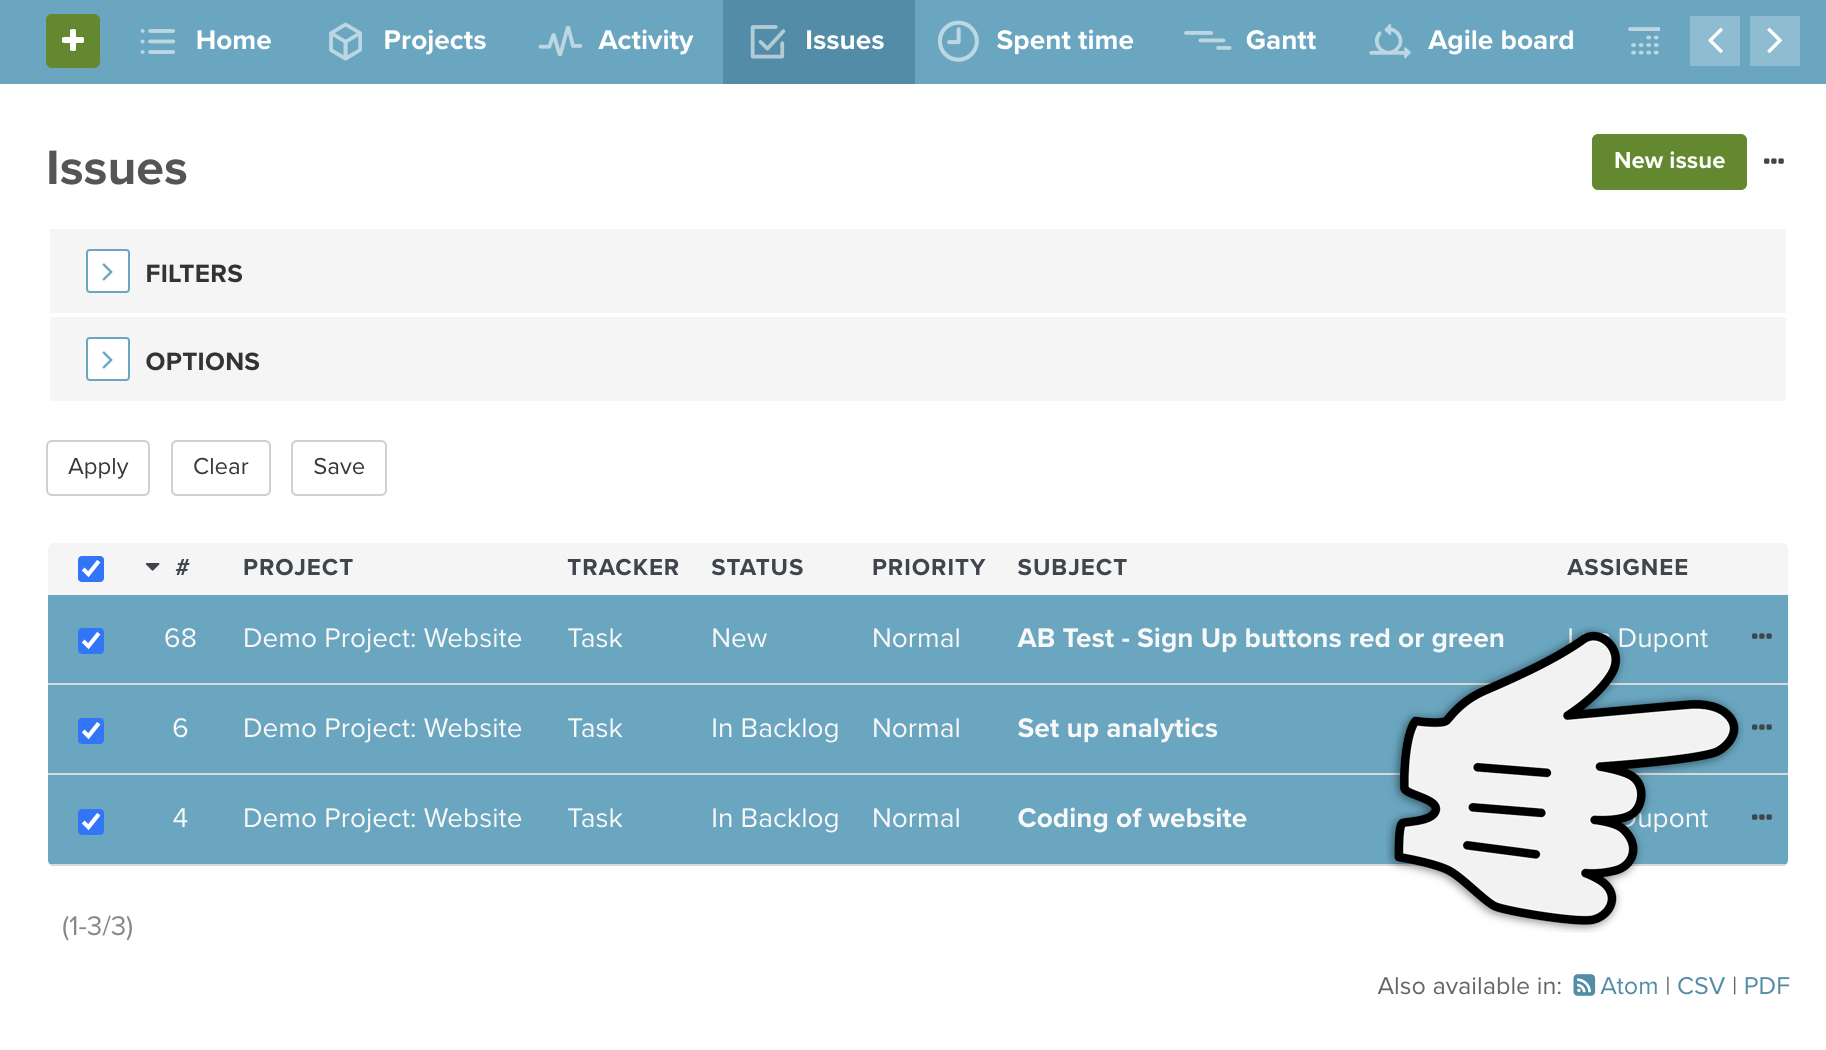
Open the bulk edit menu
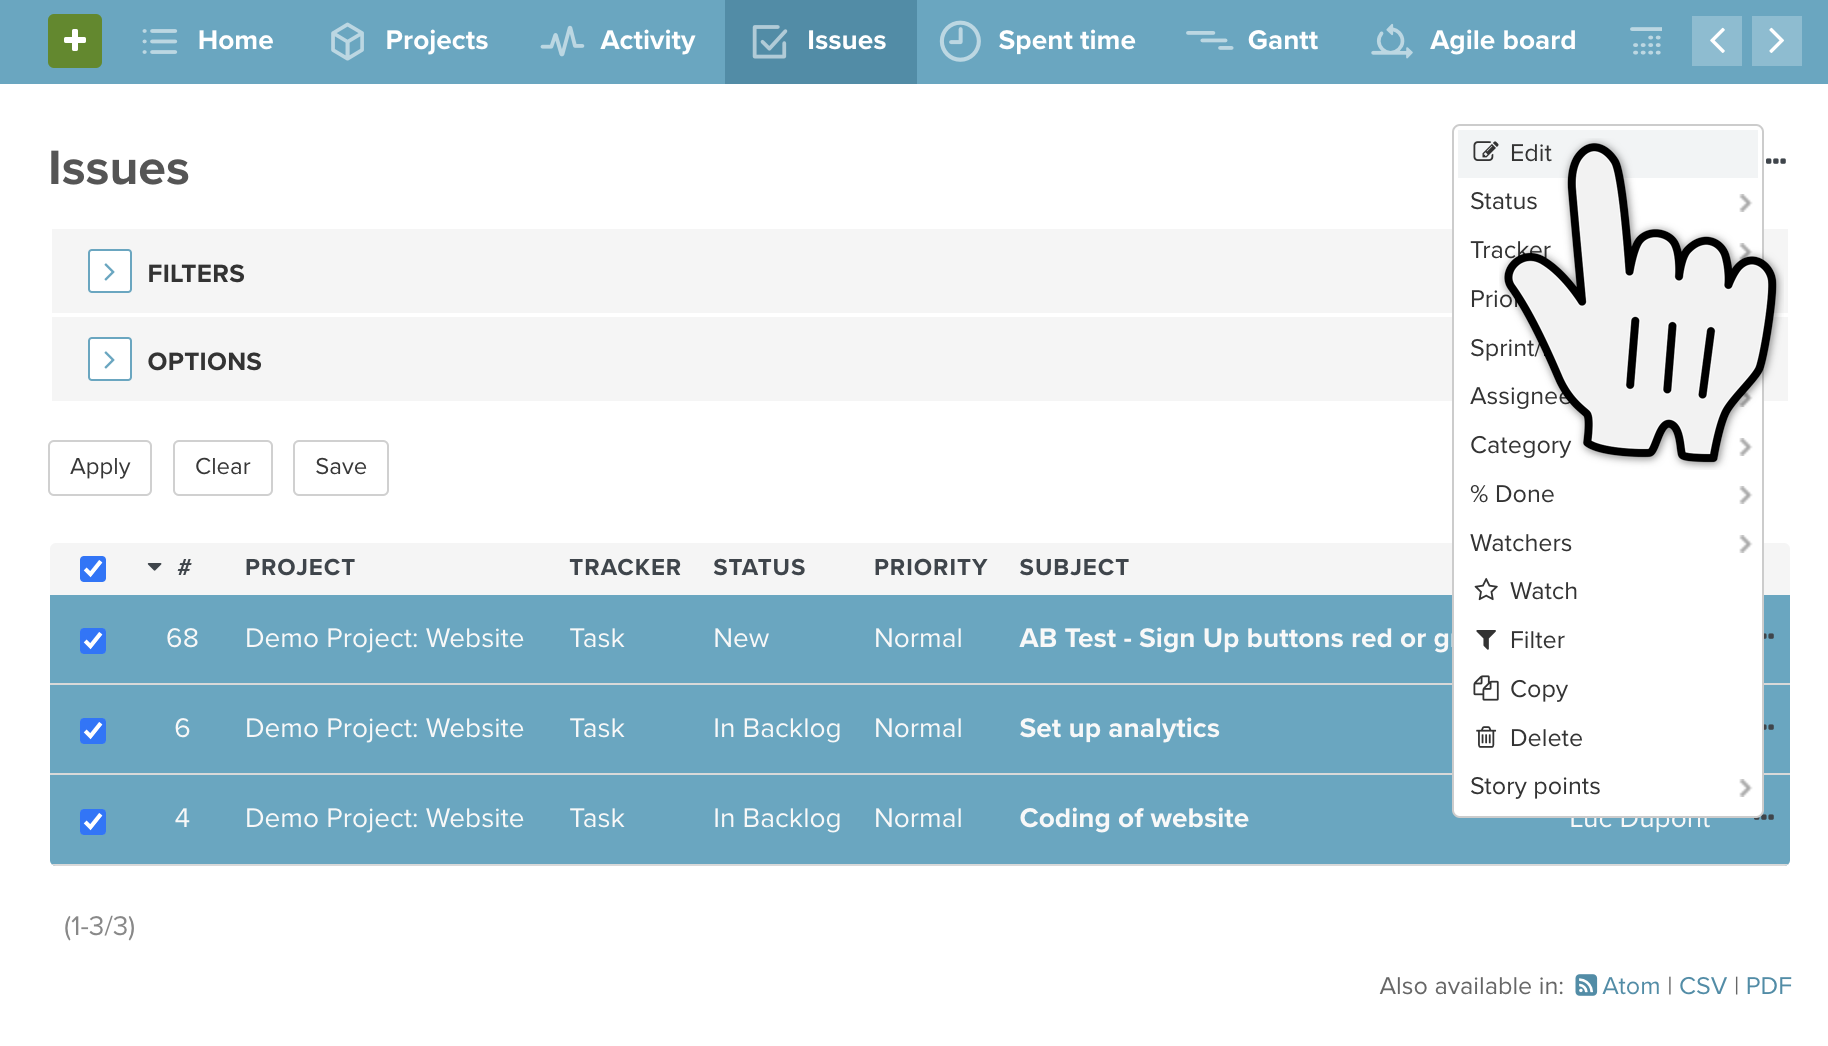
Scroll to the right of the issue list and click on the three dots in one of the highlighted issue rows.
In the bulk edit menu that opens, click on Edit.
Make the changes
You will be redirected to a new page, where all the issue fields are shown.
In this example, we want to change the status to "To Do", the priority to "High" and set a new due date in 3 issues at the same time.
That means we will use the field drop-down menus to change the Status → To Do, the Priority → High and the Due date → 27.07.22.

If the parameter you want to change is NOT available in the bulk edit menu then please scroll down to Hints Tips and Troubleshooting
When you're done, click Save and you will be redirected back to the updated issue list.

2. Steps for making one change on multiple issues
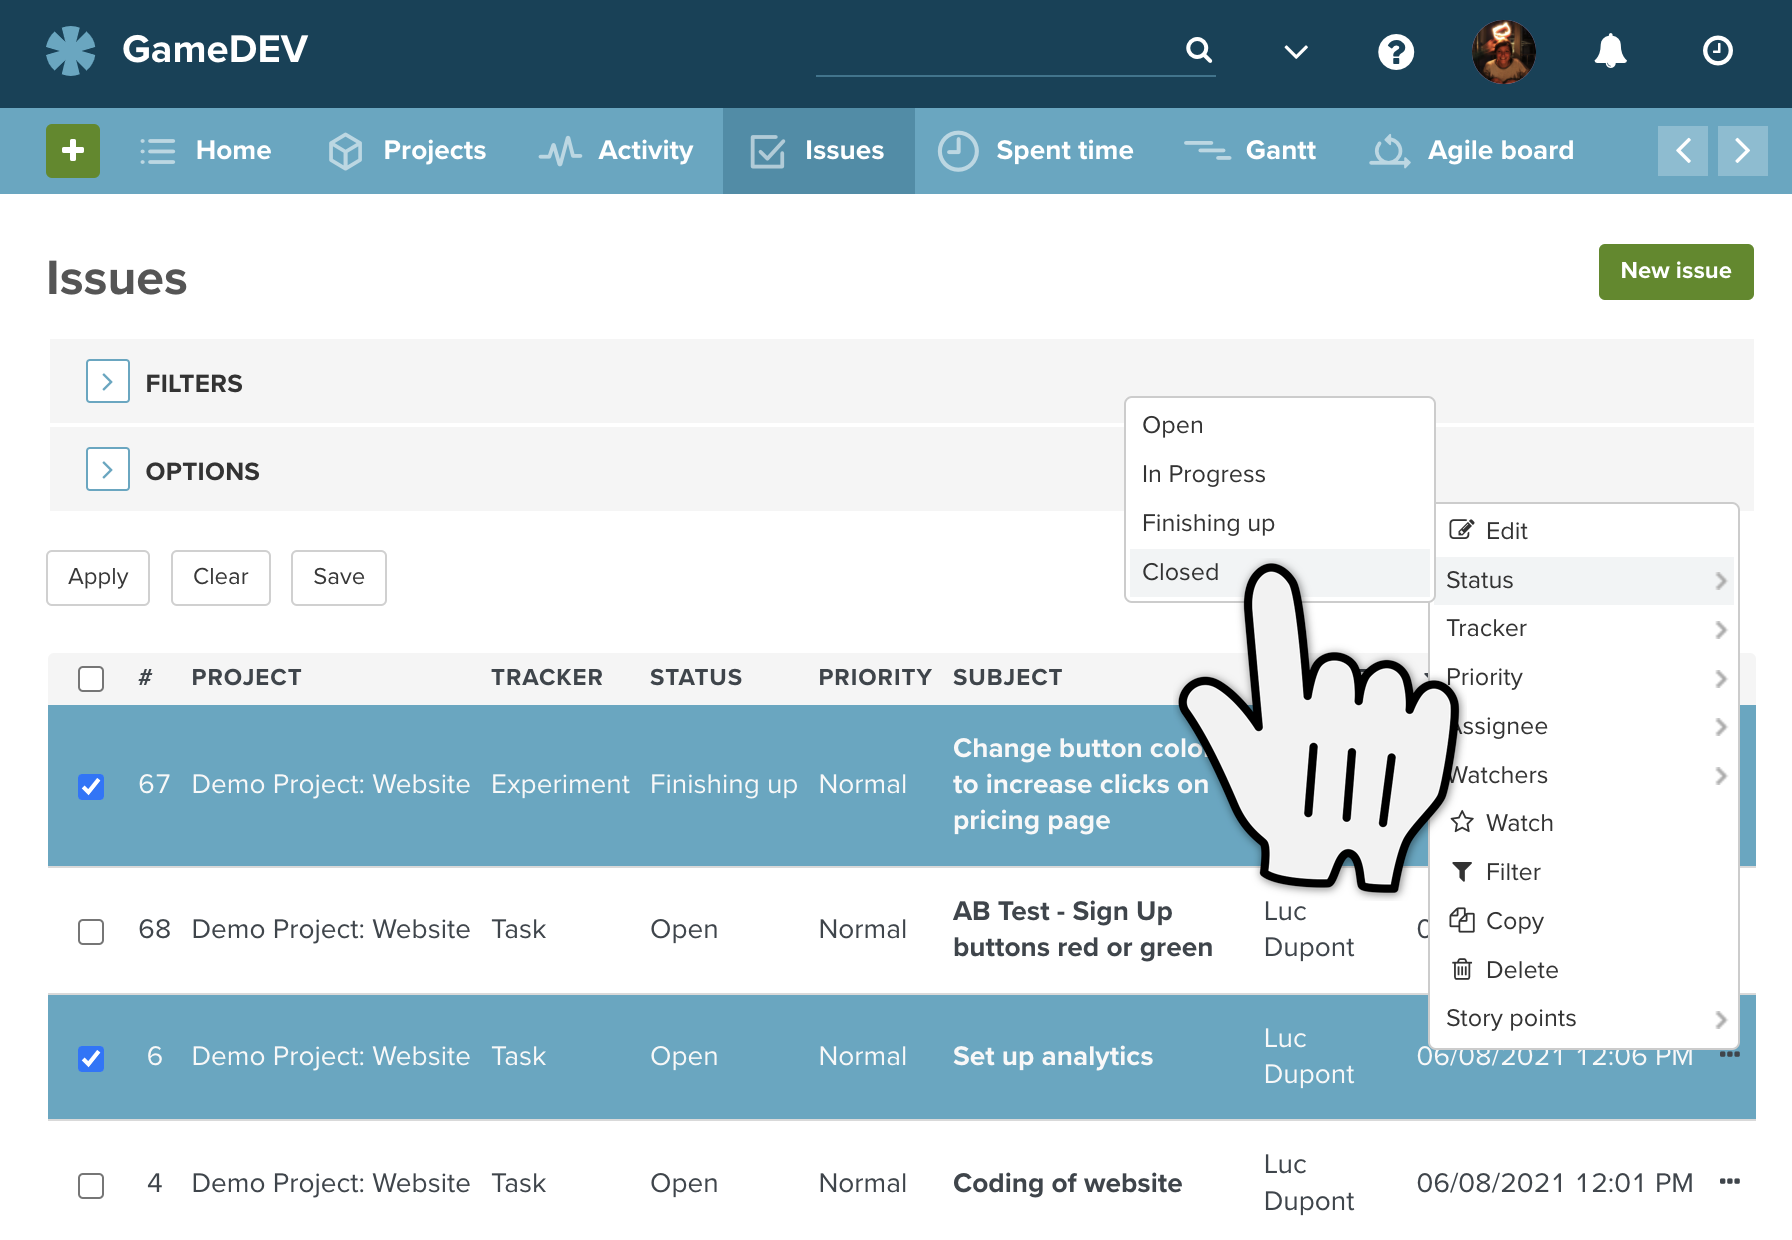
If you only want to change one parameter, you can save yourself a few clicks and use the other options in the bulk edit menu. Don't click on Edit and instead click on the parameter you want to change in all of the highlighted issues. In our case, we want the status to be changed to "Closed" and so we will click on Status → Closed.
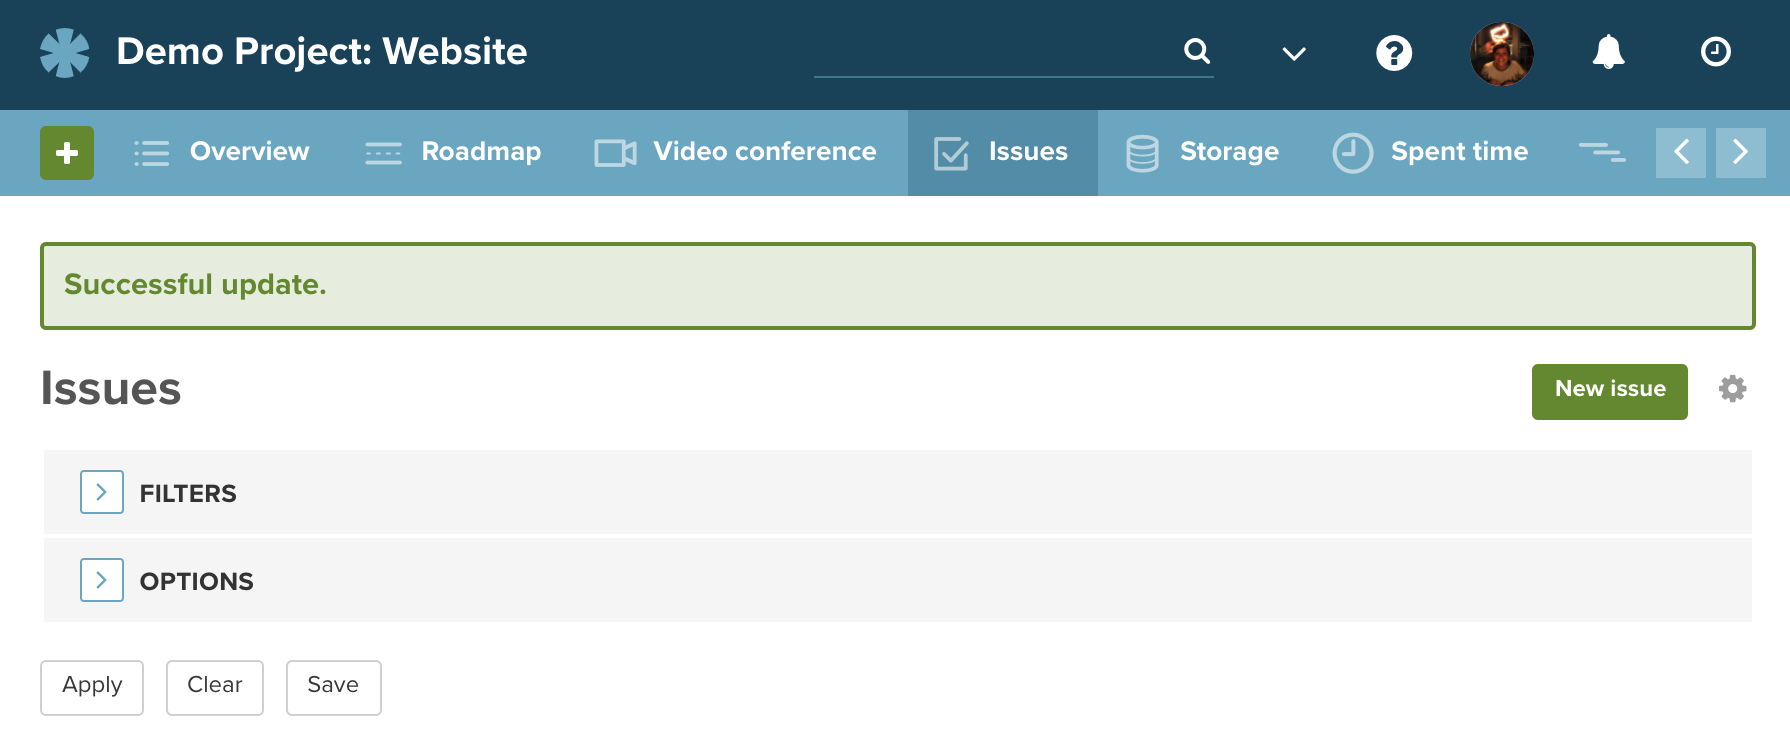
This will automatically update and you will be redirected back to the updated issue list.
3. Hints, Tips and Troubleshooting
→ The parameter I want to use doesn't show up: As you can only make the same change to all the highlighted items at once, the parameter that you want to change must be available for all the issues. Therefore only options that apply to ALL the highlighted items will be displayed. Try highlighting fewer items, or items with more in common (the same tracker for example), to see if the option you want is then displayed.
→ Can I make bulk edits to time entries? Yes, the bulk edit functionality is also available for time entries and works in the same way as described above, except instead of going to the issue list, you would go to the "Spent time" tab.
→ Use it when removing a status or tracker: If you ever want to delete a tracker or status for example from your account, you'll have to make sure this isn't being used in any issues (even issues in archived or closed projects!), otherwise you'll get the error response "Unable to delete issue status (This status is used by some issues)". Use the issue filters to find where the status or tracker is still being used, and then the bulk edit functionality to change them all at once.
→ Use it when removing a custom field from your account: If you want to remove a custom field from your account you could just delete it, but then all the entries would also be deleted - and in Planio, deletions are permanent! If you want to keep those entries, you can move them to another field instead with the bulk edit functionality before deleting that custom field. Remember, you'll have to perform the bulk edit for each different entry in your issues, systematically moving the entry from one field to another.
If you get stuck when trying to use the bulk edit function, have any other questions, or just want to know more, please don’t hesitate to contact our super friendly support staff.
Ohne Kreditkarte und unverbindlich. In nur 1 Minute angemeldet.