- Table of contents
- Steps for creating new custom fields
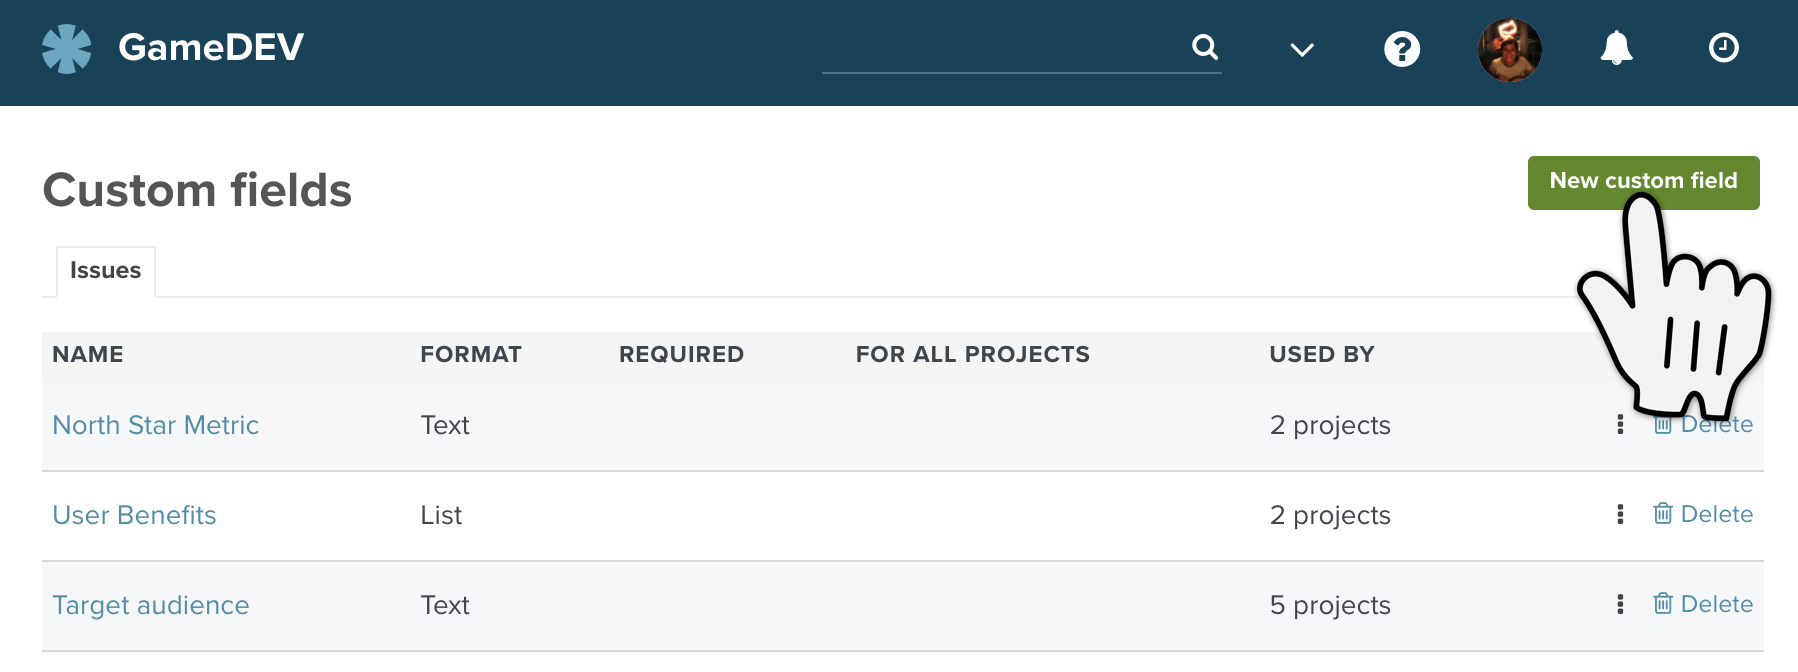
- 1. Navigate to the custom fields tile in Administration
- 2. Create the new custom field
- Choose where your field should be used
- Choose the format
- Give your field a name
- Add a description
- Fill out your custom field details
- Choose your options for how the custom field will be handled
- Choose who it should be visible to
- Choose what trackers and projects it should appear in
- Save it!
- Use your custom field
- Different Formats for different requirements
- Hints, Tips and Troubleshooting
- Steps for creating new custom fields
1. Steps for creating new custom fields
As an administrator of an account, your imagination is the limit when it comes to customizing the Planio experience. Planio supports many different field formats (such as text, integer, list, date etc.), and new fields can be added to many different functionalities (e.g. issues, spent time, users, groups, folders, customer companies etc.).
In this example, we will add the issue field "Author" to our blog article tracker.
1. Navigate to the custom fields tile in Administration
In the top right hand corner you should see your name or your Avatar, which you can click on. This will open up a drop down menu.
Once you have clicked on Administration you will see a set of tiles with global settings for the account. Click on the tile Custom fields.

2. Create the new custom field
You’ll be redirected to the Custom fields page where you will see a list of custom fields that already exist in your account. In the top right hand corner there is a green button New Custom Field. Click on it.
Choose where your field should be used
Here you’ll be asked where your custom field should appear. There is a list of all the functionalities in Planio where you can add you own custom field. For this use case we will create a custom field, which we want to see in our issues.

Choose the format
Now you can configure your custom to field to exactly what you need. Start by choosing the format of the field. Each format will need slightly different information and so the fields on this page will update automatically once you have chosen which format you want to use.
In our use case we have a set list of authors who will be writing the blogs and so we can create a custom field with a list of existing authors to choose from.
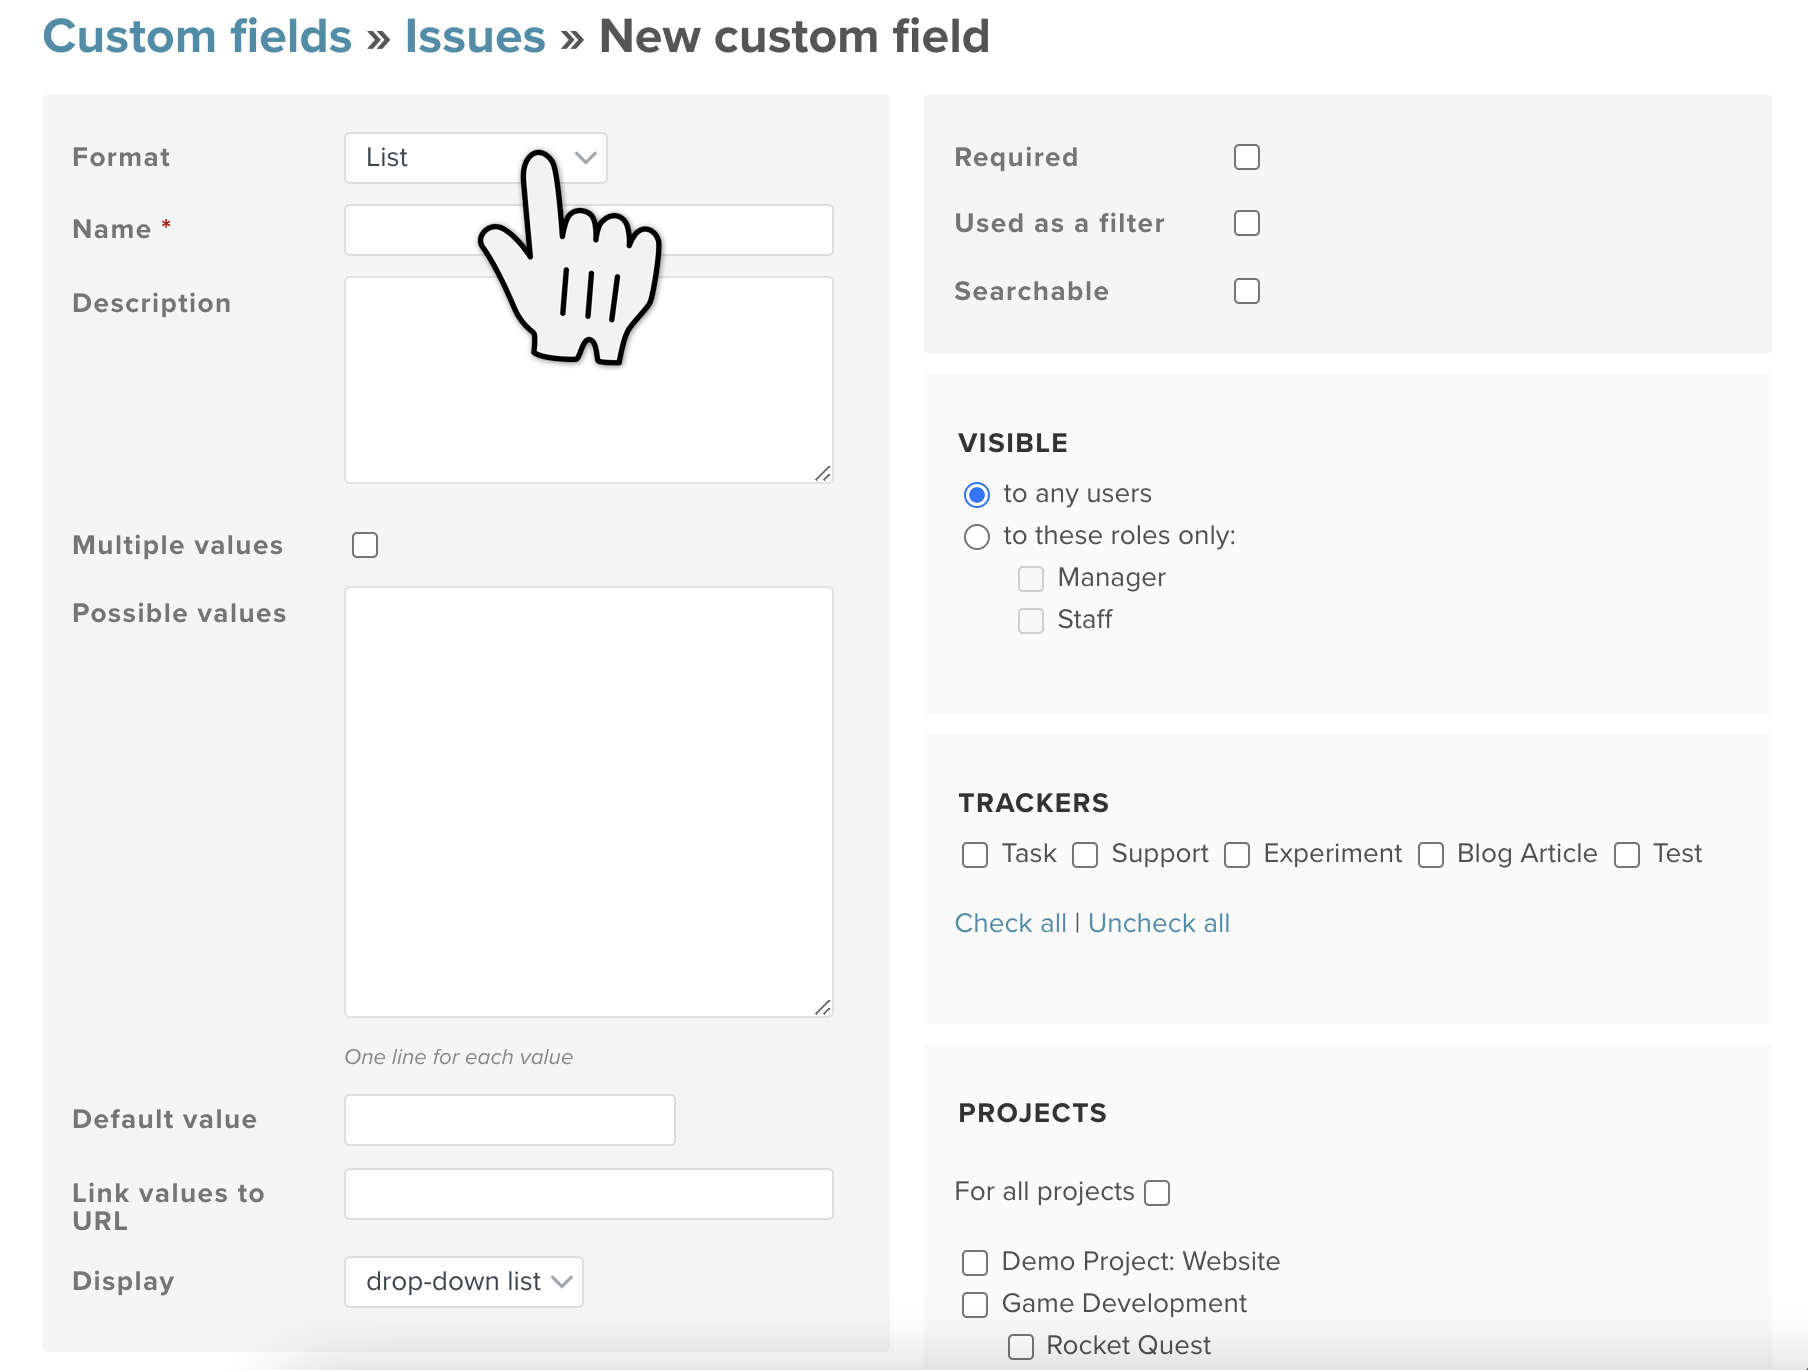
Remember that the format cannot be changed once your custom field has been saved. Everything else can be edited afterwards though.
Give your field a name
This will be the name that appears in your issues, along side the other fields you usually fill out (Project, Assignee, Due Date etc.)
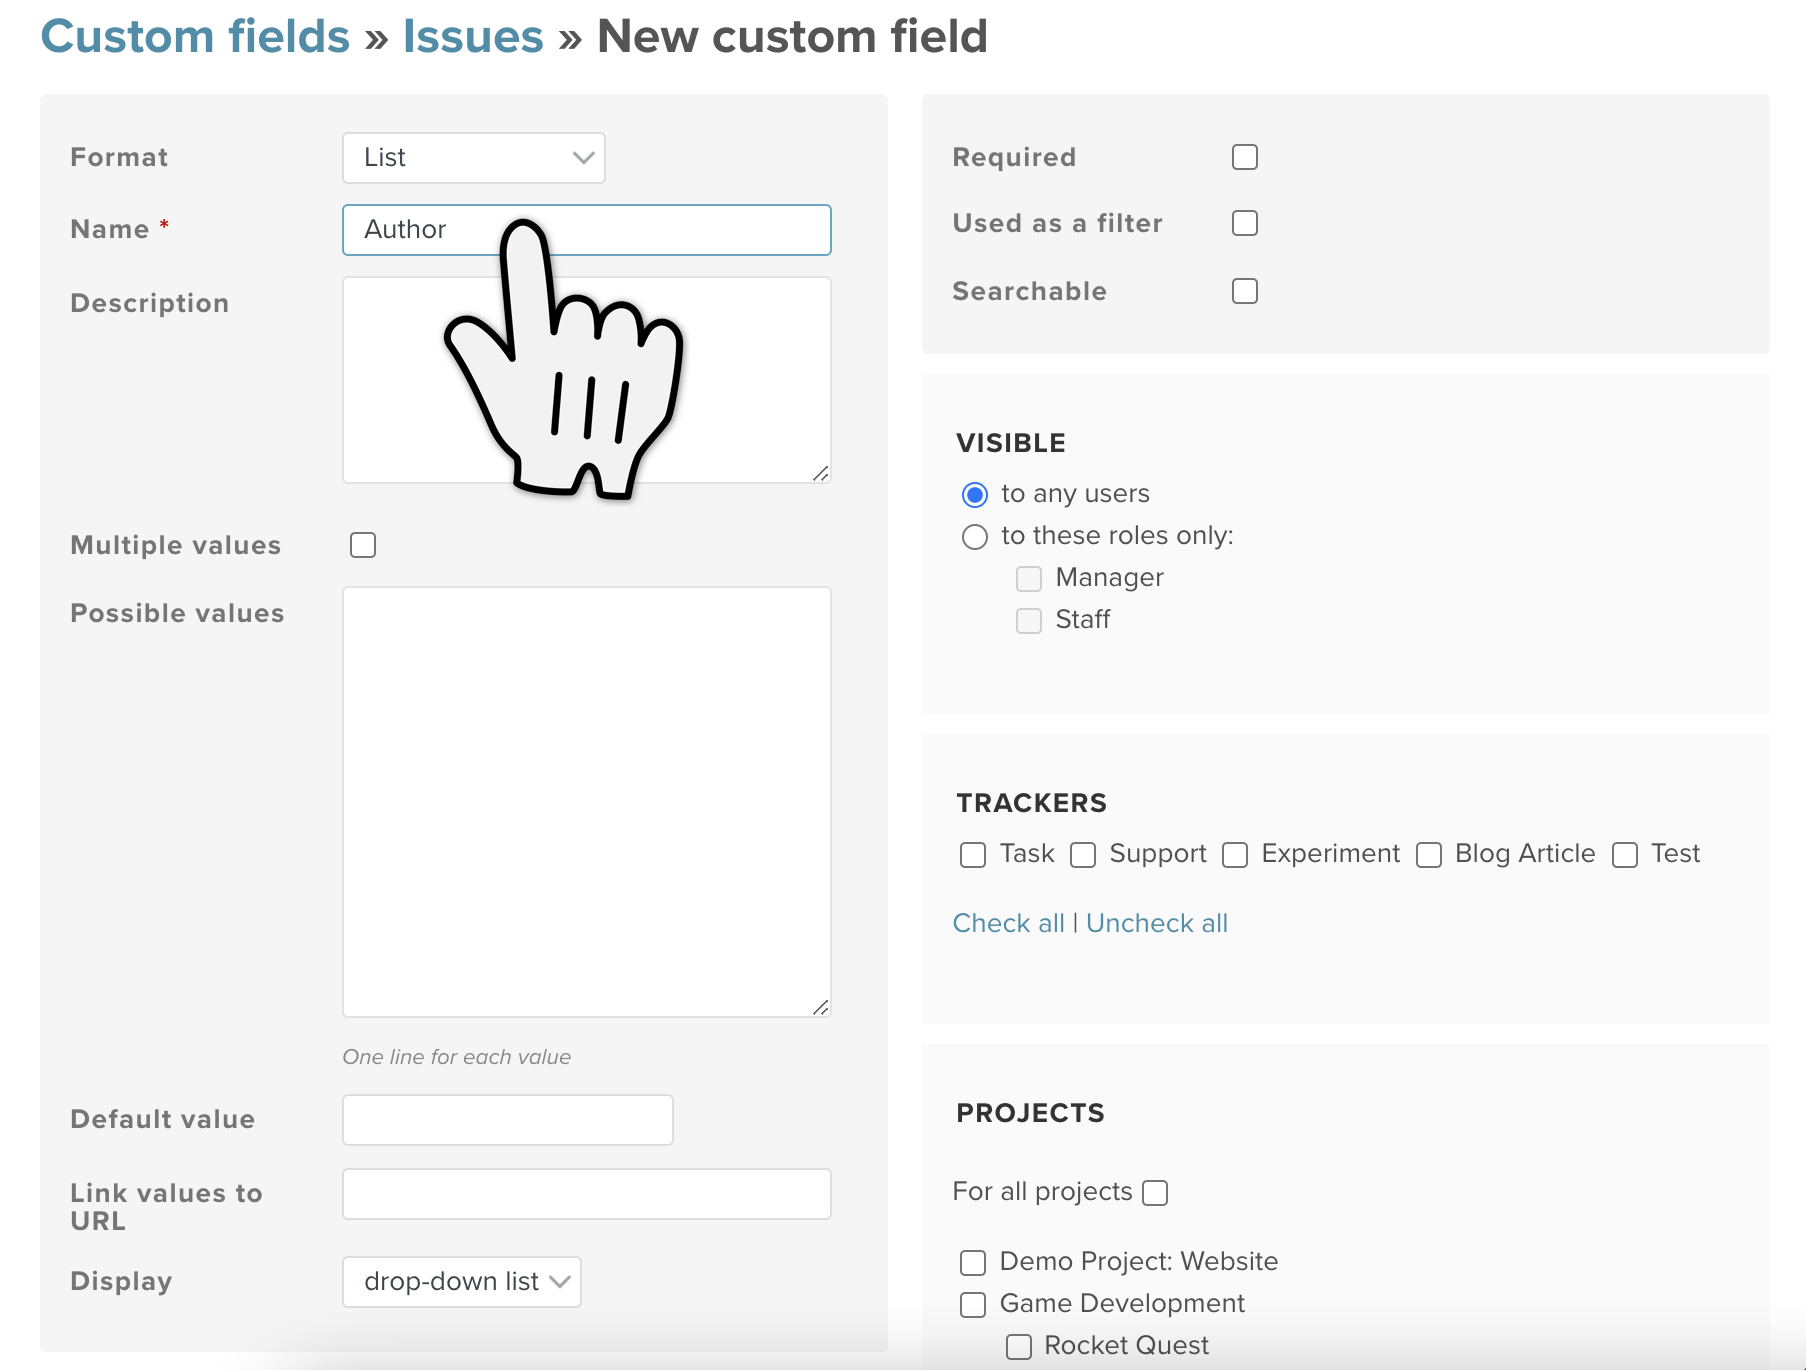
Add a description
If you choose to add a description, users will be able to read this text in the issues. A little ? will show up next to the custom field in the issues and if your users hover over that ? the description will pop up. You can use this to help your users know what exactly they should be filling out here.
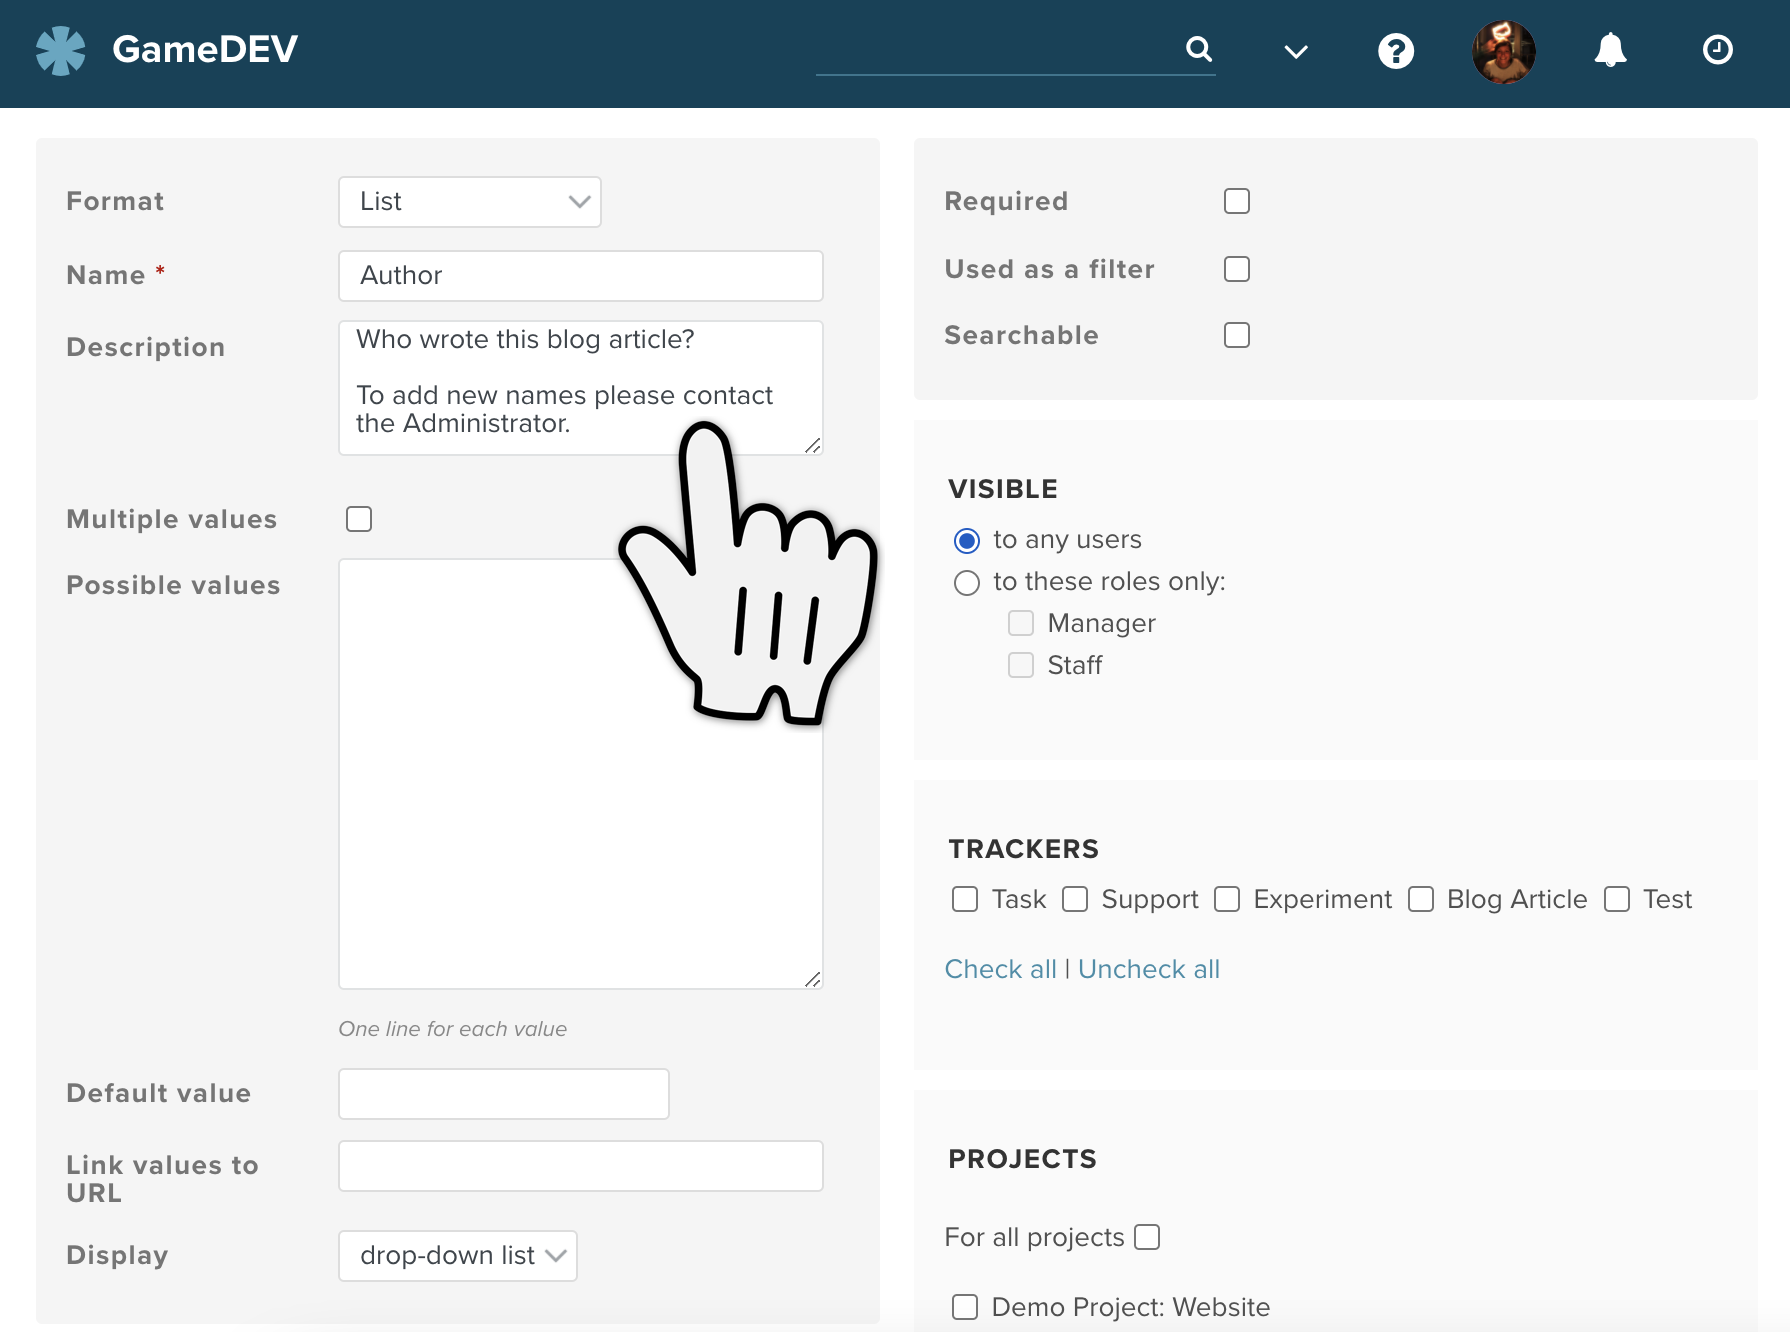
Fill out your custom field details
Here you can finally add the values that your users can choose from when filling out that custom field. Here we are adding a list of names of authors. For the list format specifically, remember to add only one value per line. There is a little note under the Possible values box in each format type to remind you if this is needed.
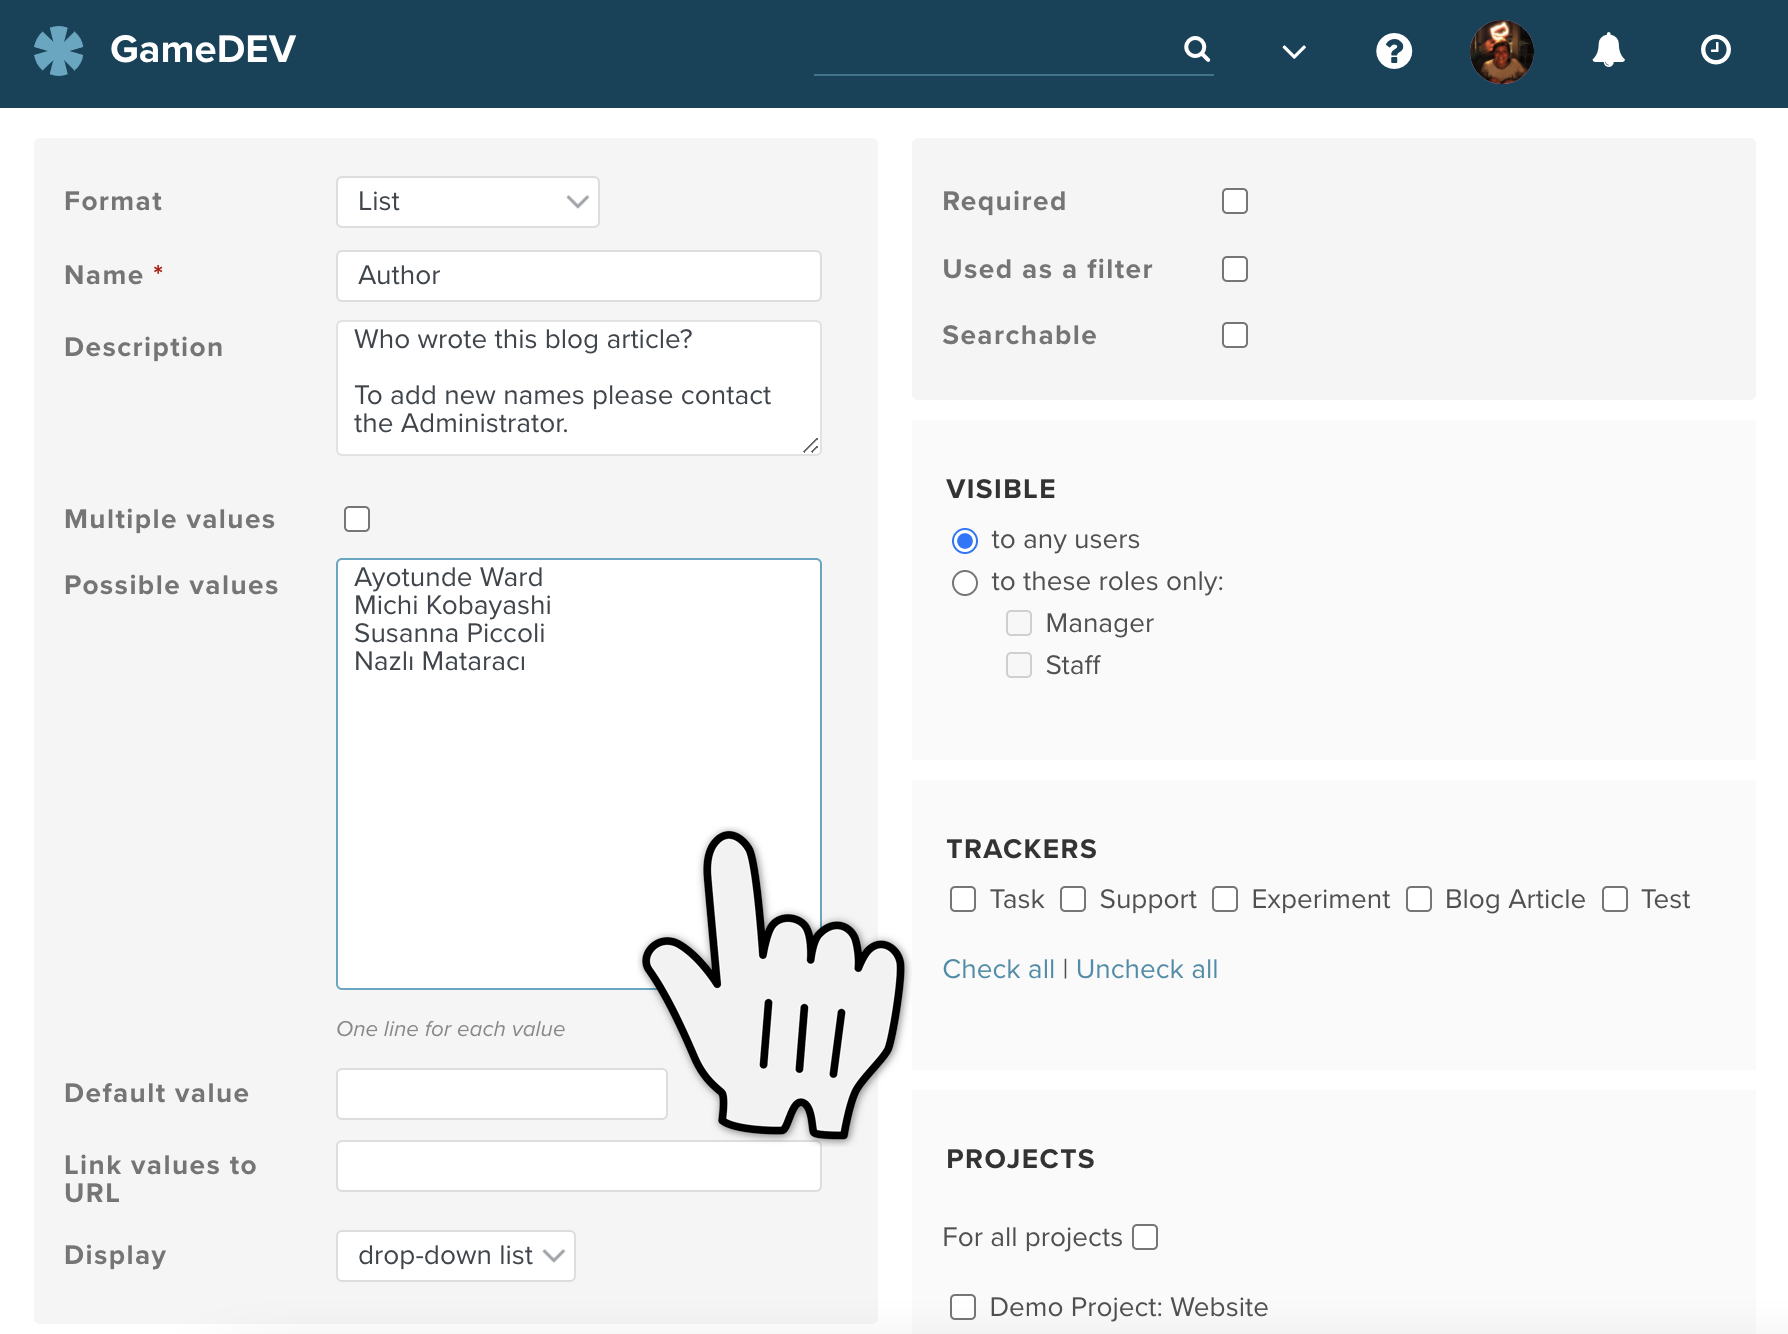
- Also here you can decide whether users should be able to choose more than one value or not. In our case there can only be one author and so we will not put a tick in the box Multiple Values.
- Depending on which format you have there also might be display options. For the list format you can either choose a drop down menu or checkboxes for your list.
- If you want one particular value to show up in the field automatically, you can enter a value into the Default value field. If not you can leave it blank.
- Link values to URL can be defined for boolean, date, list, integer and text format fields. You can set a URL base so users can finish constructing a destination URL with their entry in the custom field. This can provide context for that piece of information in a different place on the Internet – provided that it has a URL that can be constructed using the information entered.
If you entered for example https://en.wikipedia.org/w/index.php?search=%value% in the Link values to URL field, and someone filled out this new Author custom field with "William Shakespeare", the value would become clickable and a click would lead to the Wikipedia entry for William Shakespeare.
This field accepts the following URL variables:
| Variable | Explanation |
|---|---|
| %value% | the custom field value |
| %id% | ID of the customized object e.g., the ID of the issue |
| %project_id% | ID of the project of the customized object if defined |
Choose your options for how the custom field will be handled
Here you can set up further options for how to handle or use the new custom field.
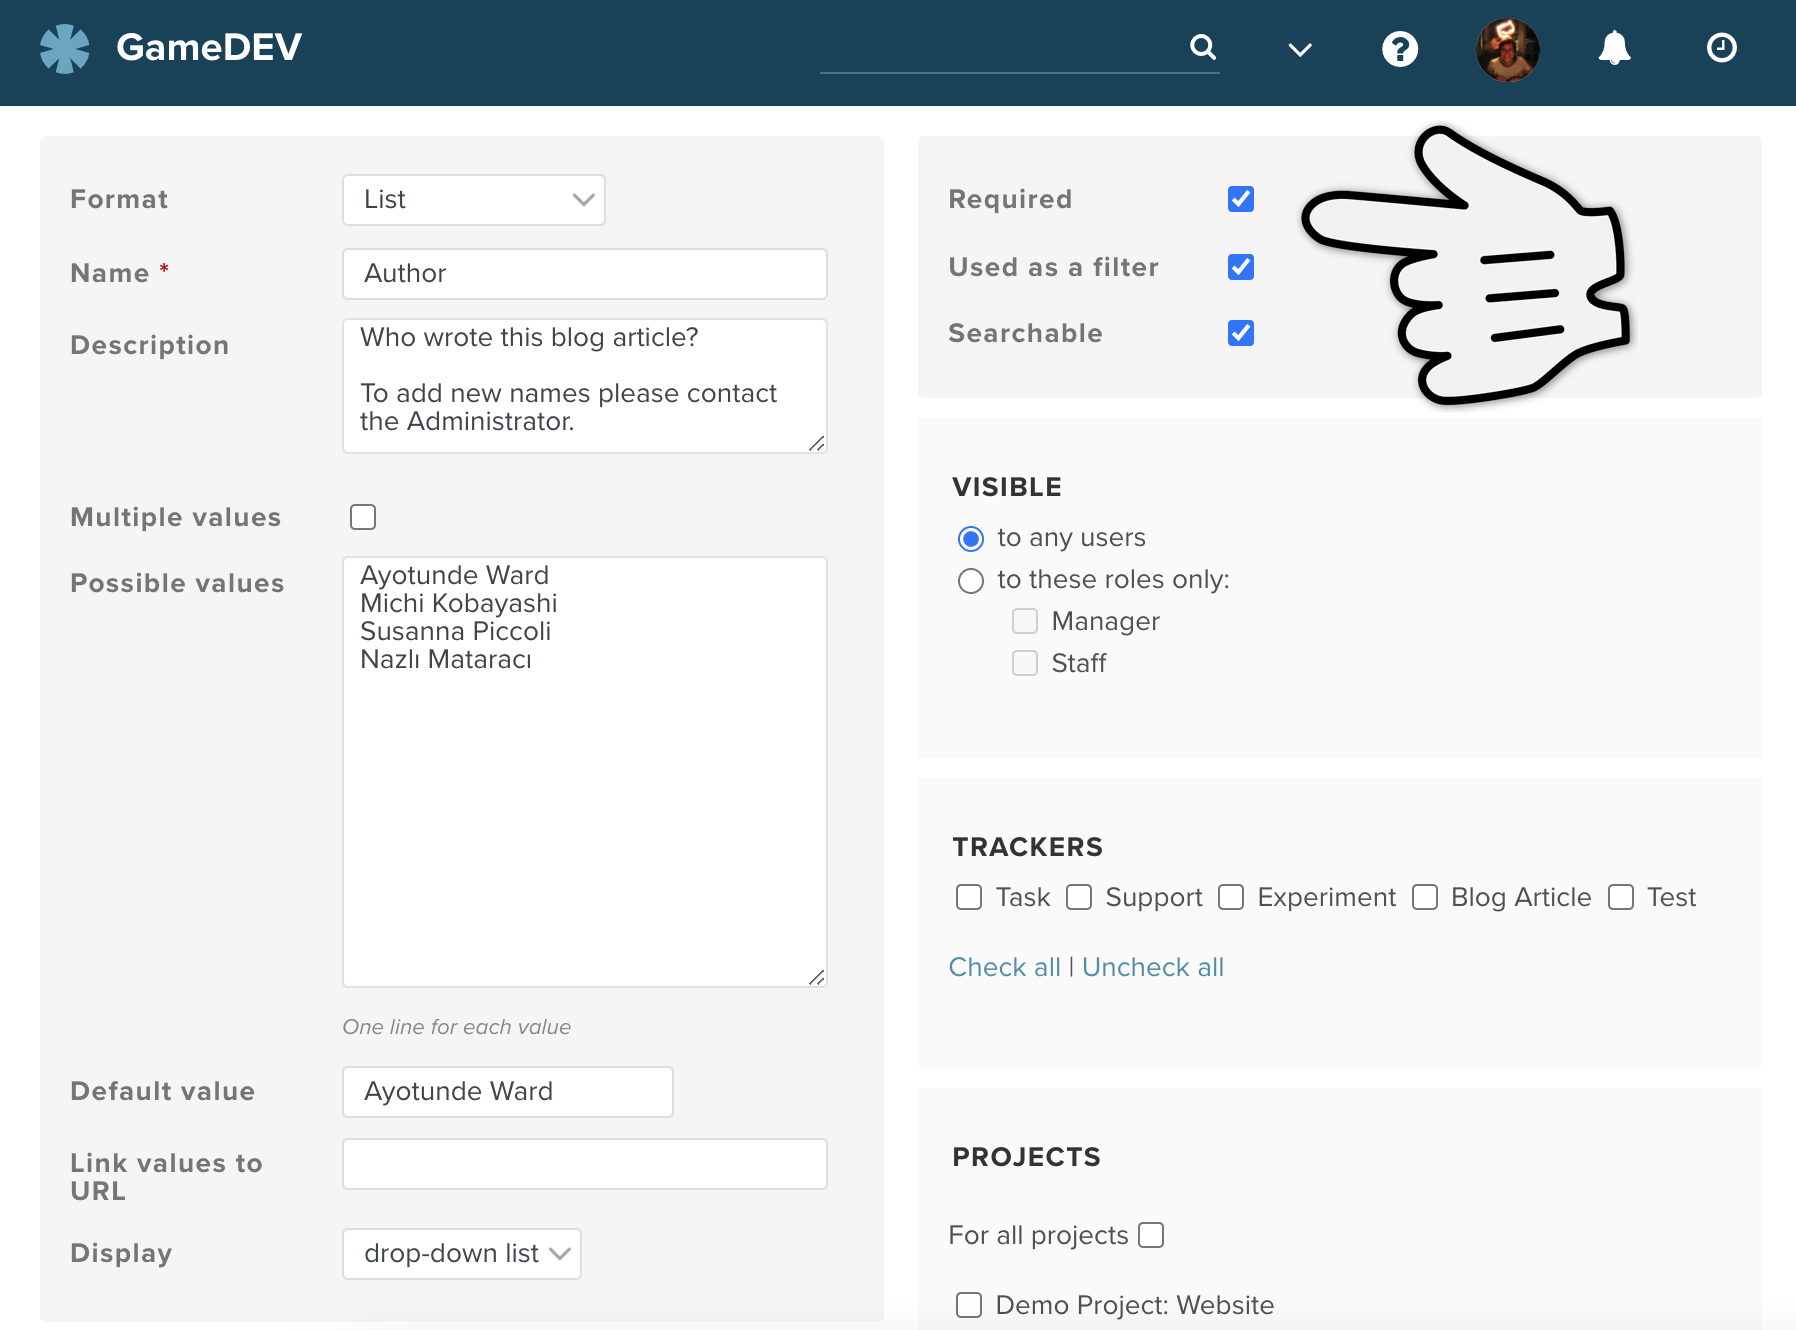
- In the Required field, select the check box to indicate that filling out the field is mandatory. That means that there must be an entry in that field at all times otherwise you won’t be able to save the issue.
- In the Used as a Filter field, select the check box to indicate that the field can be used in the issue list as a filter.
- In the Searchable field, select the check box to indicate that you can use the Planio search function to find this data. This is available for the field types listed below.
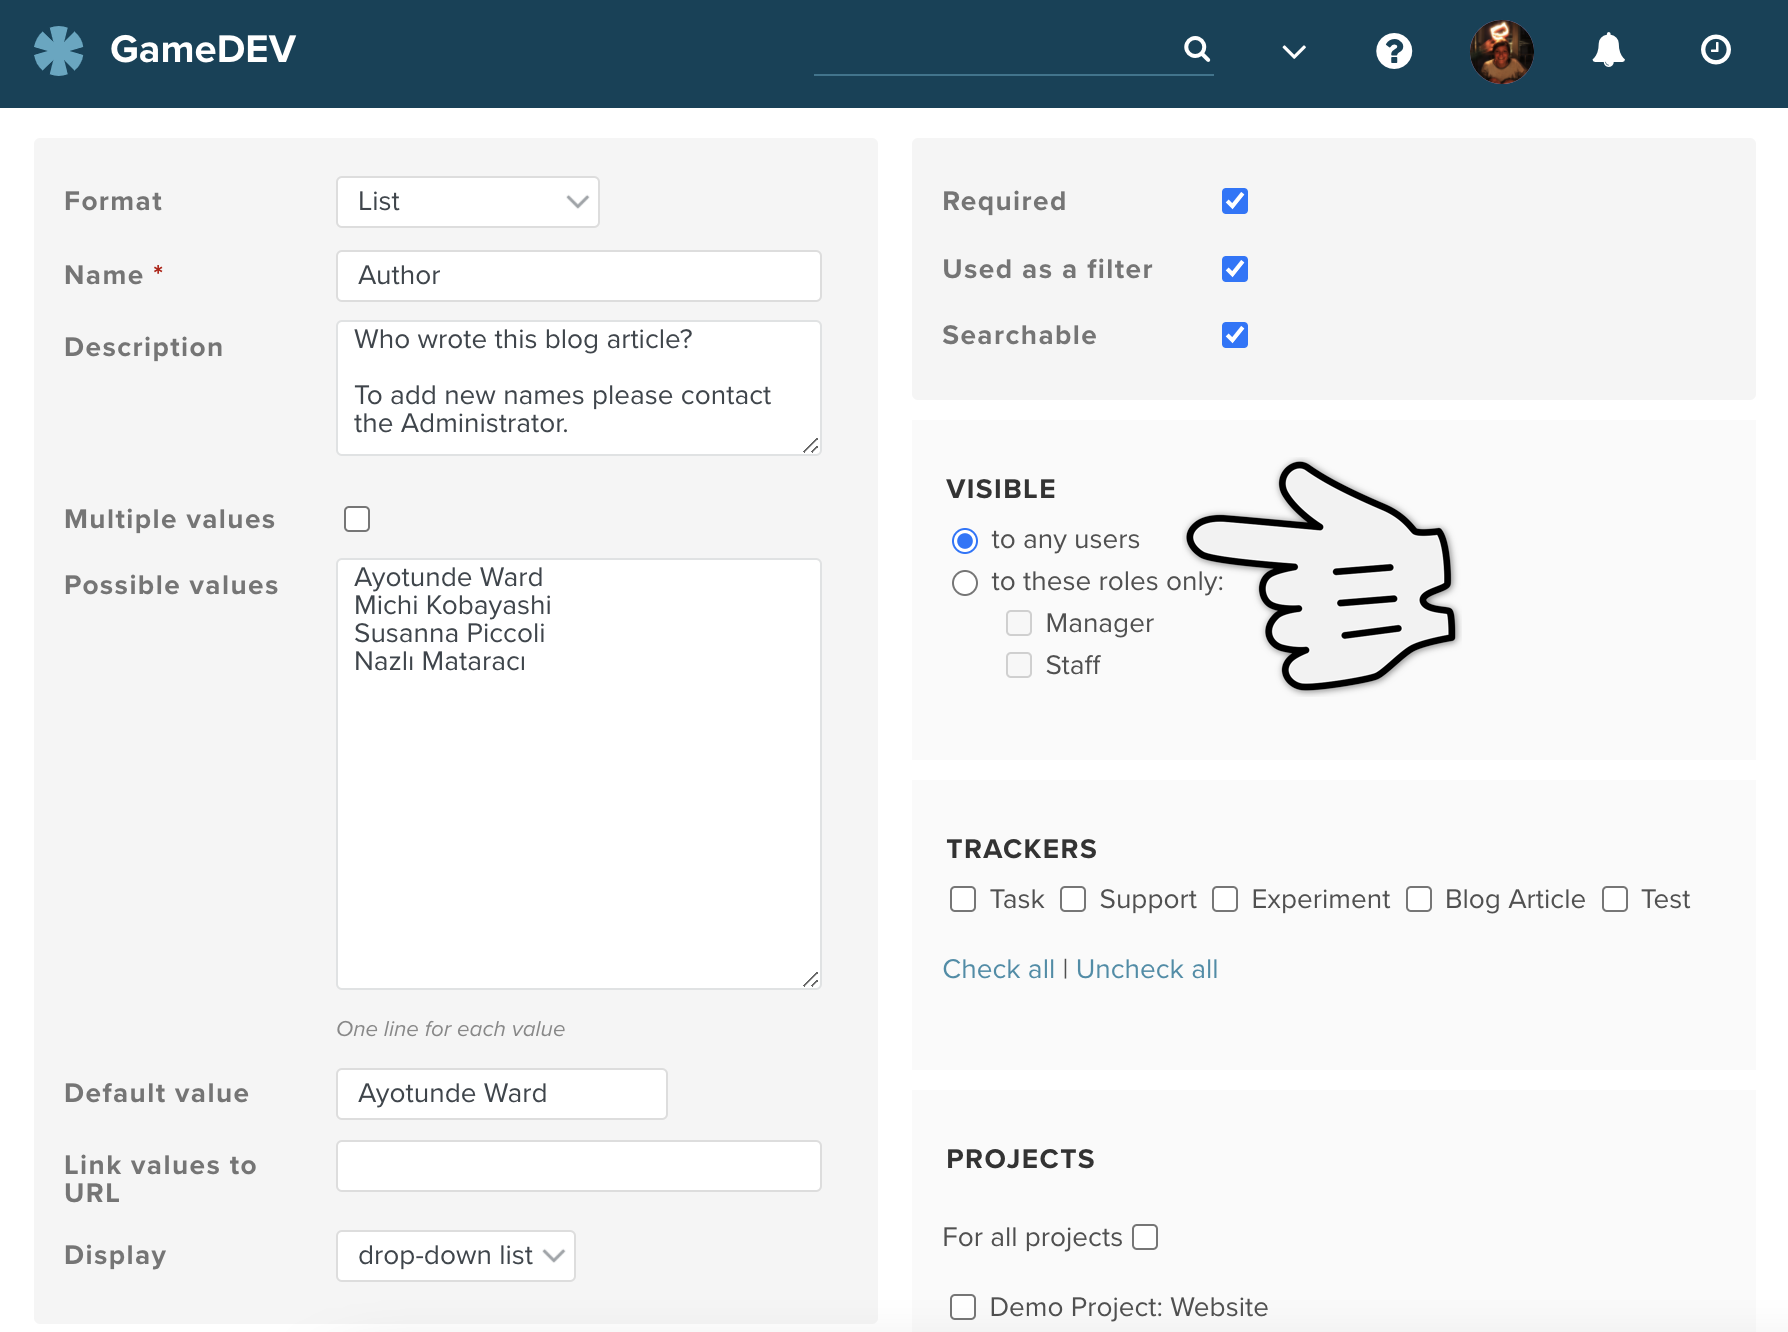
Choose who it should be visible to
Who should use this field? Depending on who this field will be relevant for, you may want to restrict who can see or use this field. In this case all users who have access to the tracker and project should be able to see and use the new field.
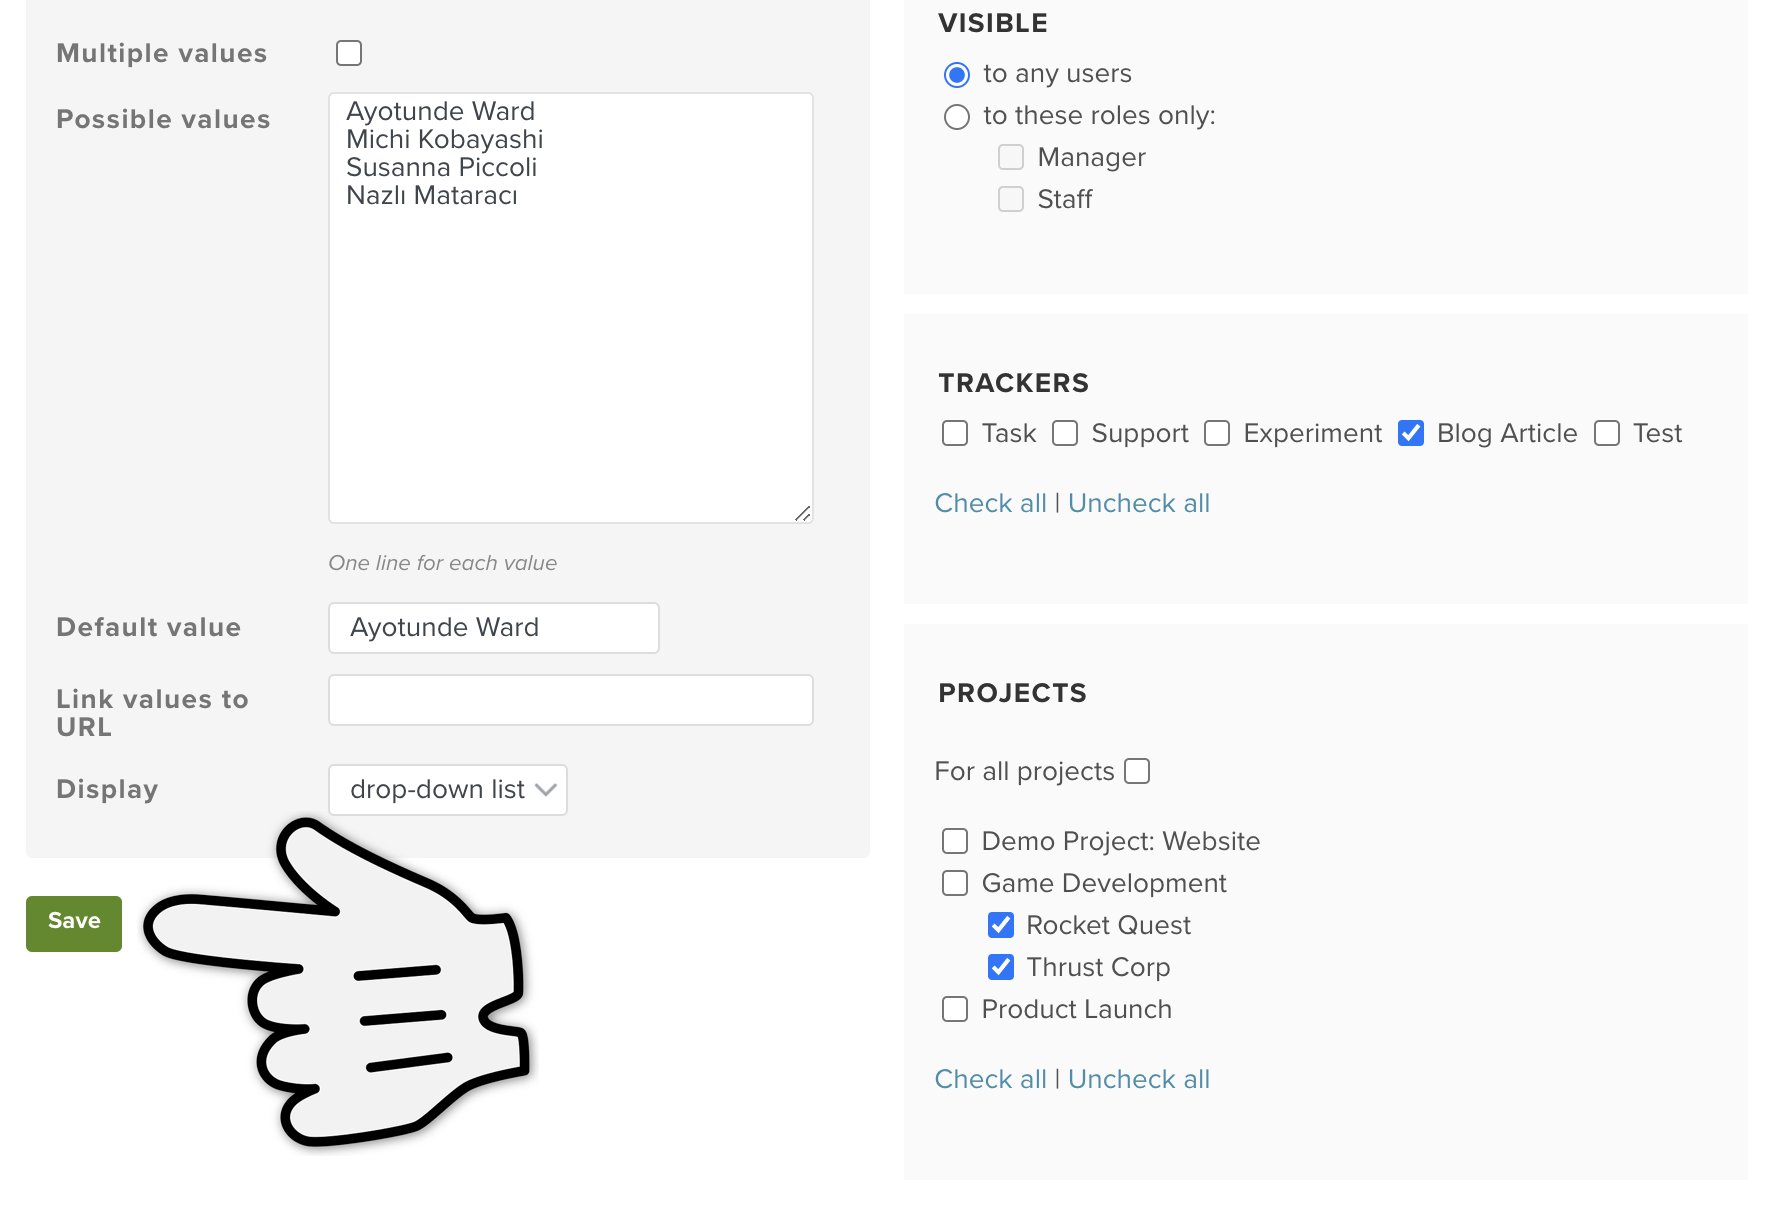
Choose what trackers and projects it should appear in
Here you will decide which trackers and projects this field will be shown in. Just highlight the trackers and projects that you want to see and use your new field in.
In our use case, we only want this field to show up in the tracker for "Blog articles" and so we have only highlighted that one. We have blogs in both projects "Rocket Quest" and "Thrust Corp" and so we have highlighted both of these. The tracker "Blog article" is also active in both those projects.
![]()
Save it!
Finally you can save it!
You will be directed back to the list of custom fields and you will see that your new one will have appeared.
Use your custom field
Your new custom field will now be wherever you configured it to be. We created our "Author" field to be used in issues in the project "Thrust Corp" when creating or editing the tracker "Blog article" and there it is:

2. Different Formats for different requirements
As we mentioned earlier, there are many different formats for custom fields. We’ll go through what they are here with some explanation of what they can be used for:
| Format | Explanation | Filterable | Searchable | |
|---|---|---|---|---|
| List | → | Users can click on options in a drop-down menu or checklist | ✔ | ✔ |
| Text | → | Users can type a single line of arbitrary text in this field. | ✔ | ✔ |
| Sprint/Milestone | → | Users can choose from sprints or milestones that already exist in your account | ✔ | ✘ |
| Longtext | → | Users can write a multi-line text here. Like the description field in issues the field size can be adjusted | ✔ | ✔ |
| Link | → | URL | ✔ | ✘ |
| Key/Value List | → | As with the format List users can click on options in a drop down menu or checklist. The entries however correspond to a static value, which means the entries can be changed at a later date without losing the old data | ✔ | ✘ |
| Integer | → | Users can enter a positive or negative whole number | ✔ | ✘ |
| Float | → | Users can enter whole or rational numbers (e.g. 1.5, 25.8, 7) | ✔ | ✘ |
| File | → | Users can attach a file (it will also be shown in the "attachments" tab in your project) | ✘ | ✘ |
| Date | → | Users can enter a date | ✔ | ✘ |
| Boolean | → | Users can choose either yes or no in the form of either a drop down menu, checklist or radio buttons | ✔ | ✘ |
| User | → | Users can link other users from the account to the issue. Groups can’t be assigned | ✔ | ✘ |
3. Hints, Tips and Troubleshooting
→ I can’t find the Administration area As only administrators of the account can access the administration area, you won’t see the administration option unless you have administrator rights. You are automatically administrator of the account if you created it. If not you’ll have to ask the administrator of your account to do this for you or give you administrator rights.
→ I want to change the order of the custom fields The order of the custom fields list is the same order that the custom fields will show up in your account. Hover over the three dots in the relevant row and the pointer will become a hand. Grab the row to move it up and down into the order you want your custom fields to be shown.
→ My custom field isn’t showing up If you can’t find a field, it is usually because the wrong tracker or projects have been clicked (or none!). Luckily you can edit and change this whenever you want. Just go to Administration → Trackers and add the custom field to the list of ticked boxes → Save or Administration → Custom fields and add the tracker and/or projects to the new custom field → Save.
→ My custom field entry isn’t showing up in my search Not all custom field formats can be used as filters or be set as searchable. If the option "Used as a Filter" or "Searchable" doesn’t show up when creating the field, then it can’t be used as a filter or be included in a Planio search. You may however just need to go back and put a tick in the right box.
→ I just created a custom field but it’s not included in the custom fields list If you create custom fields for other aspects in Planio (Wiki pages, Contacts, Spent time etc.) they are grouped into tabs on the custom field page.

If you get stuck when adding a custom field to your account, have any other questions, or just want to know more, please don’t hesitate to contact our super friendly support staff.
Ohne Kreditkarte und unverbindlich. In nur 1 Minute angemeldet.