- Table of contents
There are two steps to this process. First, you need to prepare a CSV file for import. Second, you have to carry out the import. We’ll cover both in this guide.
1. Preparing the CSV file
You need to export your tasks, issues or tickets in the CSV format. You can save most Excel sheets as CSV files by clicking on File → Save As… and then selecting Comma Separated Values as the format from the drop-down menu.
Your CSV file can have the following headers. You’ll find a sample CSV file here: example.csv.
| Values | Notes |
|---|---|
| Tracker | The tracker of the issue. This is needs to map a name of an existing tracker in your project. You’ll find their names in Administration → Trackers. If you don't provide this column within the CSV, you may select a tracker for all new issues during the import. |
| Status | The status of the issue. This is needs to map a name of an existing status available for the selected tracker. You’ll find their names in Administration → Issue statuses. If you don't provide this column within the CSV, the default status will be used. |
| Subject | The subject of the issue. This is required |
| Description | Enter the text describing the issue. |
| Priority | Enter the name of one of the priorities listed in your Planio account. You’ll find their names in Administration → Enumerations |
| Category | The category of the issue. New categories may created automatically during the import, if need be. |
| Assignee | Enter the First and Last Name, login or email of the person to whom you want to assign the issue. You’ll find those details in Administration → Users. Make sure the person is a member of the project before assigning them issues via the importer. |
| Sprint/Milestone | Enter the name of the milestone or sprint to which the issue should be assigned. New sprints/milestones may be created automatically during the import, if need be. |
| Private | This selects whether the issue will be private for the assignee or not. Enter 1 to make the issue private or 0 otherwise. |
| Start date | Enter the start date in your preferred date format (e.g. MM/DD/YYYY or DD.MM.YYYY). |
| Due date | Enter the due date in your preferred date format (e.g. MM/DD/YYYY or DD.MM.YYYY). |
| Estimated time | Enter a number for the estimated number of hours (e.g. 15). |
| % Done | Enter a number for the percentage done (e.g. 27). |
Please note: You may also import issue relations. This topic is covered below.
2. Importing the CSV File
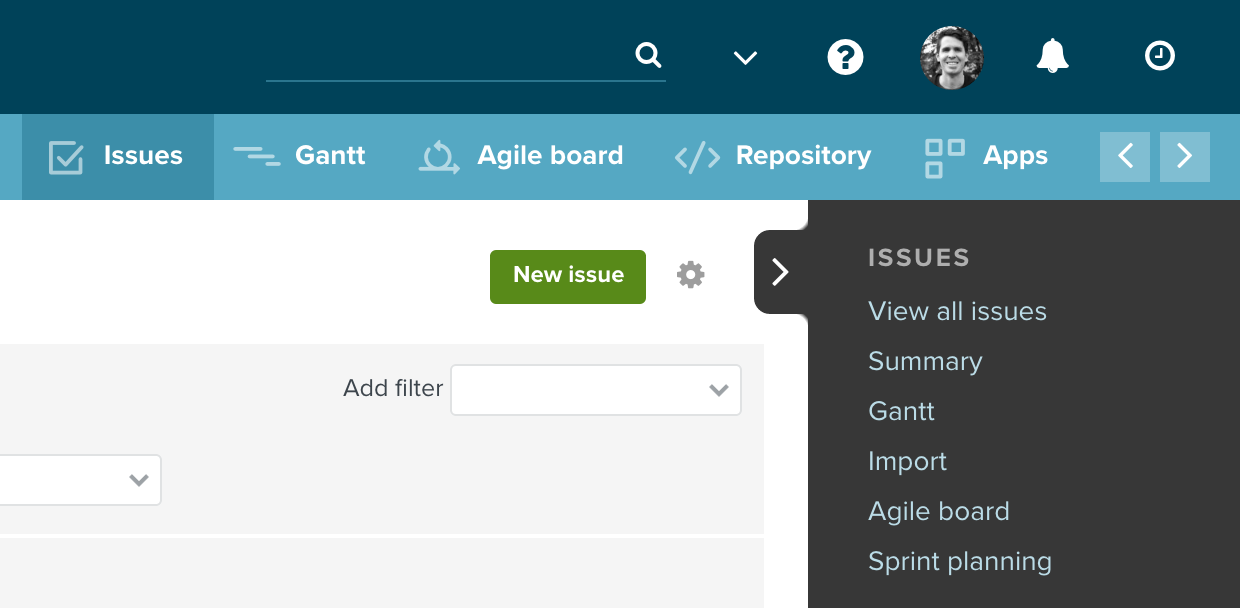
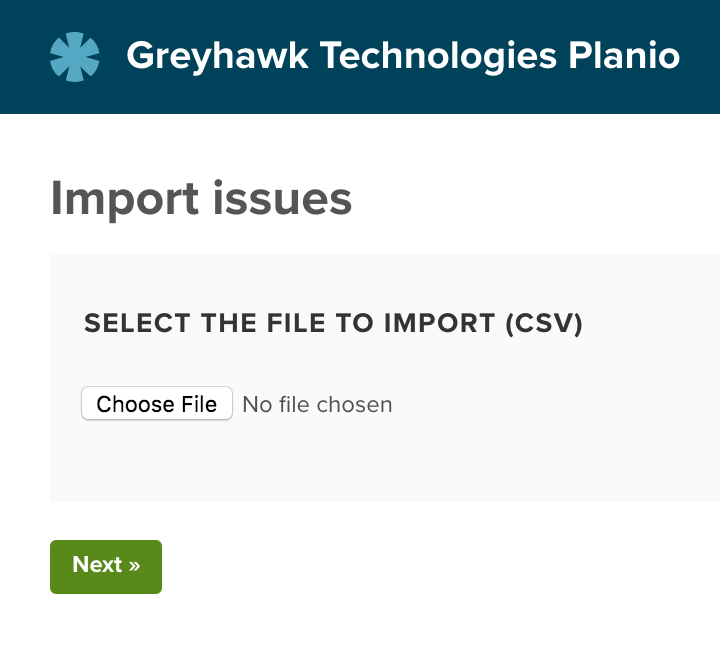
Now, you have a CSV file ready for import. The next step is to import it into Planio. You’ll find the button for the Import on the issues page in the sidebar.
Then, select your CSV file using the file picker.
On the next page, you can select options for importing the CSV File
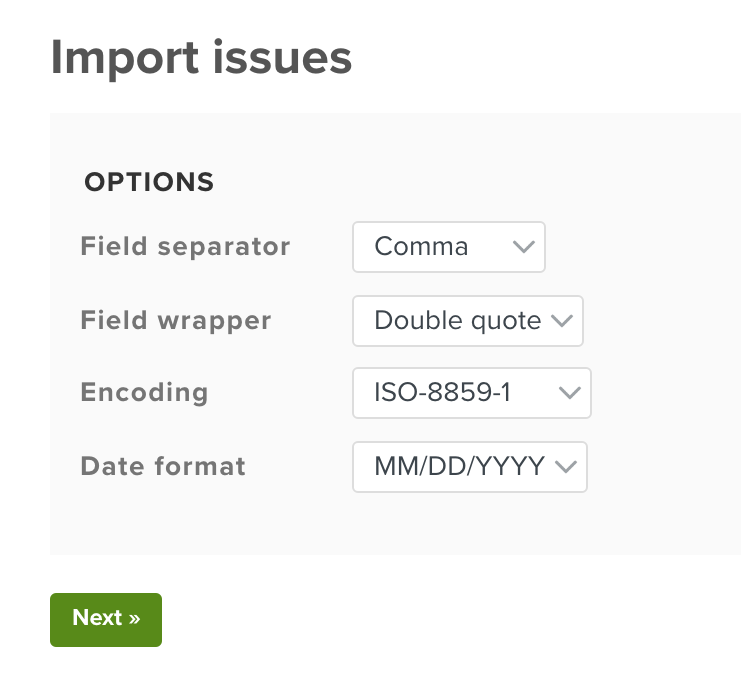
| Option | Notes |
|---|---|
| Field separator | You can select between comma separated values or semicolon separated values |
| Field wrapper | You can select between double quotes or single quotes. |
| Encoding | You can select the encoding for the CSV file |
| Date format | You can select one of five date formats (YYYY-MM-DD, DD/MM/YYYY, MM/DD/YYY, DD.MM.YYY or DD-MM-YYYY) |
First you have to select a target project for the import. Then, you have to map the values from the CSV files to issue fields in Planio. You can select each value from the drop-down menu beside each attribute. You’ll also see a file content preview further down, so you can make sure you’re importing the right data.

Once you’re done assigning the values to each field, you can click on import to start the import.
If you encounter any issues, you'll see a page with the errors and the import will not be carried out. You can restart the import once you've fixed the problems in the CSV file.

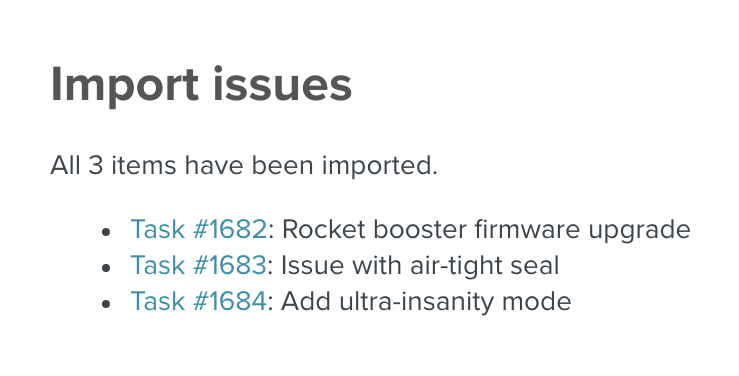
If all goes well, you’ll see a list of the imported issues.
That's how you can import tasks, issues, bugs or stories into Planio using the CSV importer.
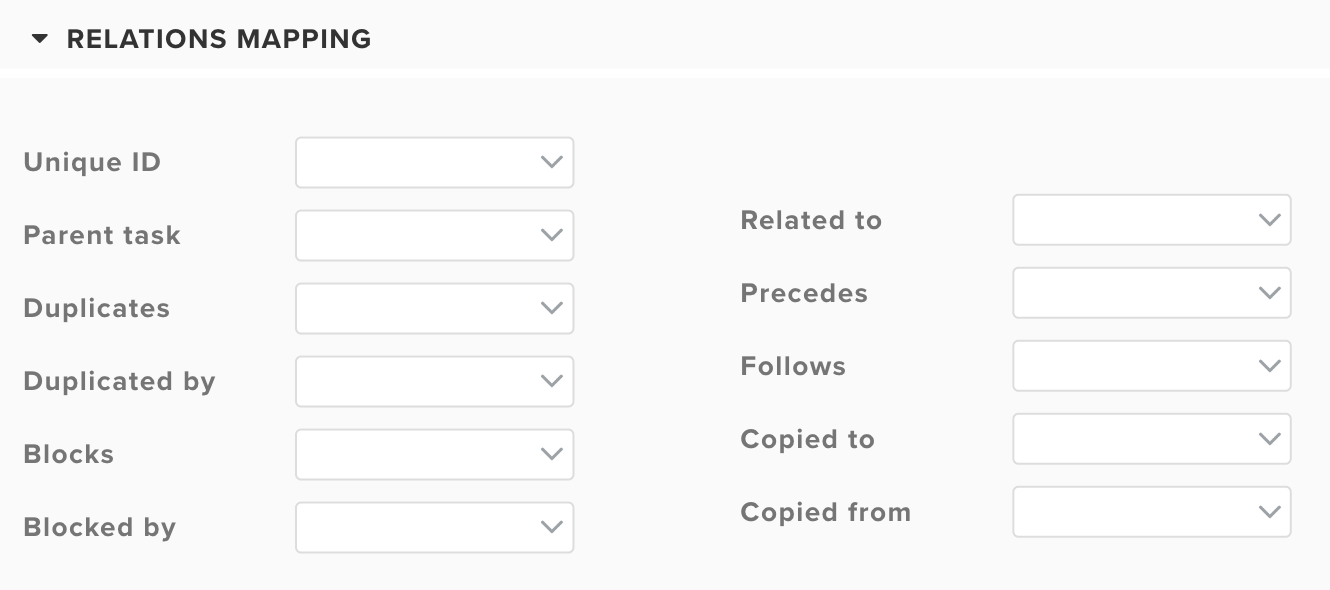
3. Import issue relations
The issue import may also set up issue hierarchies as well as any other issue relation supported by Planio. You may store the relationship information in dedicated columns within your CSV file.
Issue hierarchies
Issue hierarchies may be specified via a parent issue column. Each issue may have exactly on parent issue. To reference already existing issues within your projects, you may use the issue number with a # in front, e.g. #13. To reference issues, which are part of the same CSV, you may either use the row number or you may specify a special "Unique ID" column, which contains the reference text.
Referencing existing issues
| Subject | Parent ID |
|---|---|
| Rocket booster firmware upgrade | #13 |
| Attach booster to rocket | #13 |
Issue #13 would have been created before the import.
Referencing new issues via row number
| Subject | Parent ID |
|---|---|
| Install new rocket booster | |
| Rocket booster firmware upgrade | 1 |
| Attach booster to rocket | 1 |
Please note, that numbering starts with the first non-header row.
Referencing new issues via Unique ID column
| ID | Subject | Parent ID |
|---|---|---|
| ROCKET-101 | Install new rocket booster | |
| ROCKET-201 | Rocket booster firmware upgrade | ROCKET-101 |
| ROCKET-202 | Attach booster to rocket | ROCKET-101 |
Please be aware, that the unique ID may not start with a # sign. Otherwise it would be mistaken for a reference to an existing issue.
Issue relations
Planio supports the following issue relations:
- Related to
- Duplicates / Duplicated by
- Blocks / Blocked by
- Copied to / Copied from
- Precedes / Follows
Each issue may be part of many relations, although there are logical restrictions, e.g. an issue cannot block a preceding task. Each relation type should be presented in a different column within the CSV. You may reference other issues using the same three techniques mentioned above. Multiple relations of the same type should be separated by comma.
Please be aware, when using a dedicated Unique ID column, that said ID may not contain commas, since that is used as a separator.
For the follows and precedes relation, you may also add the delay incorporated.
Example defining relations with delay
| ID | Subject | Blocked by | Follows |
|---|---|---|---|
| ROCKET-201 | Rocket booster firmware upgrade | ||
| ROCKET-202 | Paint rocket red | ||
| ROCKET-203 | Attach booster to rocket | ROCKET-201 | ROCKET-202 2d |
The booster may only be attached after the firmware was upgraded and after the paint dried for two day.
Importing the CSV file
Follow the steps described above. When mapping the values from the CSV files to issue fields in Planio, you may also define, which CSV column contains defines which issue relation. When selecting a column for Unique ID, it is assumed, that you're using these value to reference other issues. If that mapping is left blank, it is assumed that row numbers are used.
The rest of the import works as described above.
Ohne Kreditkarte und unverbindlich. In nur 1 Minute angemeldet.