- Table of contents
1. What are Public Projects used for?
Making your projects public is a great way to provide a help desk for your customers. Allow them to view FAQs or tutorial guides in the wiki (like we do at Planio) or let them sign up to discuss in forums or create issues.
Public projects in Planio are also great for collaboration on Open Source projects, for instance. You could also use it to host public Git or Subversion Repositories.
Sounds fun? Follow this guide to learn how it's done.
2. How to Make a Project Public?
A public project on on your Planio powered Redmine account is essentially that: An open project that is available to the public.
Normally, only the explicitly named members of a project in Planio can access it and outsiders cannot see what's going on.
Let's change that! Here's how:
- Find your project or create a new one
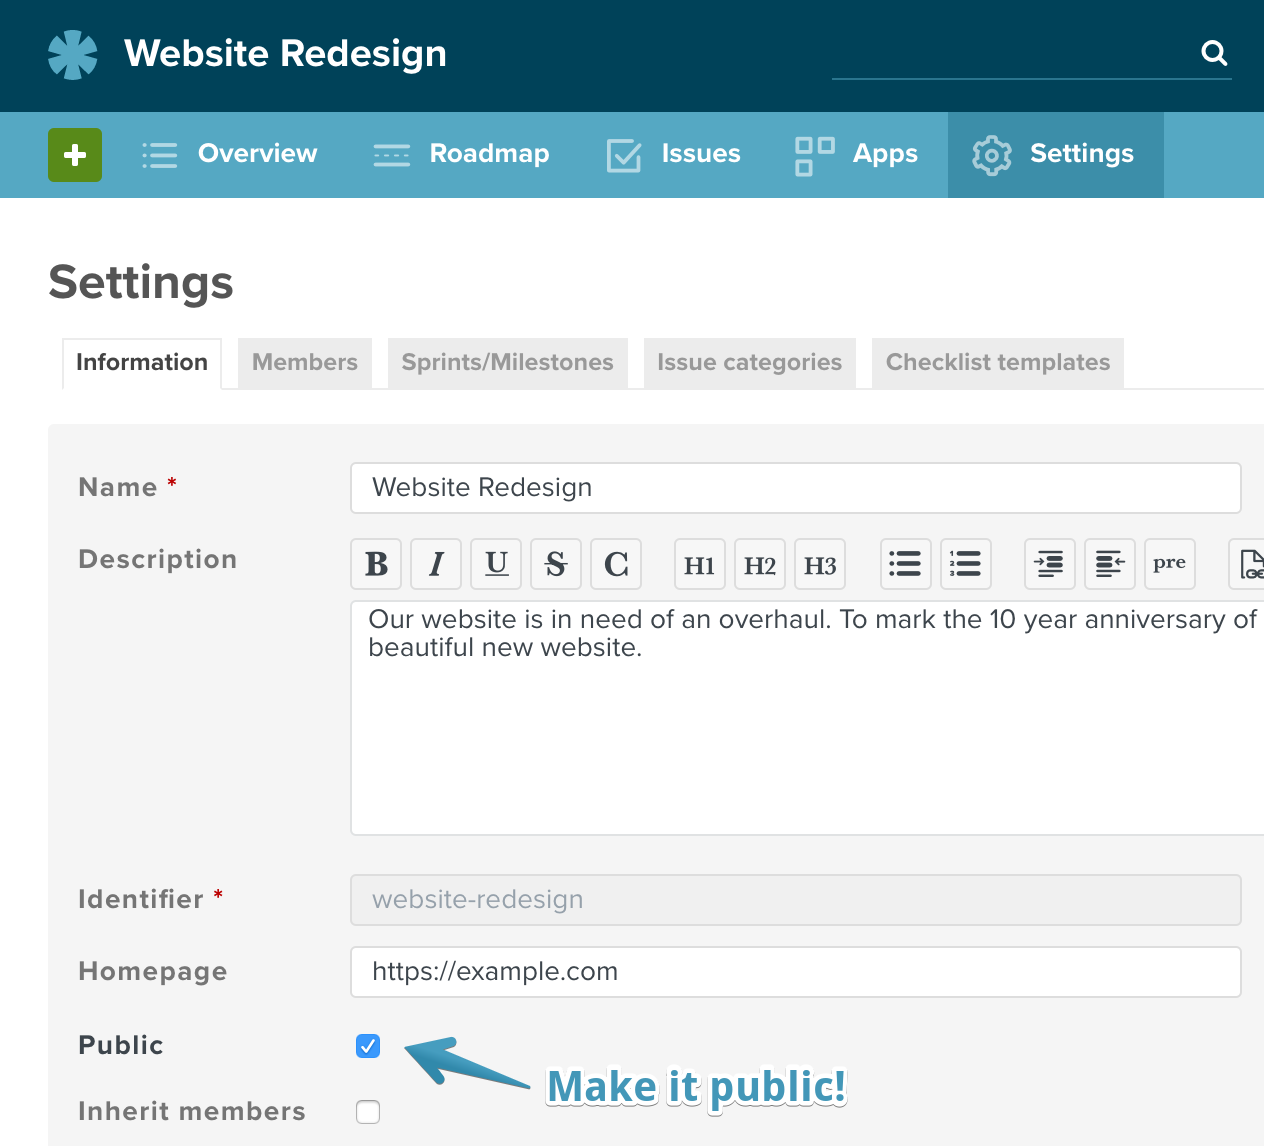
- Navigate to Settings → Information in your project
- Check the box next to the Public label and click Save
Congratulations! You now have a public project.
Optional: Make all Projects Public by Default
Would you like to make all projects public by default? No problem:
- Navigate to your avatar → Administration → Settings → Projects
- Check New projects are public by default
- Click Save
Optional: Allow Anonymous Access From the Web
Public projects are open to all users in your Planio account. But you can take this a step further and allow access to people who have not even logged in. This will publish your public projects on the Web, making your content accessible to anyone and also allow search engines to index it.
Here's how:
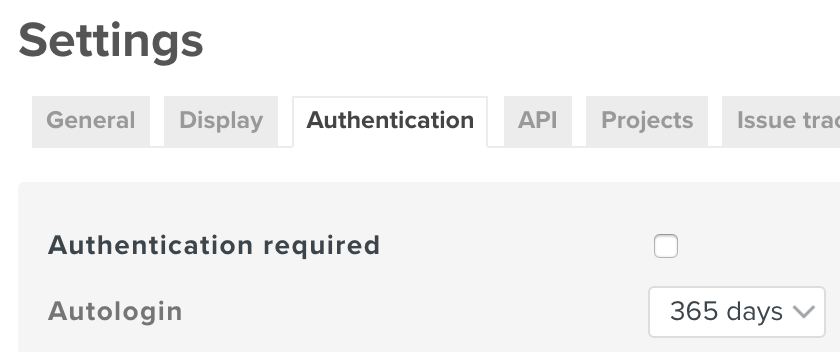
- Navigate to your avatar → Administration → Settings → Authentication
- Uncheck Authentication required
- Click Save
Be careful though with this option. You should not have any secrets in your public projects now – the whole World will be able to see them!
Next, we'll learn how exactly these changes impact your projects and who will be able to see and do what.
3. The Non-Member & Anonymous Roles
Now that you've made your project public, let's see how this changes the access permissions to it.
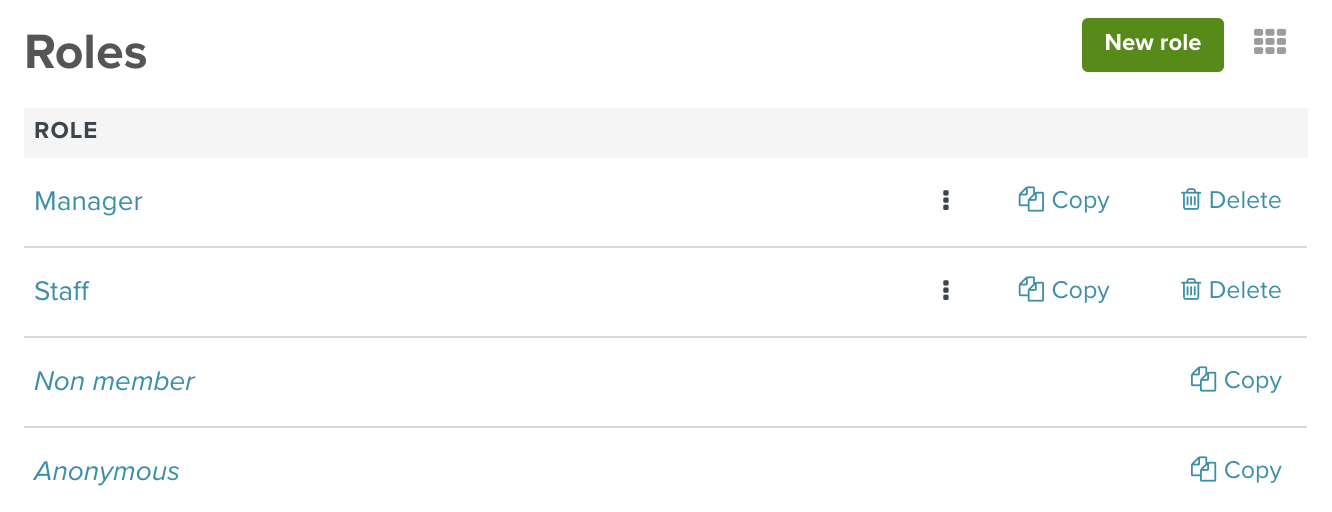
Please navigate to your avatar → Administration → Roles and Permissions for a moment. You'll see two special roles in addition to your own individual roles which you can define yourself:
The Non-Member Role
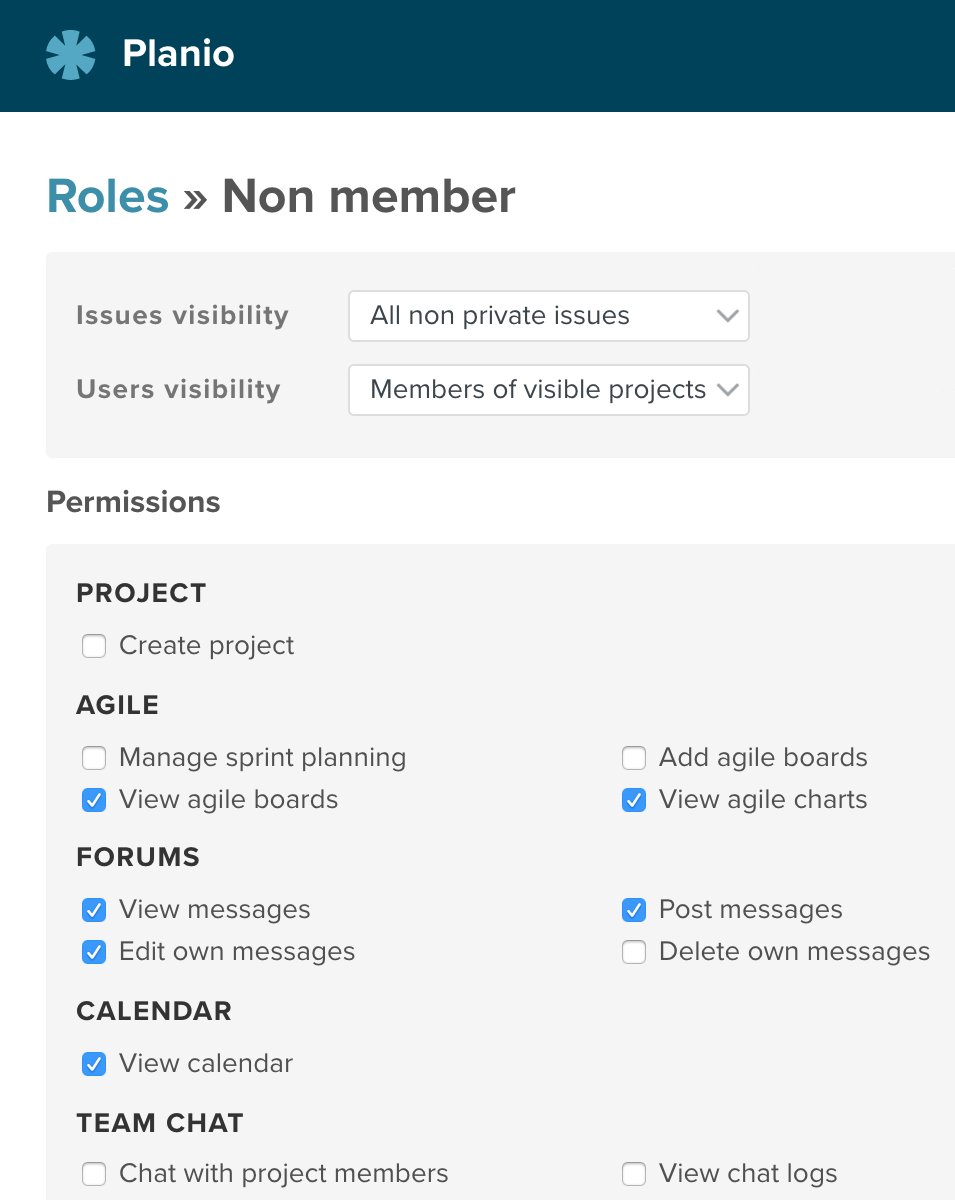
Click on the Non-Member role to pull up its permissions. What you configure here will govern what any user in your Planio account will be allowed to see and do in your public projects.
Specifically, this means that you won't have to add users to this public project anymore to give them access to it. Any user who does not have a specific role in the project automatically gets the permissions set in the Non-Member role. Users who are members in a public project will have all permissions from both the Non-Member role and their explicit membership roles combined.
The Anonymous Role
The Anonymous role is only relevant to you if you unchecked the Authentication required checkbox above. Similar to how the Non-Member role defines what logged in users can see or do, the Anonymous role specifies what anonymous users – who are not even logged in – can see or do.
We generally recommend to only give view permissions to the Anonymous role. Commenting or even creating content should only be done by logged in users.
We'll learn how to ask users to register for an account in a minute. Read on!
Individually Adding Anonymous and Non-Members to Projects
If using the Anonymous and Non-Member roles isn't specific enough for your use case and if you would like anonymous users or non-members to have different permissions in different projects, you can also add Anonymous and Non-Member as if they were real users – using the regular roles.
Let's take a look:
- Go to your public project
- Navigate to Settings → Members
- Click on New member
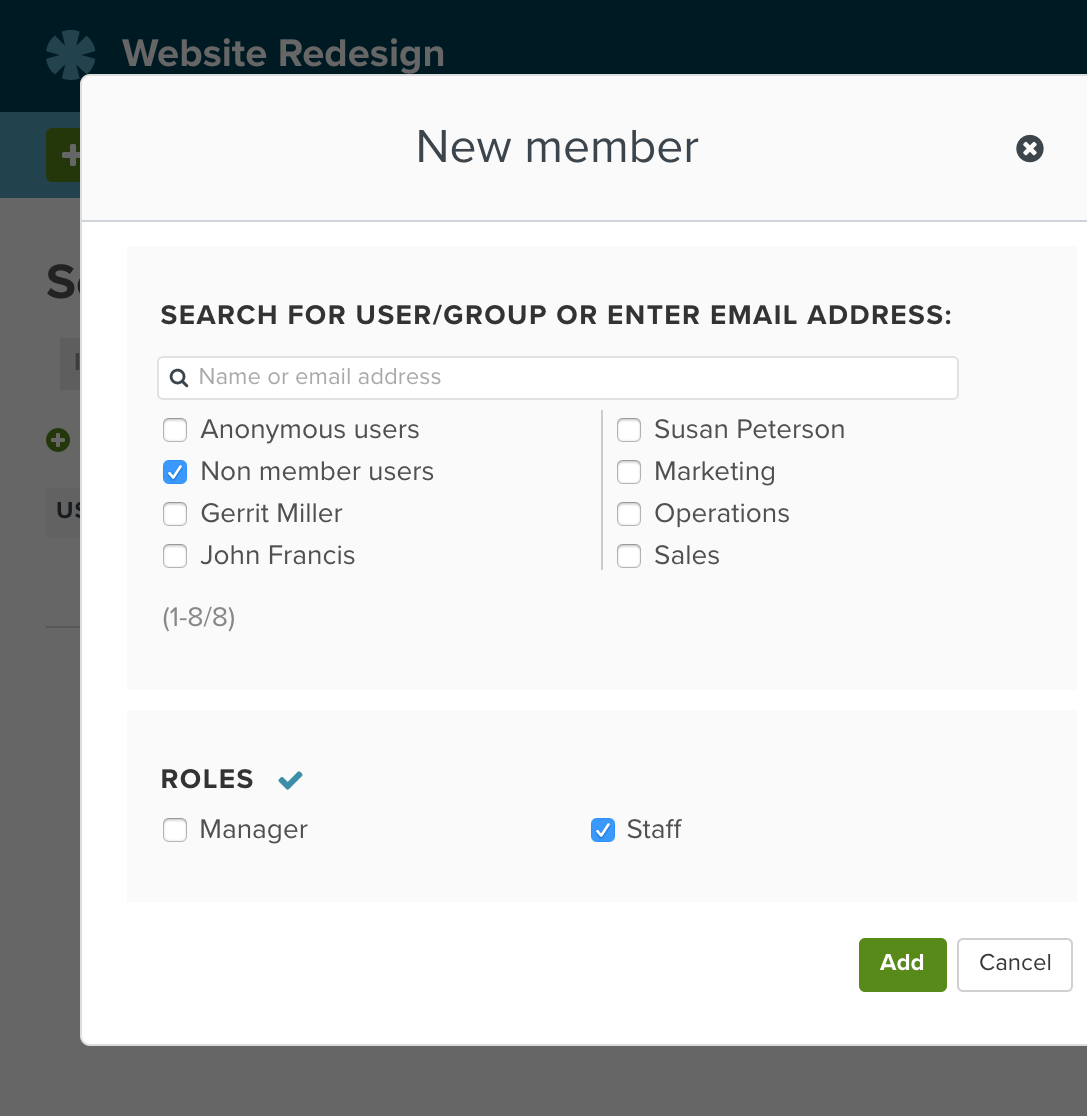
You'll find Anonymous and Non-Member among the list of regular users and groups. Now, you could add your Non-Member group with a role of Staff for instance. The result would be that non-members will be able to see and do exactly the same as normal members with a role of Staff.
It's quite advanced, we agree. In most cases it will be sufficient to configure your Non-Member and Anonymous roles' permissions.
4. User Self-Registration
Earlier we said that it's recommended to only allow view permissions to anonymous users – you most probably don't want to end up receiving spam comments on your Planio without even knowing who posted them!
In this section, we'll show you how anonymous users can register for an account on your Planio using their email address.
Activation Options
Let's set some settings first. Please navigate to your avatar → Administration → Settings → Authentication. You'll be presented with a screen like this:
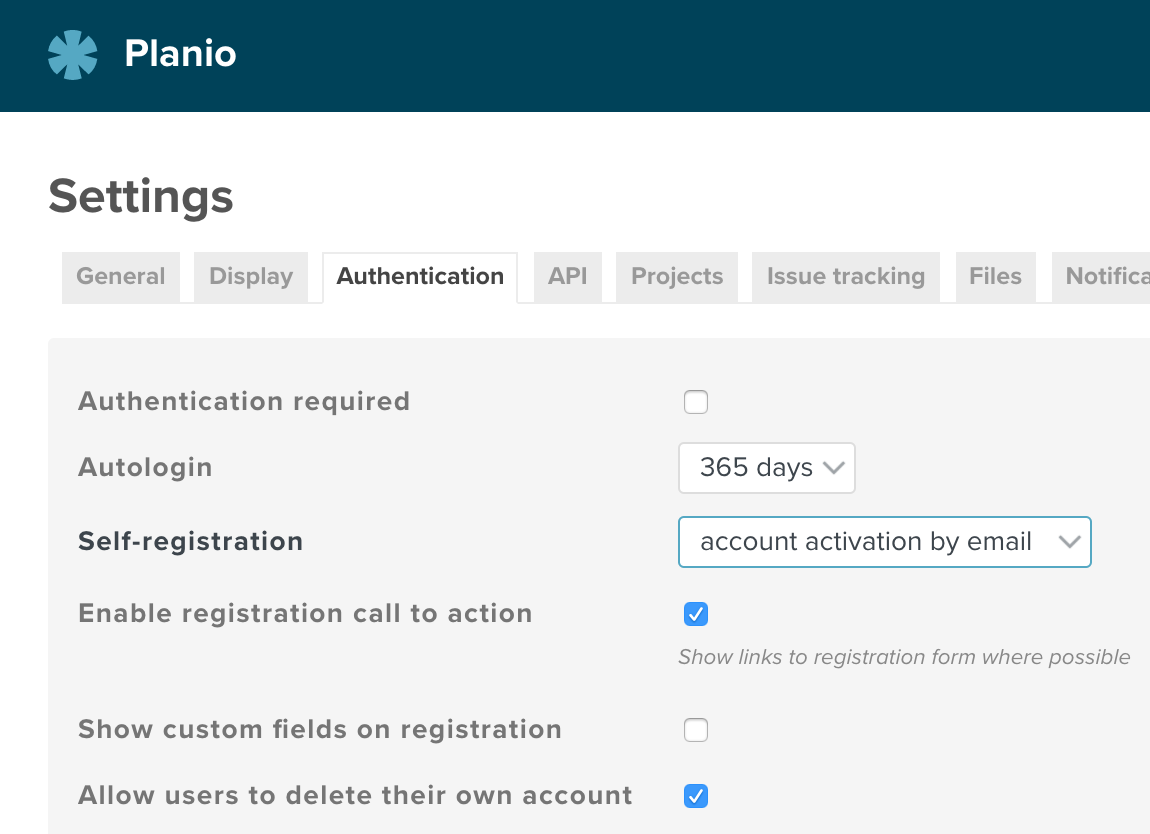
Let's take a look at the options for the Self-registration setting:
- Account activation by email will allow anonymous users to sign up using their email address. They will receive an email with an activation link. Once they've clicked it, they will be active users in your Planio account.
- Manual account activation will also allow sign ups but instead of sending activation emails, it will notify all administrators in your Planio account and you will have to activate the new users manually before they can login.
- Automatic account activation will allow anyone to sign up for a new account. New user accounts will be active immediately without any activation checks via email or by an admin.
- Disabled means that new users in your Planio account have to be added by admins – this is the default.
We recommend to use account activation by email or manual account activation depending on your personal preference.
Once registered, your new users won't have project memberships yet, so make sure to configure your Non-Member role. For example, you could allow anonymous users to view blog posts and non-member users to comment on them.
Conversion Optimization
Once self-registration is enabled on your account, anonymous users will find a menu item called Registration within the avatar menu on the top right.
But if you really want to build a community and encourage participation in your Planio account, that may not be enough.
You might want to check out these two options in your avatar → Administration → Settings → Authentication:
- Enable registration call to action will display registration links to anonymous users in various places where they would be able to participate if they were registered. For example, if non-members are allowed to create new issues, anonymous users will see a link saying Please register to add an issue right on the issues list.
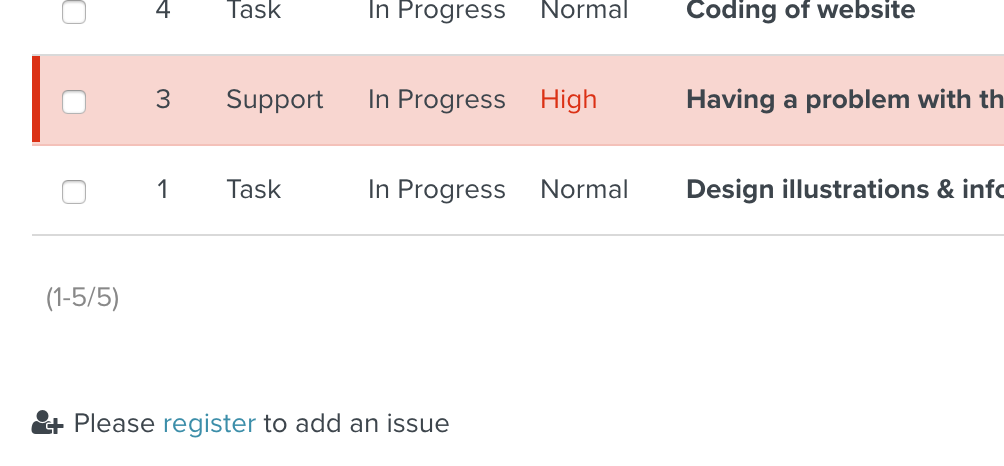
Registration CTA for creating issues - Show custom fields on registration will – when disabled – hide any extra custom fields on the registration form for your Planio account to make sign ups easier on new users by not asking too much information upfront. They can always fill out these fields later after registration.
5. Make Your Public Planio Your Own
Next up, we'll learn how to customize your user's experience with your Planio account. Here's how to make them feel right at home:
Title and Welcome Text
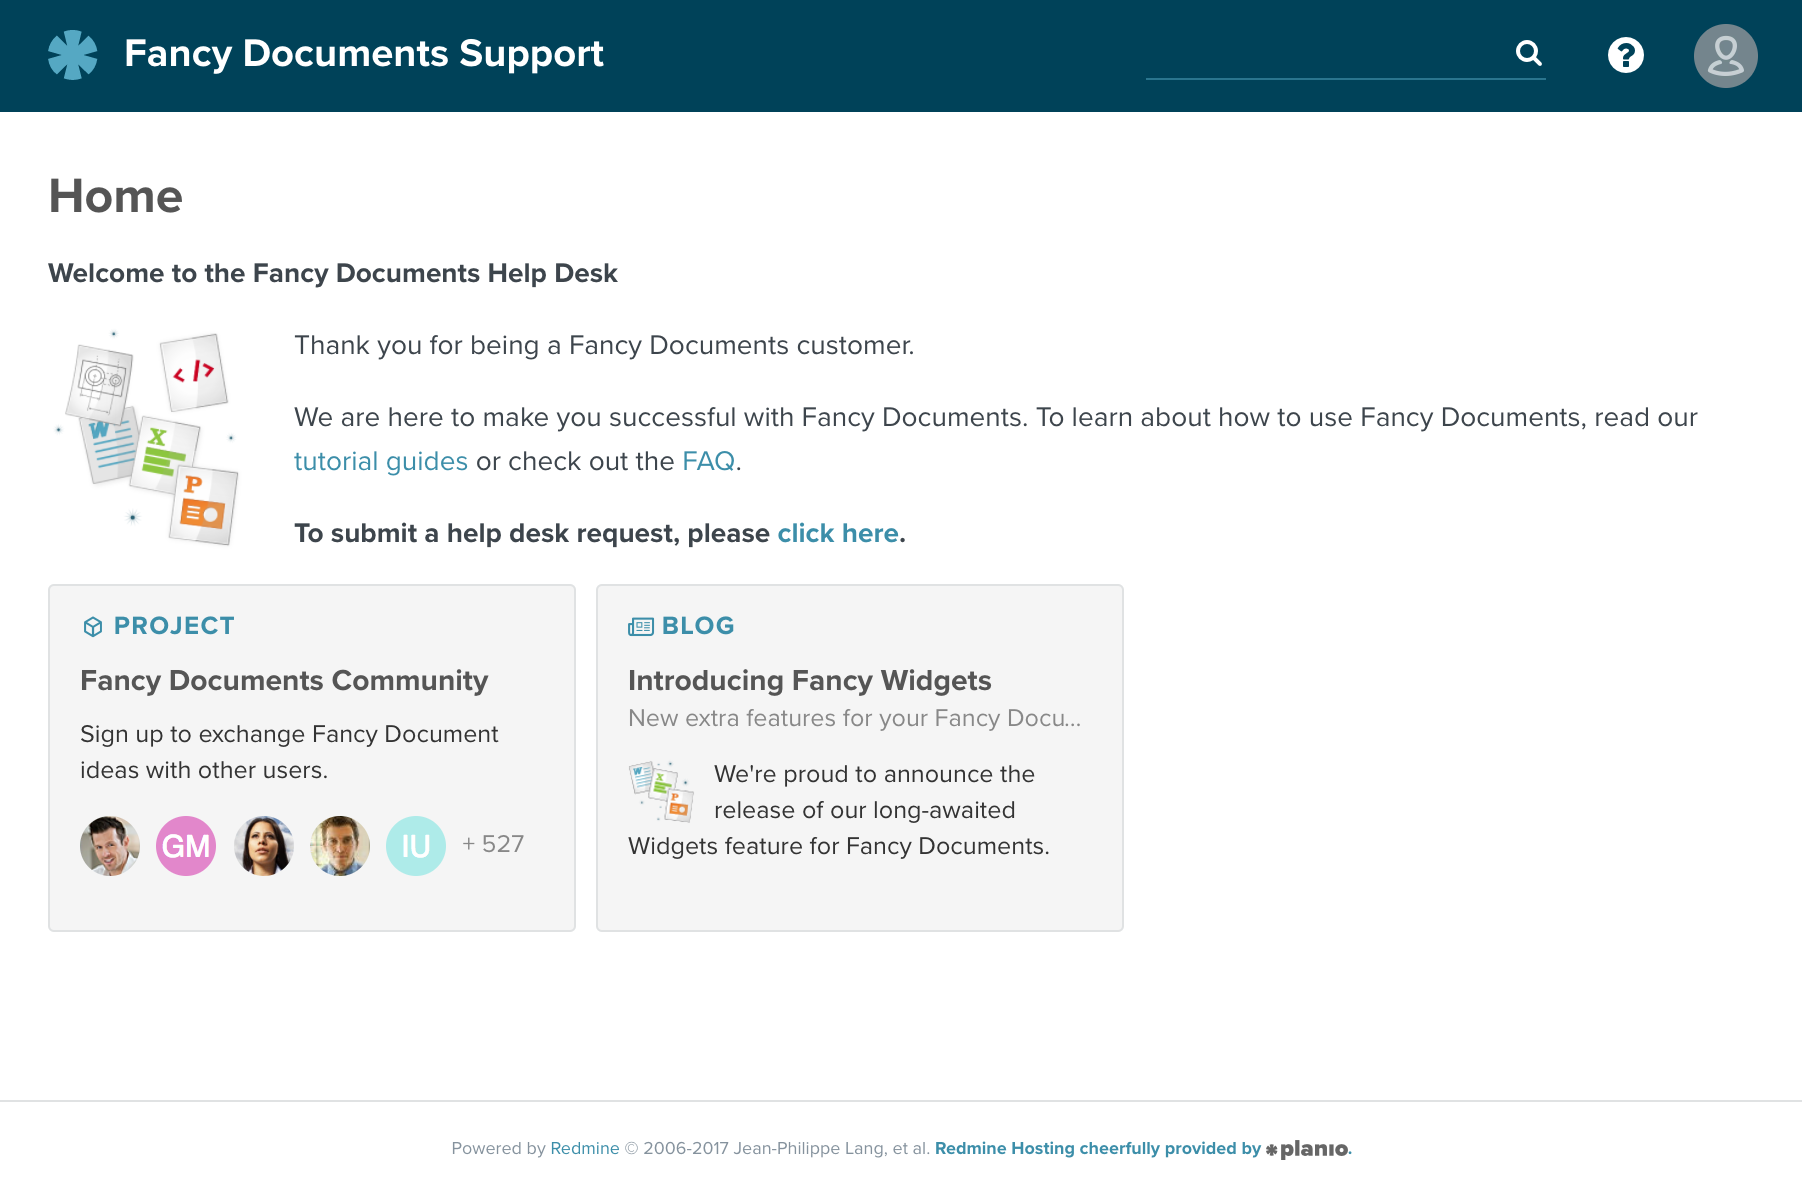
Please navigate to your avatar → Administration → Settings → General. Here, you can set an Application title – e.g. company name – and a Welcome text. Welcome texts allow for regular wiki markup, so you can use formatting options and even embed your company logo.
Below you'll see a customized welcome page as it's shown to anonymous users:
Blog Posts
You can also write blog posts within your public Planio projects and assign the View blog permission to your Anonymous role. They will be shown on your public Planio account and users will even be able to subscribe to them using their feed readers.
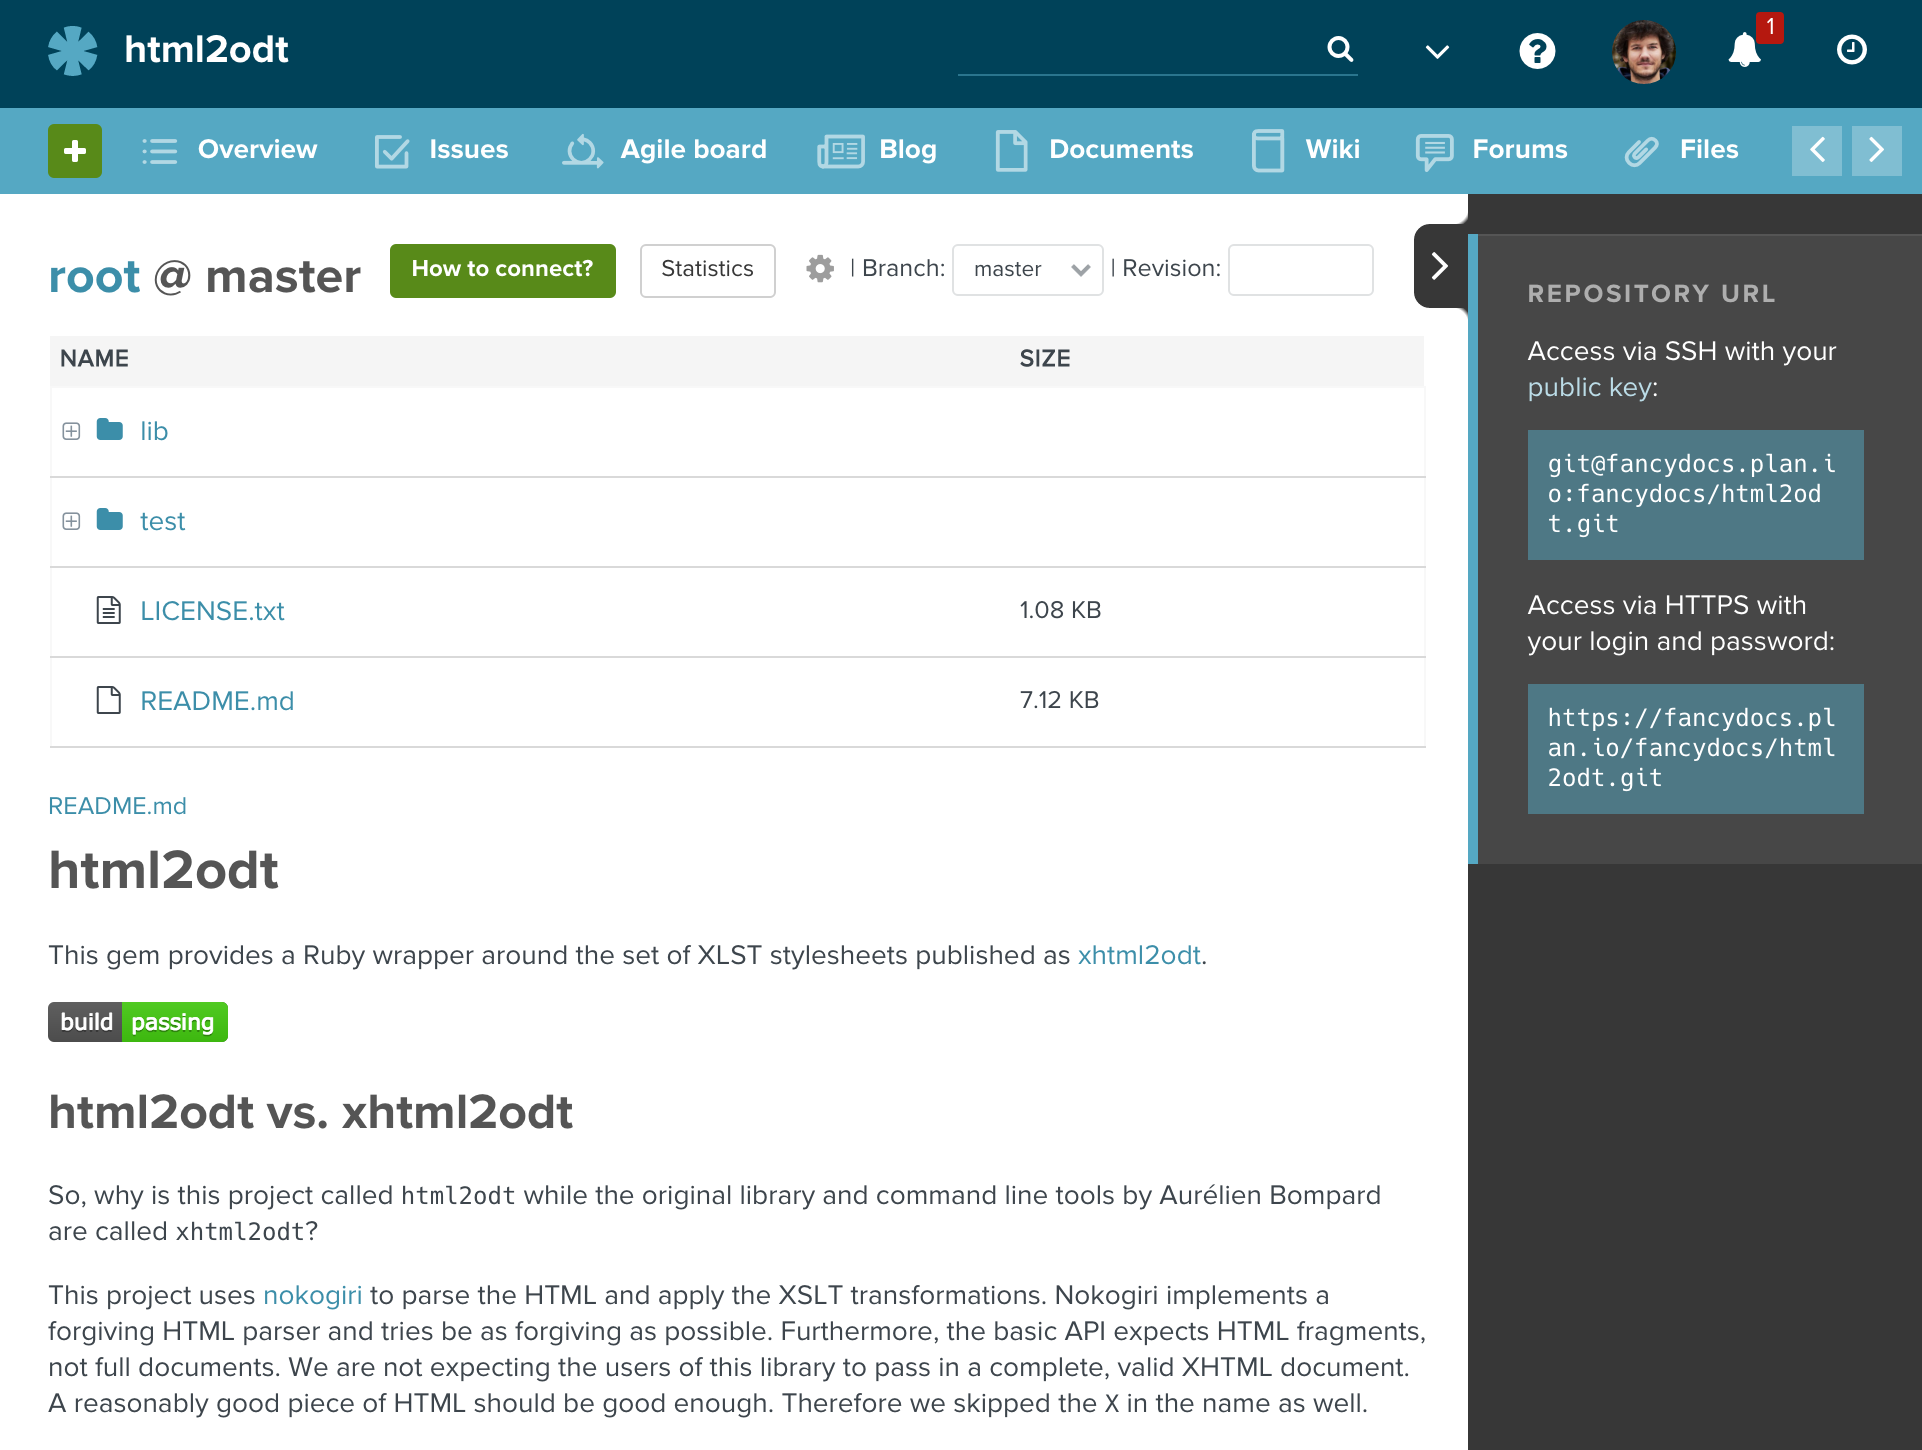
Git and Subversion Repositories
If you work on an Open Source project with Planio, you can easily publish your Git or Subversion repository to the Web as well. Simply grant the Browse repository and/or View changesets permissions to your Anonymous role and anyone will be able to clone or check out your repo using its HTTPS URL.
There are numerous other possibilities within the features of Planio. Just check out the Apps in your project and the permissions you can grant your roles.
Paid extras: Your own Design and Domain
If you'd like to take things even further, you can get your Planio account re-designed using your own logo and colors and we also offer the possibility to run your Planio account on your own Internet domain.
Both extras are included for free within our Enterprise plan and are available for 15 Euro* per month each (+ 100 Euro* setup for the design) in all other plans. Get in touch with us to activate these extras for your account.
*) Prices are subject to VAT depending on where you are based.
6. Popular examples
Need some examples? Here are some Planio accounts that use public projects:
- Saxonica – Development for the Saxon processor for XSLT, XQuery, and XML Schema
- Pulp – A software package managing platform called Pulp, run by Red Hat
- Open Source and Linux Lab – A community of computer scientists and software developers called OSLL
- Planio Support — Our own Planio account which we use for customer support, of course
Want to add your Planio account to the list? Get in touch and we'll list it here!
Ohne Kreditkarte und unverbindlich. In nur 1 Minute angemeldet.