- Table of contents
1. Project Inbox Feature
Each project is assigned a unique email address and every user that can create or update an issue in the browser can also do this via email.
This feature is available as standard in all accounts and projects at no extra cost. It is separate from our Pro Feature Planio Help Desk and works even if you don't have that installed.
2. How to use the Project Inbox
1. Know your rights
Each user in Planio is assigned one or more roles in a project. These roles determine what rights (permissions) you have in your projects.
Usually you will have the permission to create and update issues in your projects and if that is the case, you can also do this via email. Most changes you can make to an issue in the browser, you can also do via email.
Therefore the general rule is:
If you can do it in the browser, you can do it via email. If you can't do it in the browser, you can't do it via email either.
2. Use the right email address
Once you have established that you can create or update issues in a project, you'll need to know what the project's Planio Inbox email address is. This can be found in the browser.
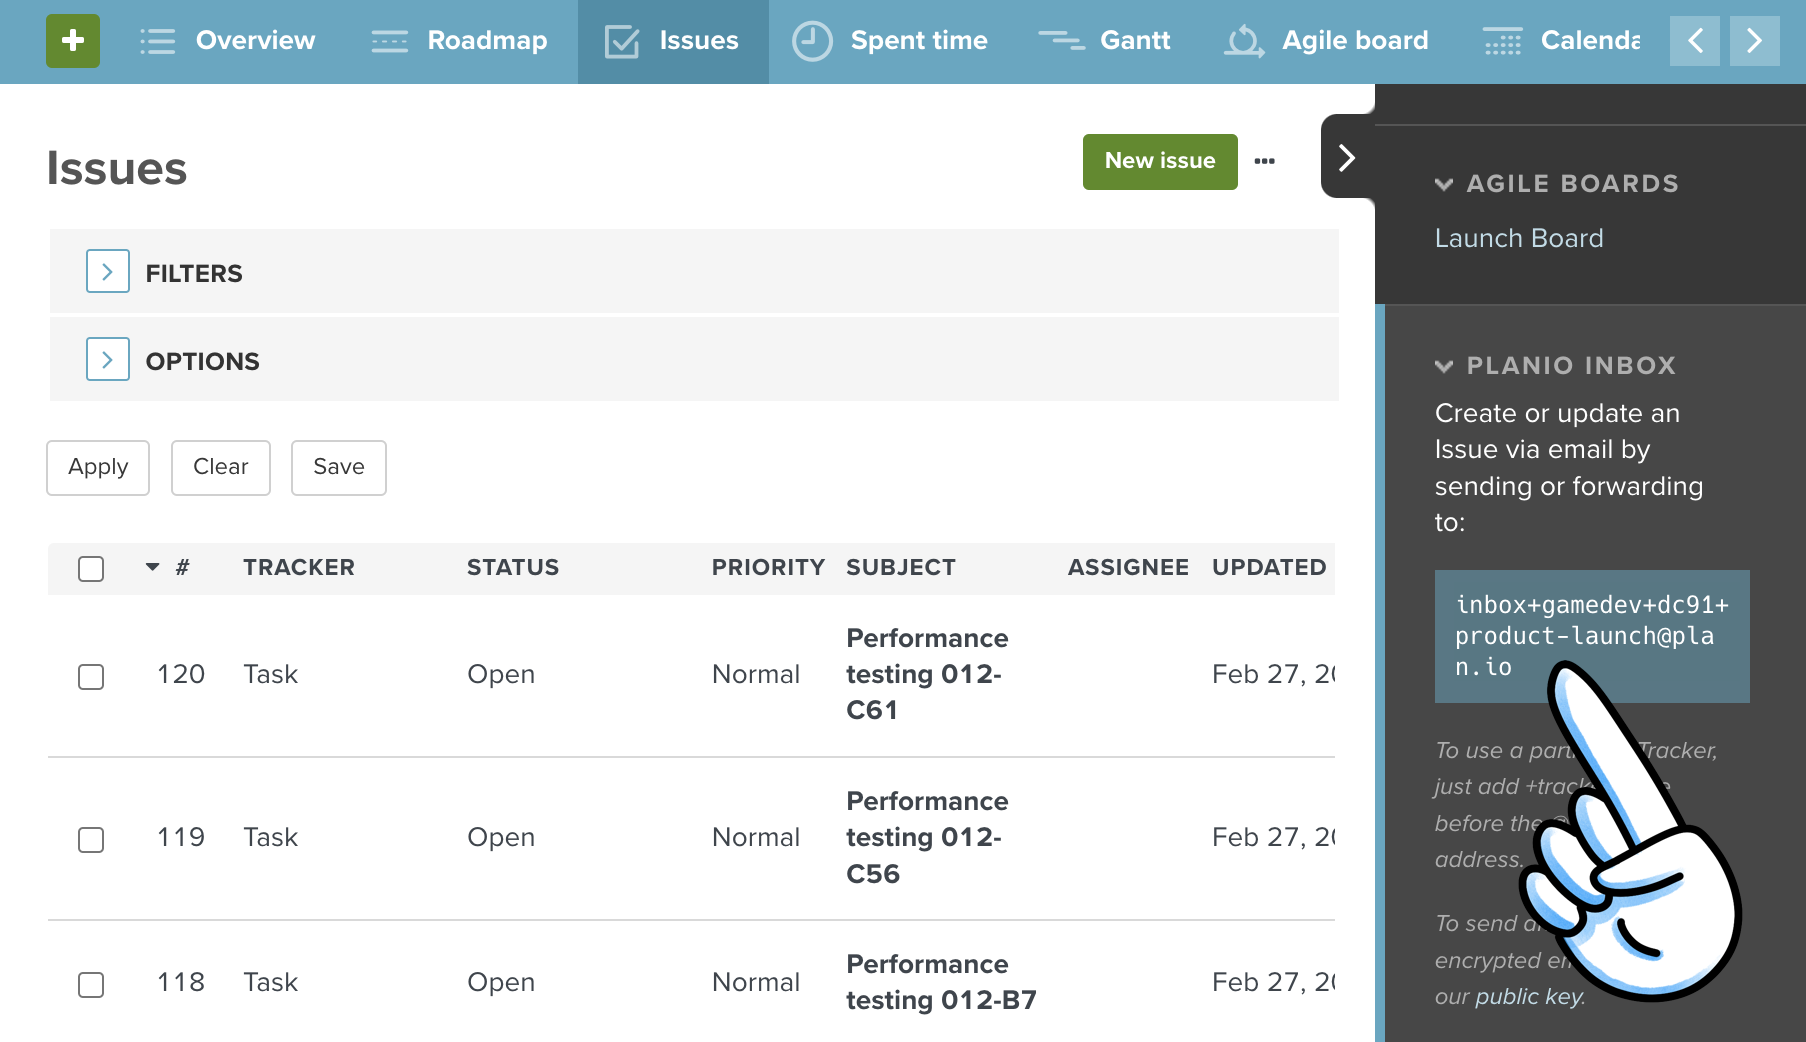
Go to the relevant project → Issues → and then open the side bar (black tab on the right hand side). Here you will see a title "PLANIO INBOX". In the blue box you'll find the email address or Inbox for that project → hover over it and copy it using the copy button that appears.
3a. Creating a new Issue via email
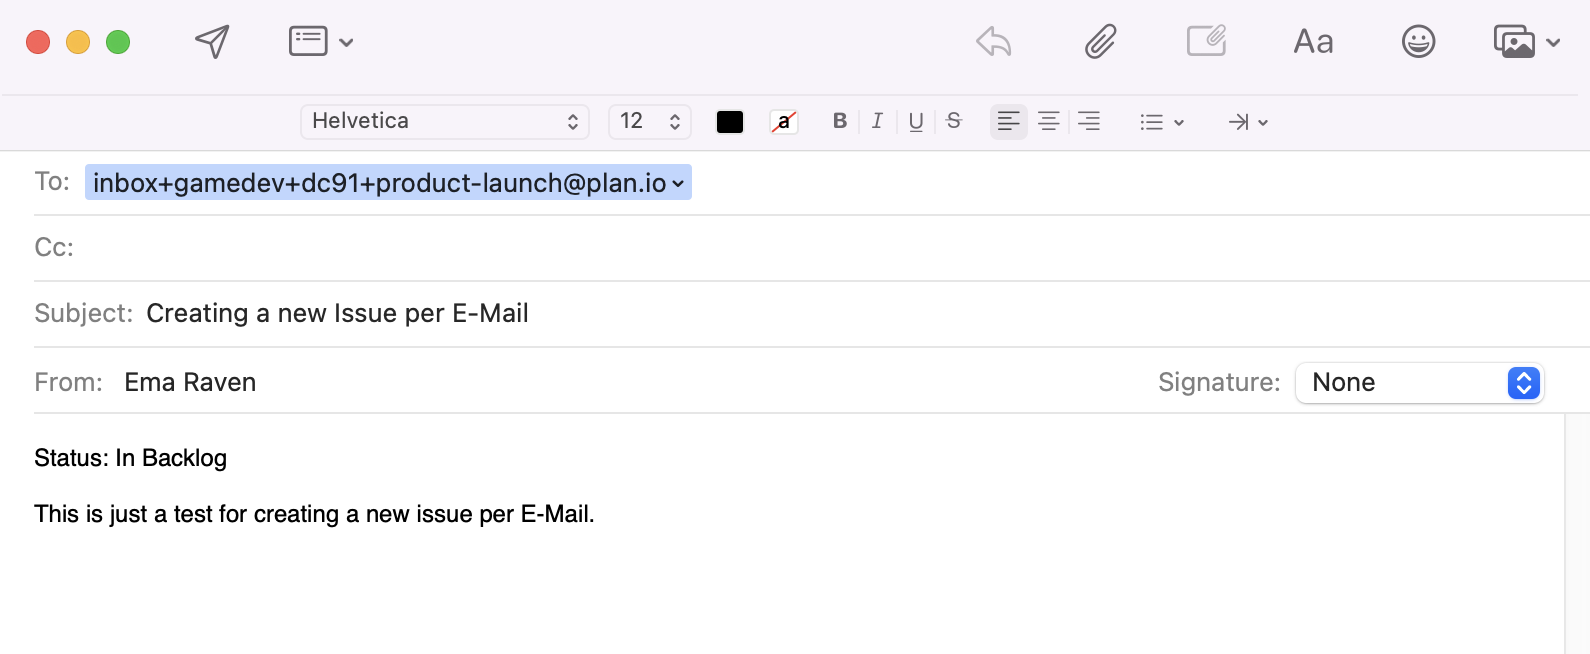
Go to your email provider or program and in the "To" Section, add the Planio inbox email address you just copied.
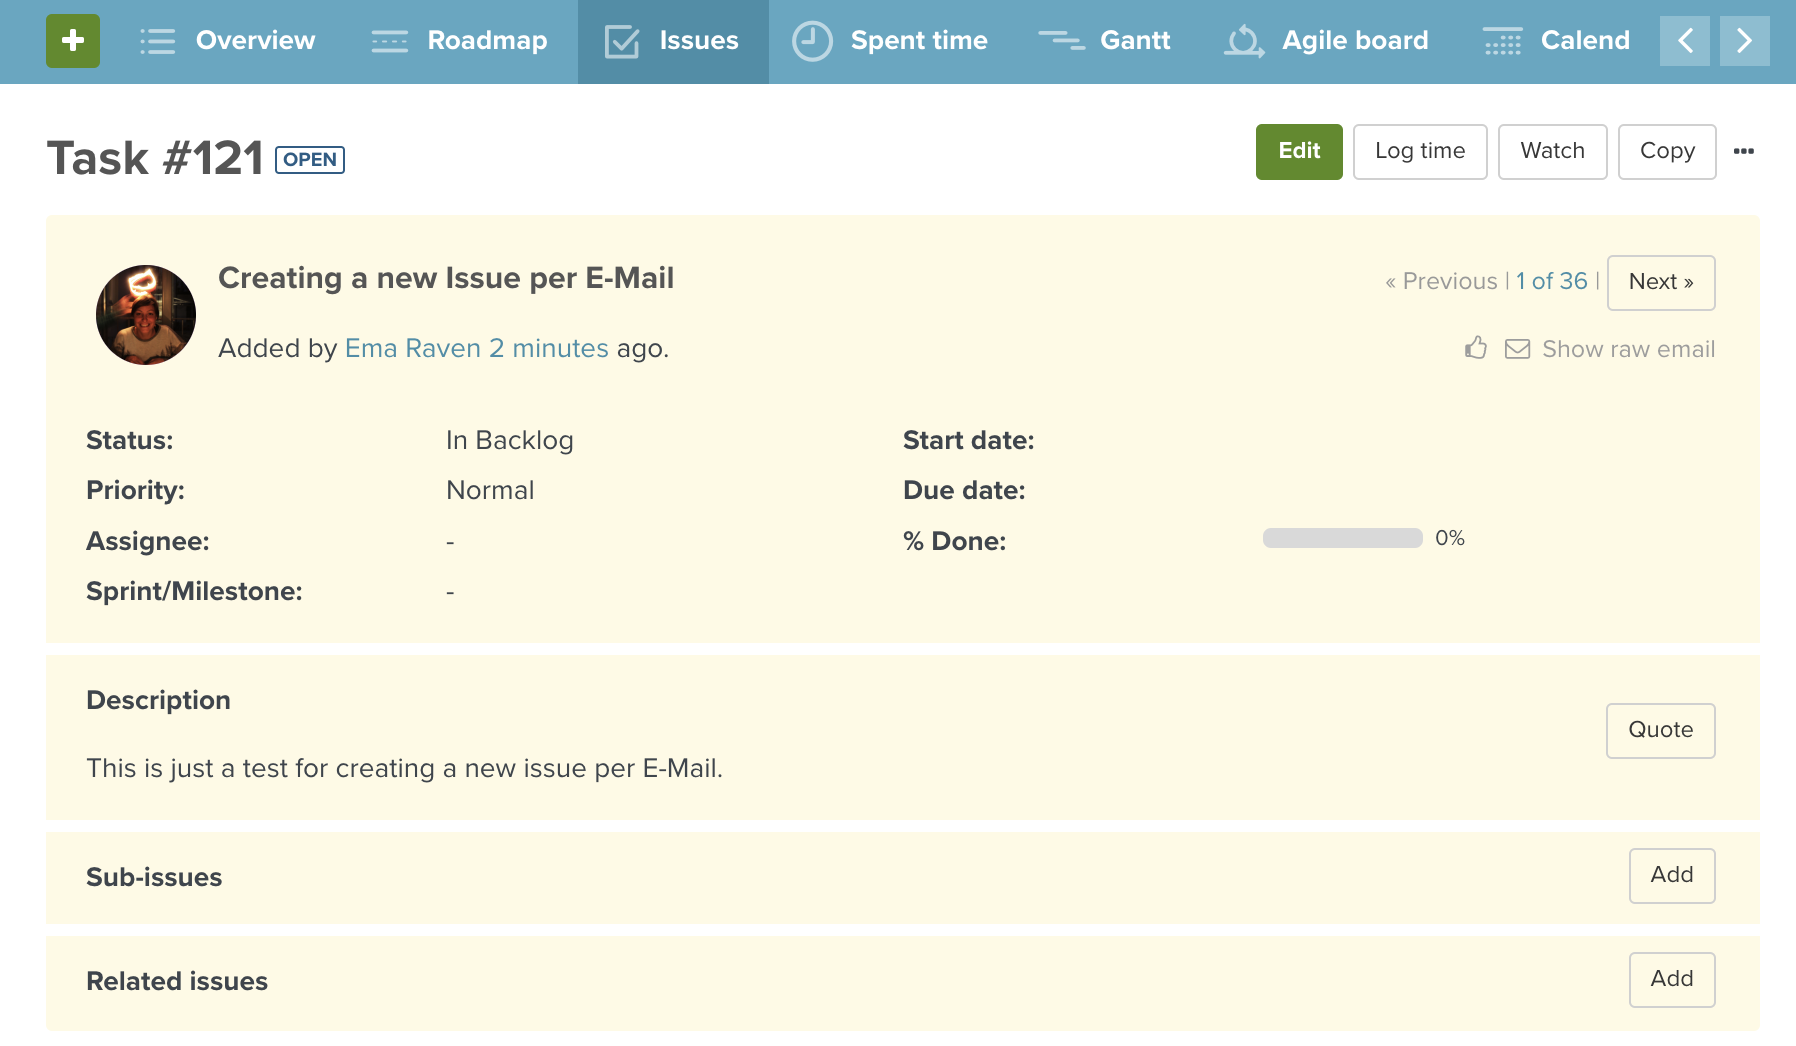
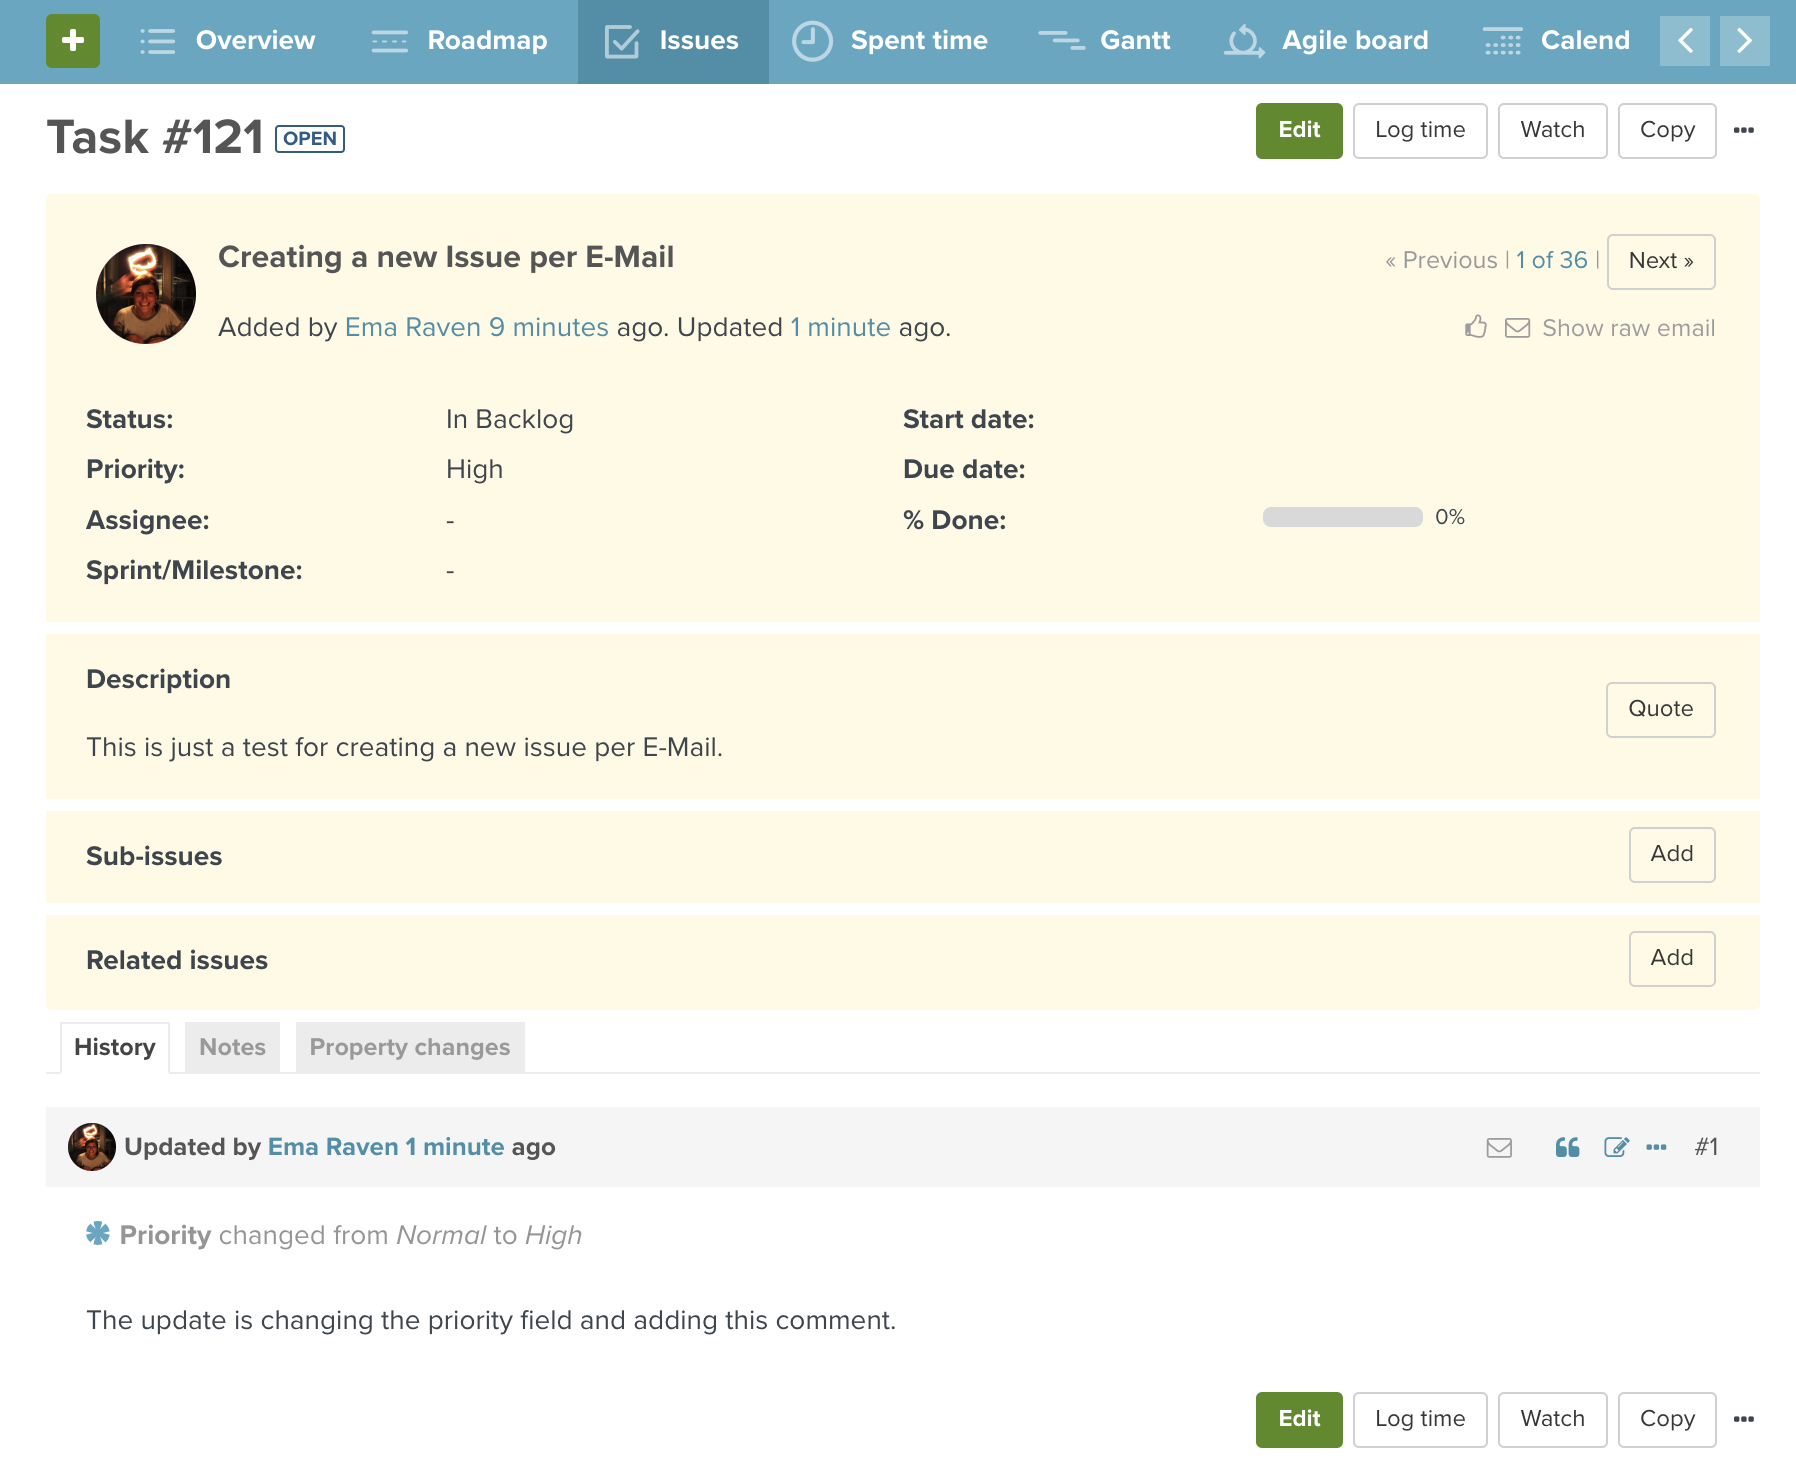
As you are creating a new issue, the email’s subject will be the issue subject. It will be automatically assigned an issue ID just as if you created the issue in the browser.
Remember to use the email address that you have registered to your user account in Planio. This is how Planio knows you are a user and member in that project and are allowed to create issues at all. If you use an email address that is not registered in your account, then Planio will reject the email. (If you are using multiple different email addresses for sending frequently, consider adding them all via your avatar → My account → Emails)
The issue that is created will have your user as the Author.
If you write anything in the body of the email it will become the Description of the issue.
The body of the email can also be used to specify all task fields, such as Status, Priority, custom fields etc.
There are a few rules however to make this work:
- Use the right Syntax. Planio will recognise that you want to fill out a field if you use the following format: "
Field Name: Field Value", for example: "Status: In Progress" - Make sure the field and value have already been set up in your account. Planio won't be able to create new custom fields or values (like priorities, categories, etc.) via email, so you can only use field and values that already exist. If you have a typo in your entry, it won't work either.
- Use one line per field entry only. This way you can change multiple fields with one email.
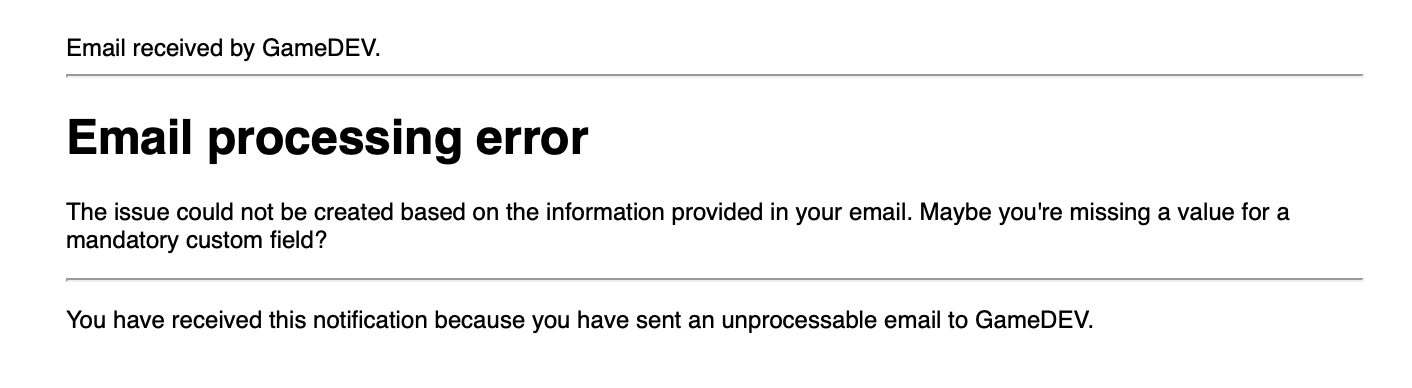
★ Tip! If you have done something wrong (e.g. forgotten to fill out a required field or made a typo), Planio will send an auto reply email back to you saying the mail could not be delivered. ★
If you don't use the body to change any fields, all standard settings will be used. We'll talk a little more about standard settings in the Hints, Tips, and Troubleshooting section below.
3b. Updating an existing Issue via email
This works just the same as creating a new issue but with some slight changes.
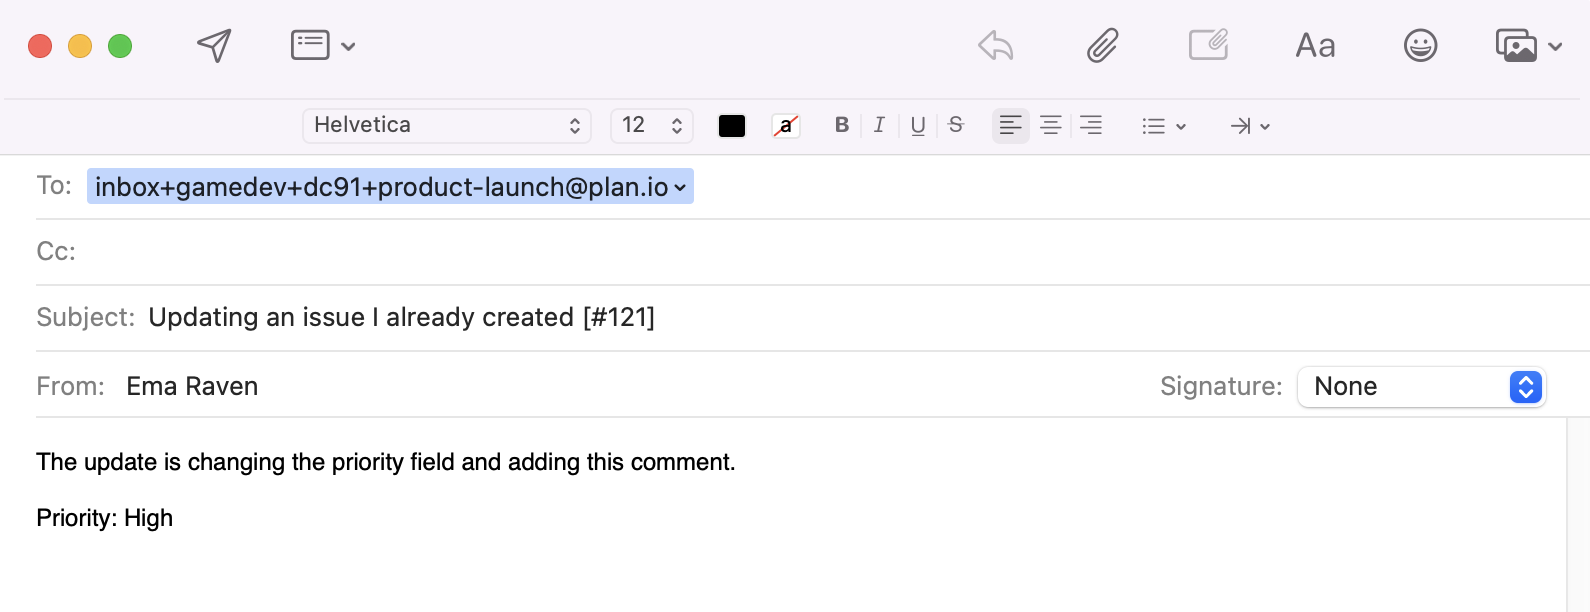
Go to your email provider or program and in the "To" Section, add the Planio inbox address you copied earlier.
As you are updating an issue, the email’s subject must contain the issue ID you want to update. This way Planio knows what issue to update. To make sure Planio recognises it as a Planio issue ID it must be written with a Hashtag before the digits and inside square brackets like so: [#12345]
If you write anything in the body of the email it will become the Notes of that update.
As with creating a new issue, the body of the email can also be used to specify all issue fields, such as Status, Priority, custom fields etc. If you don't use the body to change any fields, no further changes will be made in the issue.
3c. Replying to a Planio notification email
If you have Planio email notifications set up, you receive emails for issue updates to your inbox. In cases where they refer to a single issue you can simply click Reply in your email program to update that issue in Planio via email. As the issue already exists, you will be updating the issue and you can follow the instructions from section 3b.
4. Issue fields list and how to fill them
Here is a useful list for filling out valid fields via email:
| Field name | Valid Value Formats | Example | |||
|---|---|---|---|---|---|
| Project | → | Exact project name | Product Launch | ||
| Tracker | → | Exact tracker name | Bug | ||
| Assignee | → | Full name Email address Login | Ema Ravenraven@example.comEraven | ||
| Priority | → | Exact priority name | High | ||
| Category | → | Exact category name | Development | ||
| Start Date | → | Correct format | YYYY-MM-DD | ||
| Due Date | → | Correct format | YYYY-MM-DD | ||
| Estimated hours | → | Whole number Decimal number | 11.5 or 1,5 | ||
| % Done | → | Whole number | 50 | ||
| Parent issue | → | Issue ID | 123 | ||
| Private issue flag | → | For private For not private | 1, yes, Yes0, No, no | ||
| Files | → | Add an attachment to upload a file to the issue | |||
| Watchers | → | Add registered email addresses in CC to add them as watchers. If the email address can be matched to a user, who has no permissions to see the issue, see the field "Company and Contact person" | |||
| Company and Contact person | → | If Help Desk is installed, non-user email addresses in CC will be added with an automatically generated (or already existing) company name and adjoining contact person (with the email address). This is also automatically saved in your "contacts" tab in that project. Email addresses that can be matched to a user, but do not have permissions to see the issue will be added as a company and contact instead of a watcher. | |||
| Files | → | Files can only be added but not deleted or edited via email | |||
| Checklist | → | Not editable via email | |||
| Color | → | Not editable via email | |||
| Story points | → | Not editable via email | |||
| Spent time | → | Not editable via email | |||
| Activity | → | Not editable via email | |||
| Comment (LOG TIME) | → | Not editable via email | |||
Custom Fields
You can also fill out your custom fields via email. Depending on the format of the custom field, you can use the following values:
| Format | Valid Value | |
|---|---|---|
| User | → | See "Assignee" |
| Date | → | YYYY-MM-DD |
| File | → | You can't add a file to a file custom field |
| Text | → | Any free text |
| Long text | → | Any free text |
| List | → | Exact list value |
| Link | → | Any free text |
| Integer | → | Any whole number |
| Float | → | Any whole number or decimal number |
| Boolean | → | 1, yes, Yes or 0, No, no |
| Sprint Milestone | → | Exact existing Sprint/Milestone |
| Key/value list | → | Exact key value |
3. Hints, Tips and Troubleshooting
→ In the sidebar it says you can set the tracker via email. How does that work? It is true! To make an update or create a new issue with a certain tracker, there are two options. You can either use the syntax we talked about before (Tracker: Bug in the email body) or you can edit the project email address to include the relevant tracker; just add +Trackername before the @ sign. For example inbox+gamedev+dc91+product-launch+bug@example.io
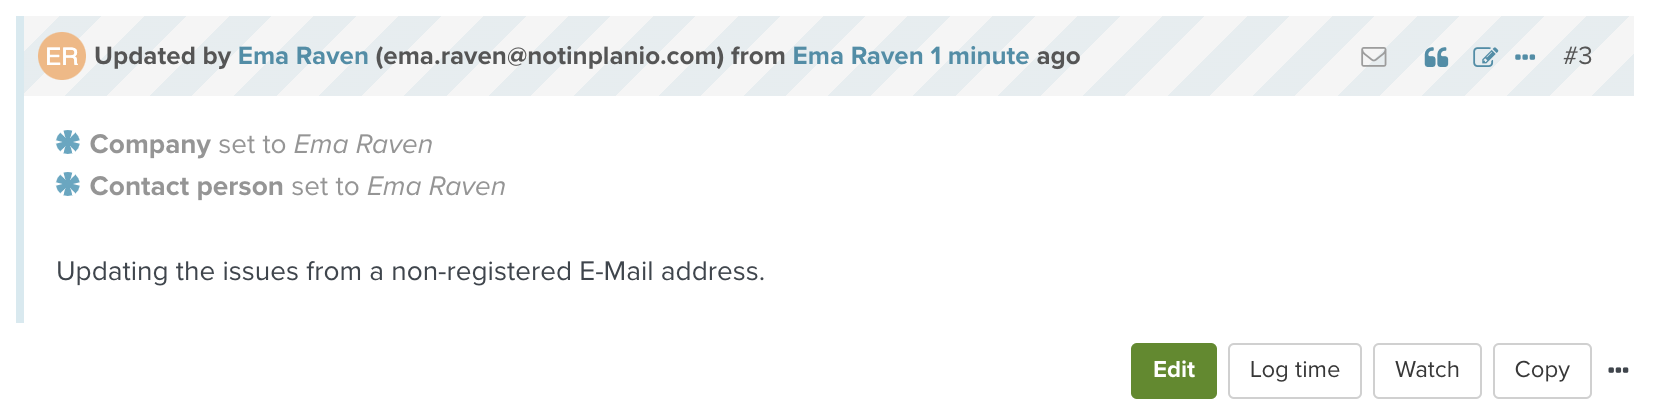
→ I didn't use my official email address so why was an issue created anyway? This can happen if Planio Help Desk is switched on for that project. Plano Help Desk allows for non-registered users to send an email to the project inbox and create or add notes to issues. However that is all you can do - it is not possible to update fields if you are using a non-registered email address. To learn more about Planio Help Desk, take a look here. An email or update from a non-registered email address will have a blue striped header and a blue vertical line on the left hand side.
→ I am using my registered email address so why am I still getting an email saying the email couldn't be delivered? That is usually because you aren't filling out a field that is mandatory. Sometimes there are fields that must be filled out in order to create or update an issue. This is the same in the browser. In Planio you can identify a required field by the small red * next to the field name. Just as in the browser, you will have to fill out the field in the email using the format we talked about above.
→ I can update via email in one project but not the other. Why? You can have different roles in each project and therefore different permissions in each project. Therefore what you may be able to do in one project, doesn't mean you can do it in all projects.
→ Why didn't I get an Auto-Reply email? When creating or updating an issue via email, it works just as if you were doing it in the browser. Auto-Replies are part of the Help Desk feature and only for non users or non-members. As you are a user and member in the project, you would get a Planio notification instead, so long as your notification settings are set up for that.
→ My account is not in English. Can I use my own language to set the fields? You can can always use the English field names, plus the names in the selected language within your avatar → My account.
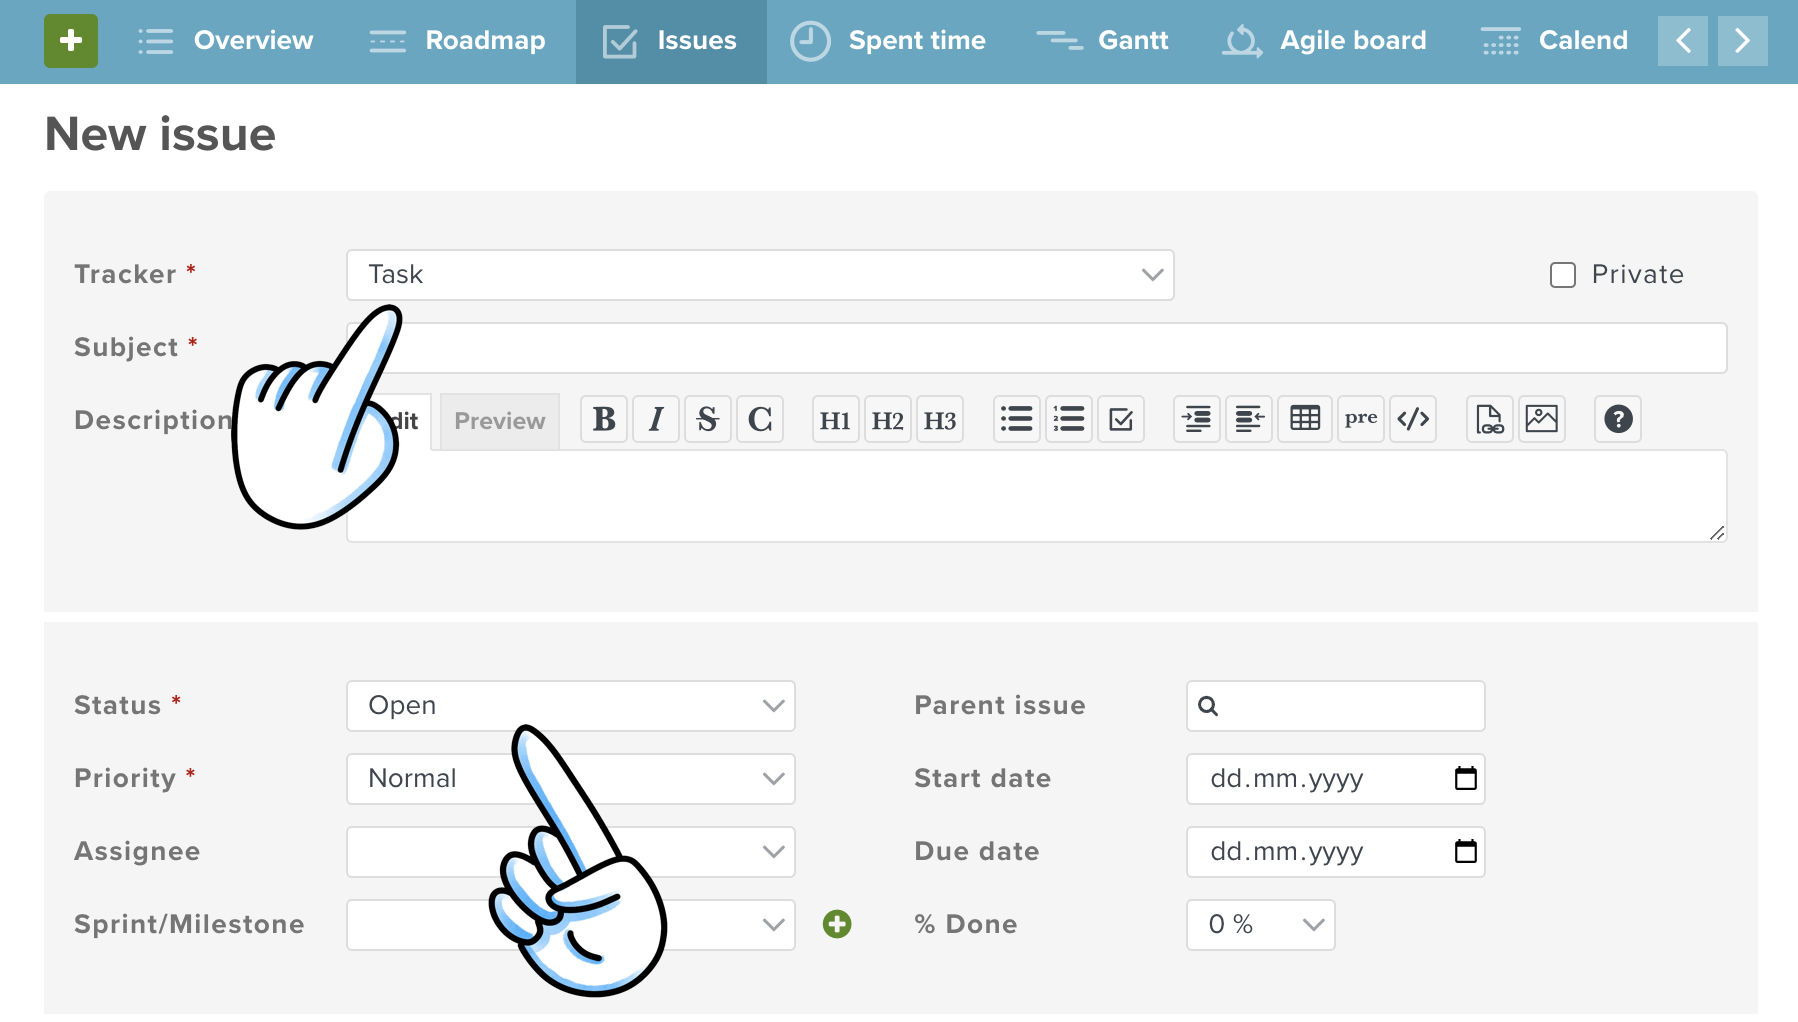
→ What are the standard settings used if I don't set fields in the email body? Every issue in Planio has to have at least a tracker, status and priority. An administrator will have determined already what they should be when creating a new issue. You can see what they are by creating a new issue in the browser and looking at what is automatically filled out in those fields. If you send an email without setting a field, these are the field values that Planio will use.
If you get stuck when using Planio Inbox in your account, have any other questions, or just want to know more, please don’t hesitate to contact our super friendly support staff.
Ohne Kreditkarte und unverbindlich. In nur 1 Minute angemeldet.