- Table of contents
1. Set up a key pair using Eclipse and store your public key in Planio
- Select "Window" → "Preferences" from the Eclipse application menu.
- Navigate to "General" → "Network Connections" → "SSH2".
- Select the "Key Management" Tab.
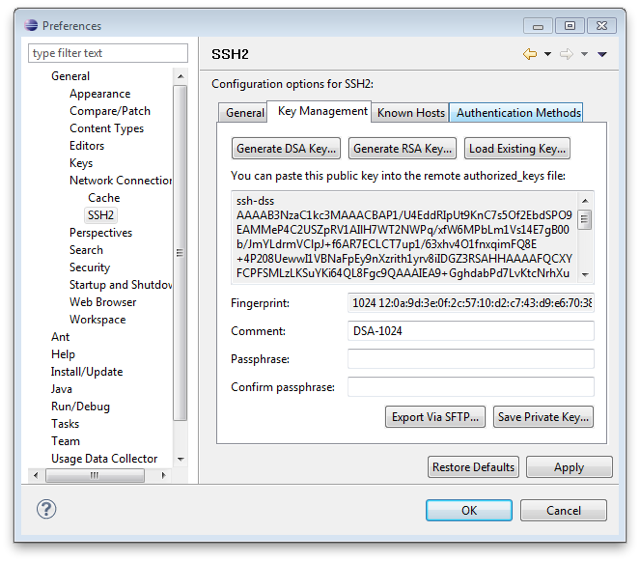
- Click "Generate RSA Key...".
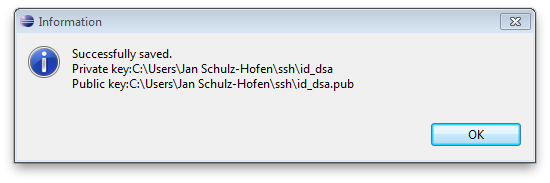
- Click "Save Private Key..." and store it as "id_rsa" in the ".ssh" directory within your home folder.
- Copy the public key (displayed in the text area) into your clipboard.
- Open Planio in your browser, navigate to "My account" → "Public keys" and click on "New value".
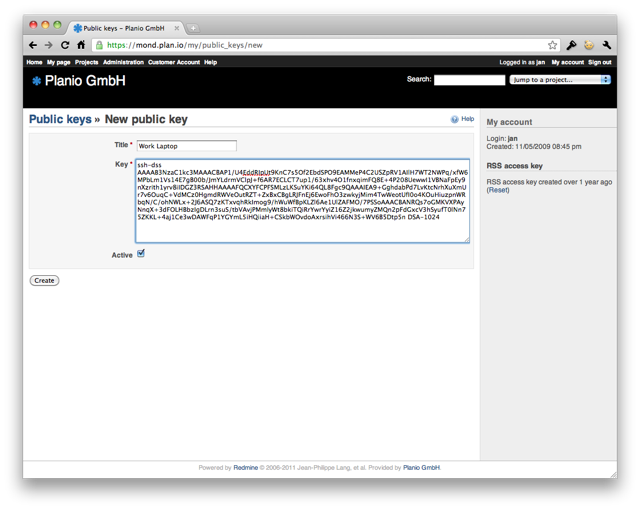
- Enter a title for your key. It makes sense to have one key per computer you use, so a good name would be e.g. "Work Laptop".
- Paste the key you copied to the clipboard in the "Key" field and click on "Create".
2. Install EGit
- Select "Help" → "Install New Software...".
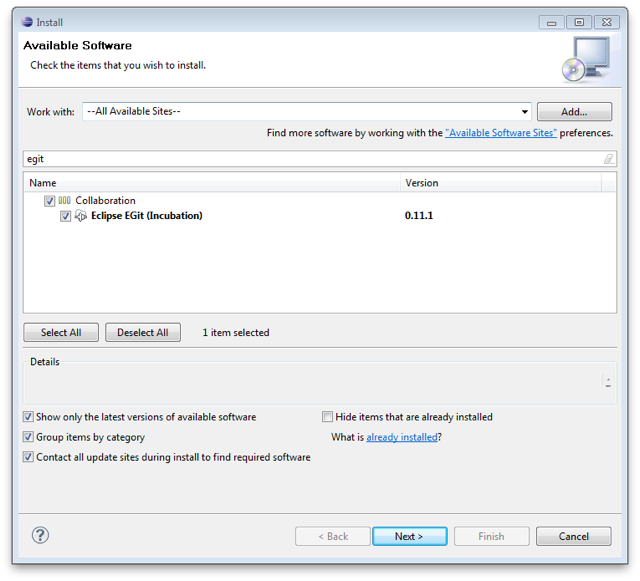
- Select "All Available Sites" from the drop down next to "Work with".
- Type "egit" in the search field.
- Check the box next to "Eclipse EGit (Incubation)" and click on "Next >", accept the terms and click on "Finish" to install EGit.
3. Make your first commit
- Open a context menu for your project, select "Team" → "Share Project...", then select "Git" and click "Next >".

- Select your project and click on "Create Repository" to create a local Git repository, then click "Finish".
- Open a context menu for your project, select "Team" → "Add" to add your local changes to the cache.
- Open a context menu for your project, select "Team" → "Commit" to commit your local changes to the (local) repository.
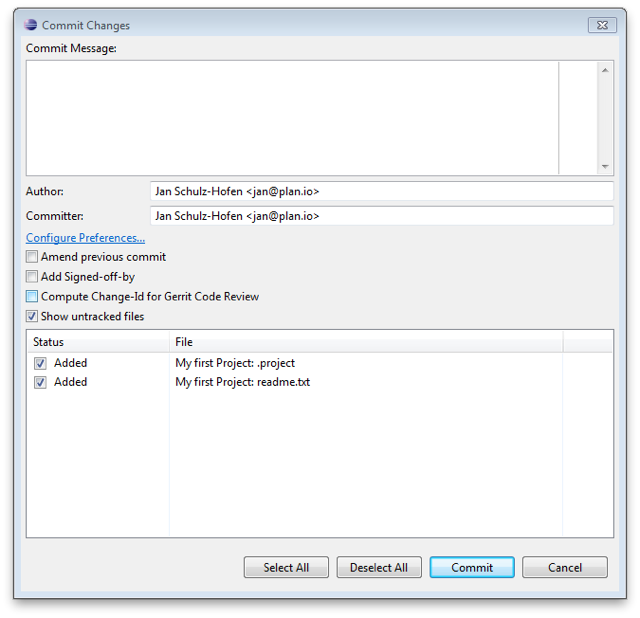
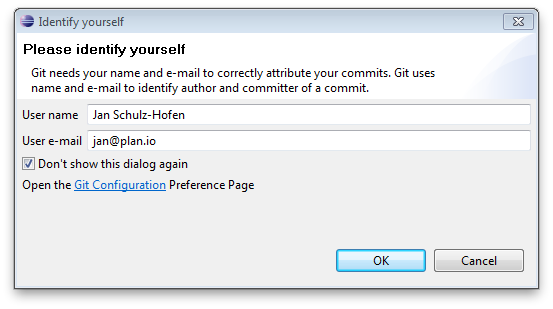
- Enter a commit message and perform your first commit. If being asked for your name and email address, please enter the information as needed.
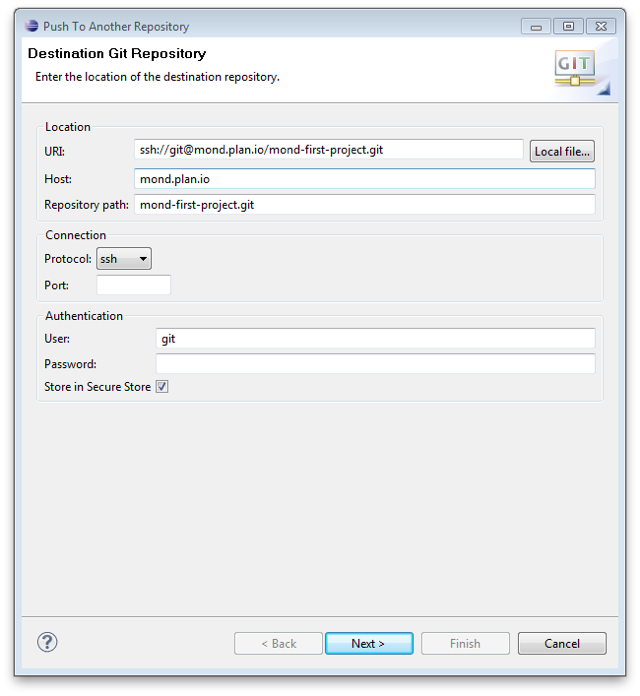
- Open a context menu for your project, select "Team" → "Remote" → "Push..." and enter your Planio repository URI in the URI field. You can find your Planio repository URI in your Planio account by navigating to the "Repository" tab.
- Then, click on "Next >" and select "master [branch]" as a source ref and confirm "refs/heads/master" as a destination ref.
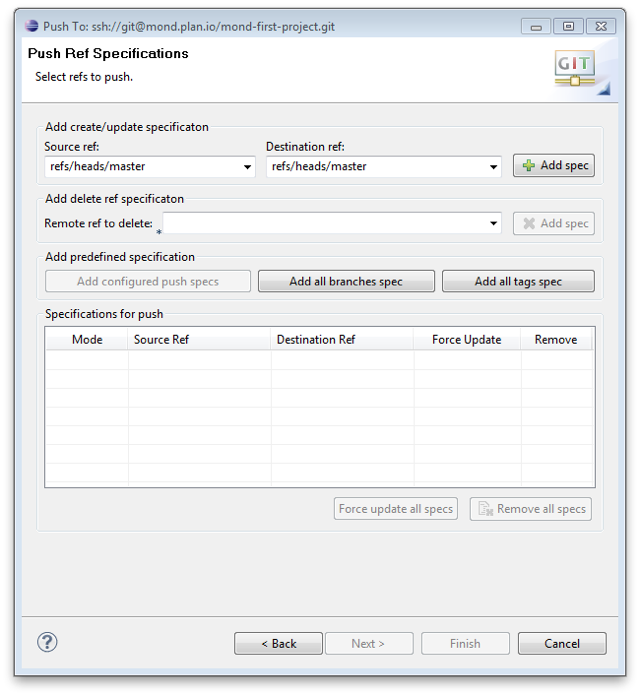
- Finally, click on "Add spec", then on Finish.
- If being asked for a password for secure local storage, select a password and click OK. This password is used to encrypt Eclipse data locally, you should not use your Planio password here.
- Your project should have been pushed to Planio's remote Git repository.
› Get a free Planio account for 30 days
No credit card required. Sign up only takes 60 seconds.
No installation No setup fees