- Table of contents
1. Issue fields
Let’s explore issues by walking through the process of creating a new issue.
Please note that based on your role and the enabled modules in your project not all of the shown fields may be available.
The basics: tracker, private, subject, and description
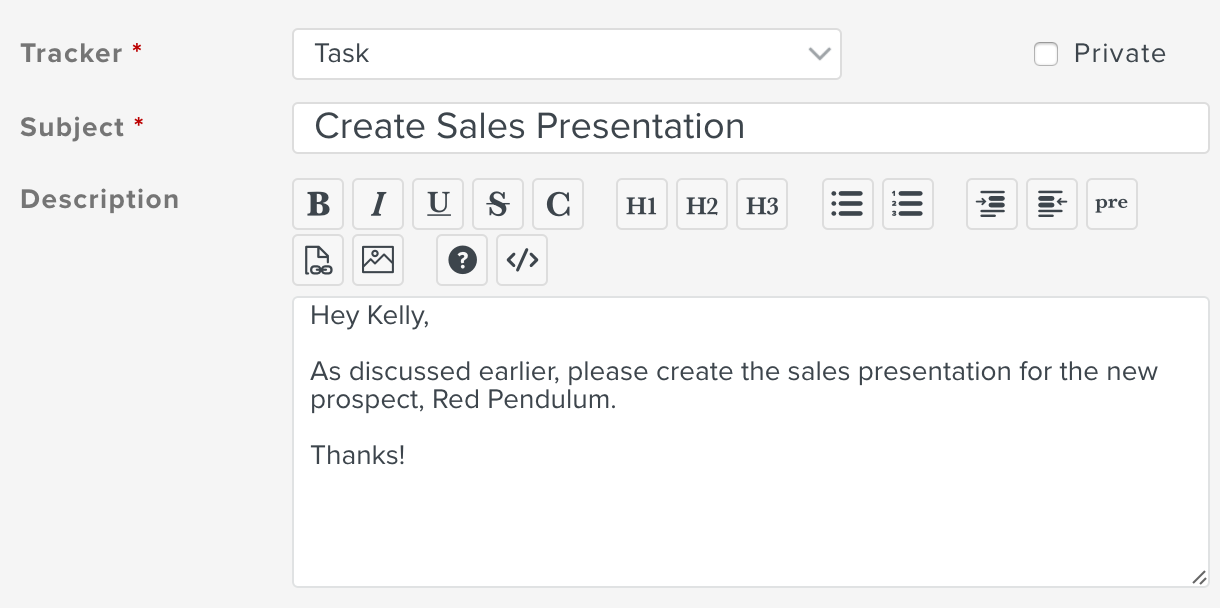
- In the Tracker field, select the most appropriate issue tracker category (learn more about trackers here).
- In the Private field, select the check box to indicate that the issue is a private issue. Based on role permissions, a private issue will not be visible to other users, though they may see other issues within the same project.
- In the Subject field, enter a brief yet meaningful subject title for the issue.
- In the Description field, describe the nature of the issue. You can use the formatting buttons at the top to add basic formatting. To learn more about Planio's default formatting language Textile, click the small Help icon.
Planning and project related fields
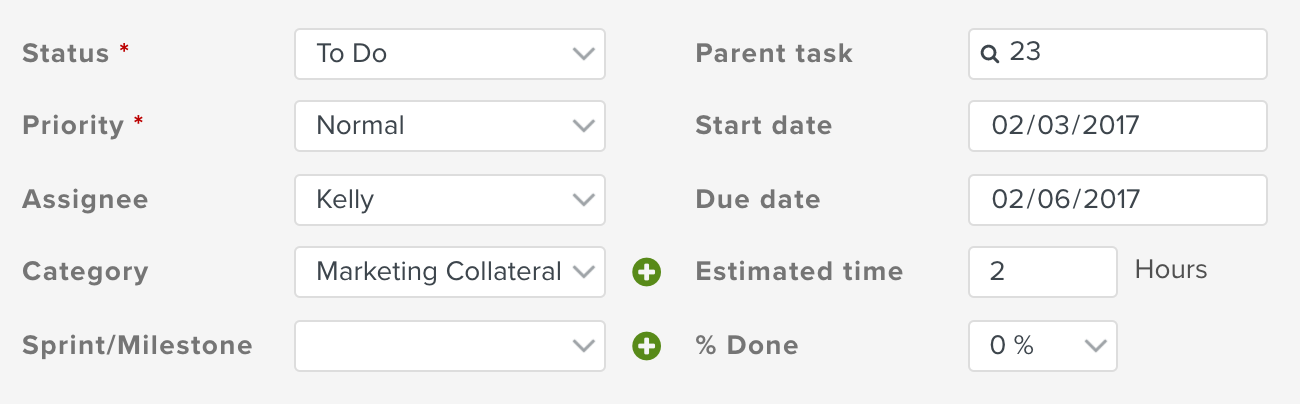
- In the Status field, select the current status of the new issue.
- In the Priority field, select the relative importance of the issue in terms of its priority with other issues.
- In the Assignee field, select the person to whom the issue should be assigned. The assignee, like a watcher (see below), receives e-mail notifications when an update to the issue occurs.
- In the Category field, select the relevant category for this issue. If you'd like to create a new category, click on the small + icon next to it.
- In the Target milestone field, select a milestone. Milestones will be displayed alongside their issues on the roadmap of your project. To create a new milestone, click on the + icon next to it.
- In the Parent task field, enter a task/issue number or enter keyword text of a task that is a parent to your task - Planio will actively display all tasks that match your text. Click the parent task when it appears.
- In the Start date field, enter the date when the issue should begin in
yyyy-mm-ddformat or click the icon to launch the mini-calendar. - In the Due date field, enter the date when the issue is due in
yyyy-mm-ddformat or click the icon to launch the mini-calendar. - In the Estimated time field, enter the number of hours to be allocated to the issue.
- In the % Done field, select the current percentile value of the issue’s completion rate.
Please note that if you don't have issue categories or milestones yet, the fields will not be shown. You can create them within your project Settings.
Customer related fields
Planio lets you work together with your customers even when they haven't got their own user account. If an issue is associated with a customer company and contact, you can optionally send issue updates to your customers via e-mail. Their response will automatically update the respective issue in Planio. Both companies and contacts can be managed in the Customers tab within your project.

- In the Customer company field, enter the name of an existing company - Planio will actively display all companies that match the name. Click the company when it appears.
- In the Customer contact field, select the name of the contact within the company who is associated with the issue.
- In the Additional customer contacts field, you can add additional contacts from within the customer company that should receive issue updates in CC. Simply enter names or e-mail addresses - Planio will select or create contacts automatically for you. You can add as many additional contacts as you like, to add a new line, simply click on Add contact.
Files and watchers
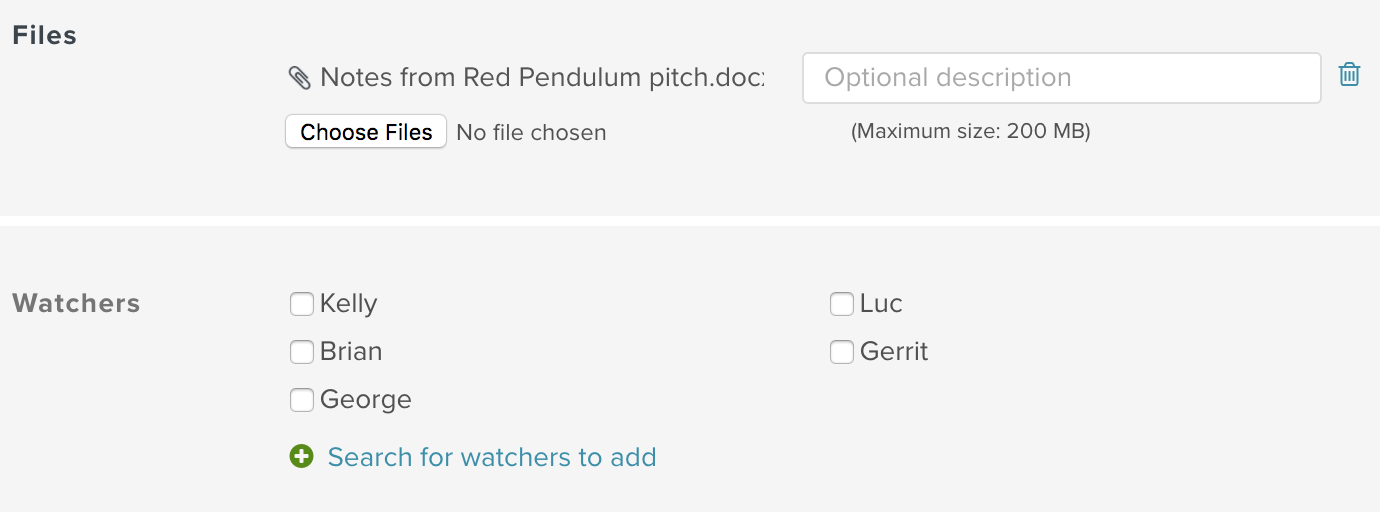
- In the Files field, click Choose Files to launch the file upload tool. This field is used to attach files that are relevant to the issue. Alternatively, you can simply drag and drop files from your computer onto the issue form to attach them.
- In the Watchers field, select the check box(es) to indicate other people within the project team who should be kept aware of the issue via e-mail notifications. Users that aren't shown can be added by clicking on Search for watchers to add.
2. Finalizing your issue
- Click Create to finalize the issue and view its details; or,
- Click Create and continue to finalise the issue and create an additional issue; or,
- Click Preview to view the appearance of the issue’s description (very useful if you have included wiki syntax text in your description).
Do you think your colleagues might be overwhelmed with all those issue fields and options? Learn how to strip down your Planio to a productive bare minimum.
No credit card required. Sign up only takes 60 seconds.