- Table of contents
1. Planio workflow basics
In Planio, every issue must belong to a tracker which defines its workflow. Let's look at this in more detail:
Trackers
We'd like to see trackers as special issue types. An issue must belong to exactly one tracker. Task, Support incident, Software bug, or -- you guessed it -- Vacation request would be great examples for a tracker.
Issue statuses
Issue statuses describe the different states, that an issue in Planio can have at any given moment. For instance, an issue can be Open, In progress, Waiting for review, or Closed. An issue will always have exactly one status and the status will likely change over time as people work on the issue.
Roles
Users in Planio have their own user account using which they take part in projects using one or more roles: While some users may take part as Manager, others may be regular Staff or e.g. Client. The role defines what a user can and cannot see or do in a given project. It also defines the user's workflow.
Workflows
The workflow brings it all together: A workflow defines for every possible combination of tracker and role which issue statuses are available. It defines for all its tracker's issues which status changes are allowed and which issue properties are visible and/or changeable.
Say what!? This is arguably the most complex (and powerful) part of Planio, but don't worry -- we will walk you through it and you will be a workflow expert in no time!
2. Technicalities of going on a vacation
We knew you would love this section. Dreaming of that deserted beach in the Caribbean? Let's request some vacation days and off we go.
In many companies, taking a vacation requires approval by a manager. Employees must submit a request mentioning the start and end date of the requested vacation and managers will approve or disapprove the request. Upon approval, the dates of that vacation can not be altered, and the vacation request is final. If disapproved, employees can alter their requested dates and re-request approval until -- hopefully -- they will be allowed their well-deserved days in the Caribbean.
We will now build this workflow in Planio allowing for actual vacation requests being made and approved. We will also show you how to visualise them on Planio's calendar, so you can get a great overview on who is on vacation at which point in time.
3. Tracker, Statuses, Roles, and Workflow
To implement this, we will create a Tracker called Vacation request, three Issue statuses called Open, Approved, and Rejected, and two Roles, called Manager and Staff.
Finally, we will tie all those together using a custom Workflow in Planio.
Create the tracker
First things first. Let's get down to business:
- Navigate to Your avatar → Administration → Trackers, then click on New tracker.
- Enter Vacation request as Name.
- Select Open as the Default Status.
- Uncheck the Issues displayed in roadmap checkbox since we do not want to see vacation days on our project roadmaps.
- Uncheck all Standard fields checkboxes except the ones for Start date and Due date. We'll actually use those for the start and end of our vacations.
- Do not select anything in the Copy workflow from drop down.
- Click Create.
![]()
Create issue statuses
The steps are similar but slightly different for the three statuses Open, Approved, and Rejected.
- Navigate to Your avatar → Administration → Issue statuses.
- Do you see a status called Open? Great, you can skip this step. Don't see it? Simply click on New status, enter Open in the Name field, and uncheck the Add to all workflows checkbox since we only want it for our Vacation request workflow. Then click on Create.
- Create the remaining statuses Approved and Rejected following the same pattern and make sure the Approved status has the Issue closed checkbox checked.

Create a role
This one should be easy:
- Navigate to Your avatar → Administration → Roles and permissions.
- Do you see the roles Manager and Staff already? Great. You're done with this step. Those are actually the two basic roles your Planio account came with.
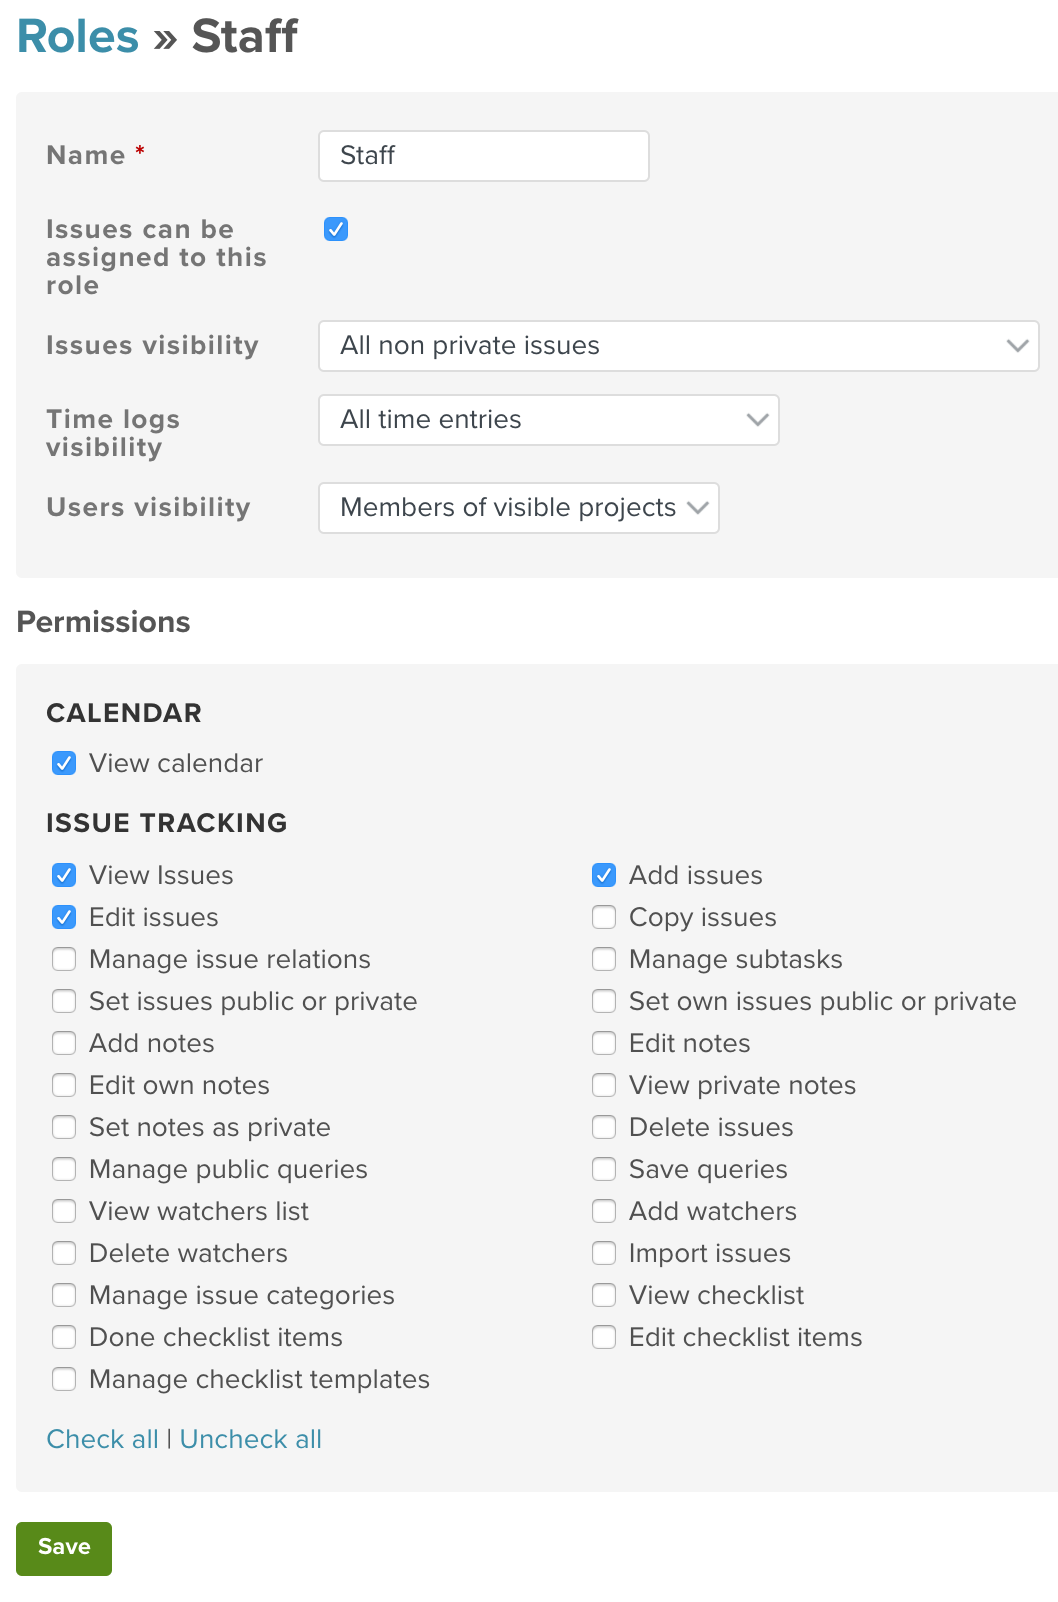
- Do not see the roles? Create them by clicking on New role. Enter the role's Name and ignore the rest for now, just be sure that the check boxes for permissions View calendar, Edit issues, View issues, and Add issues are checked. Repeat this for both the Manager and Staff roles.
Define the workflow
This is the fun part. Here is where it all comes together.
- Navigate to Your avatar → Administration → Workflow.
- Select the Staff role and your Vacation request tracker.
- Uncheck the Only display statuses that are used by this tracker checkbox and click on Edit.
- The checkbox matrix that appears lets you configure all allowed status transitions for a given role and tracker. For instance, the Staff workflow should have the checkbox at the top and lower left checked. This means that members having the role Staff can create new issues with a status of Open. Additionally, they can set an issue having a current status of Rejected back to Open.
- Now, let's configure the Staff workflow according to the following screenshot:
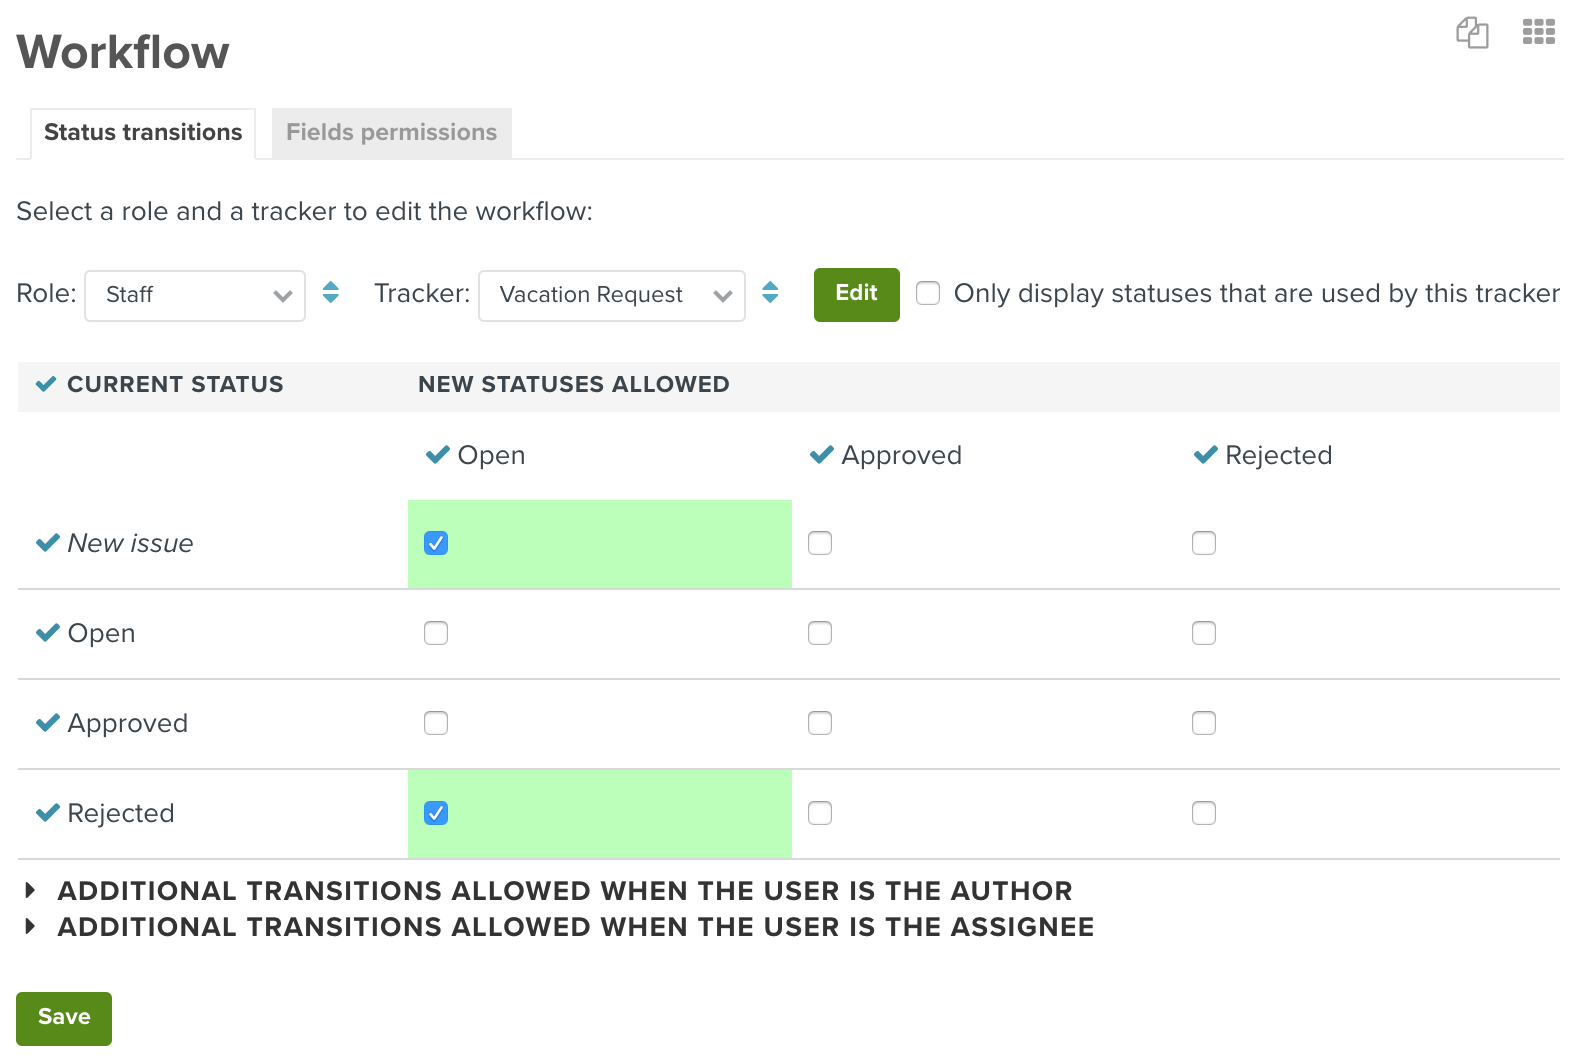
Workflow for Staff role - Click on Save.
- Next, select Manager as a role, make sure the Only display statuses that are used by this tracker checkbox is unchecked click on Edit again.
- Configure the Manager workflow according to the following screenshot:

Workflow for Manager role - Click on Save.
Wait, what did we just do? Have a look at the screenshots again. What we defined is:
- Managers can set an open vacation request to Approved or Rejected and a Rejected vacation request to Approved (in case they changed their mind).
- Staff can only set a Rejected vacation request back to Open. (This is for when they change their dates and want to re-request approval.)
Adapt field permissions
Now, let's customize the issue form fields a bit according to the issue status.
- Still on the Workflow screen, select the Fields permissions tab.
- For Manager, set everything to read-only except the Subject. To save some clicks, you can copy a value to the entire row by clicking on the » symbol.
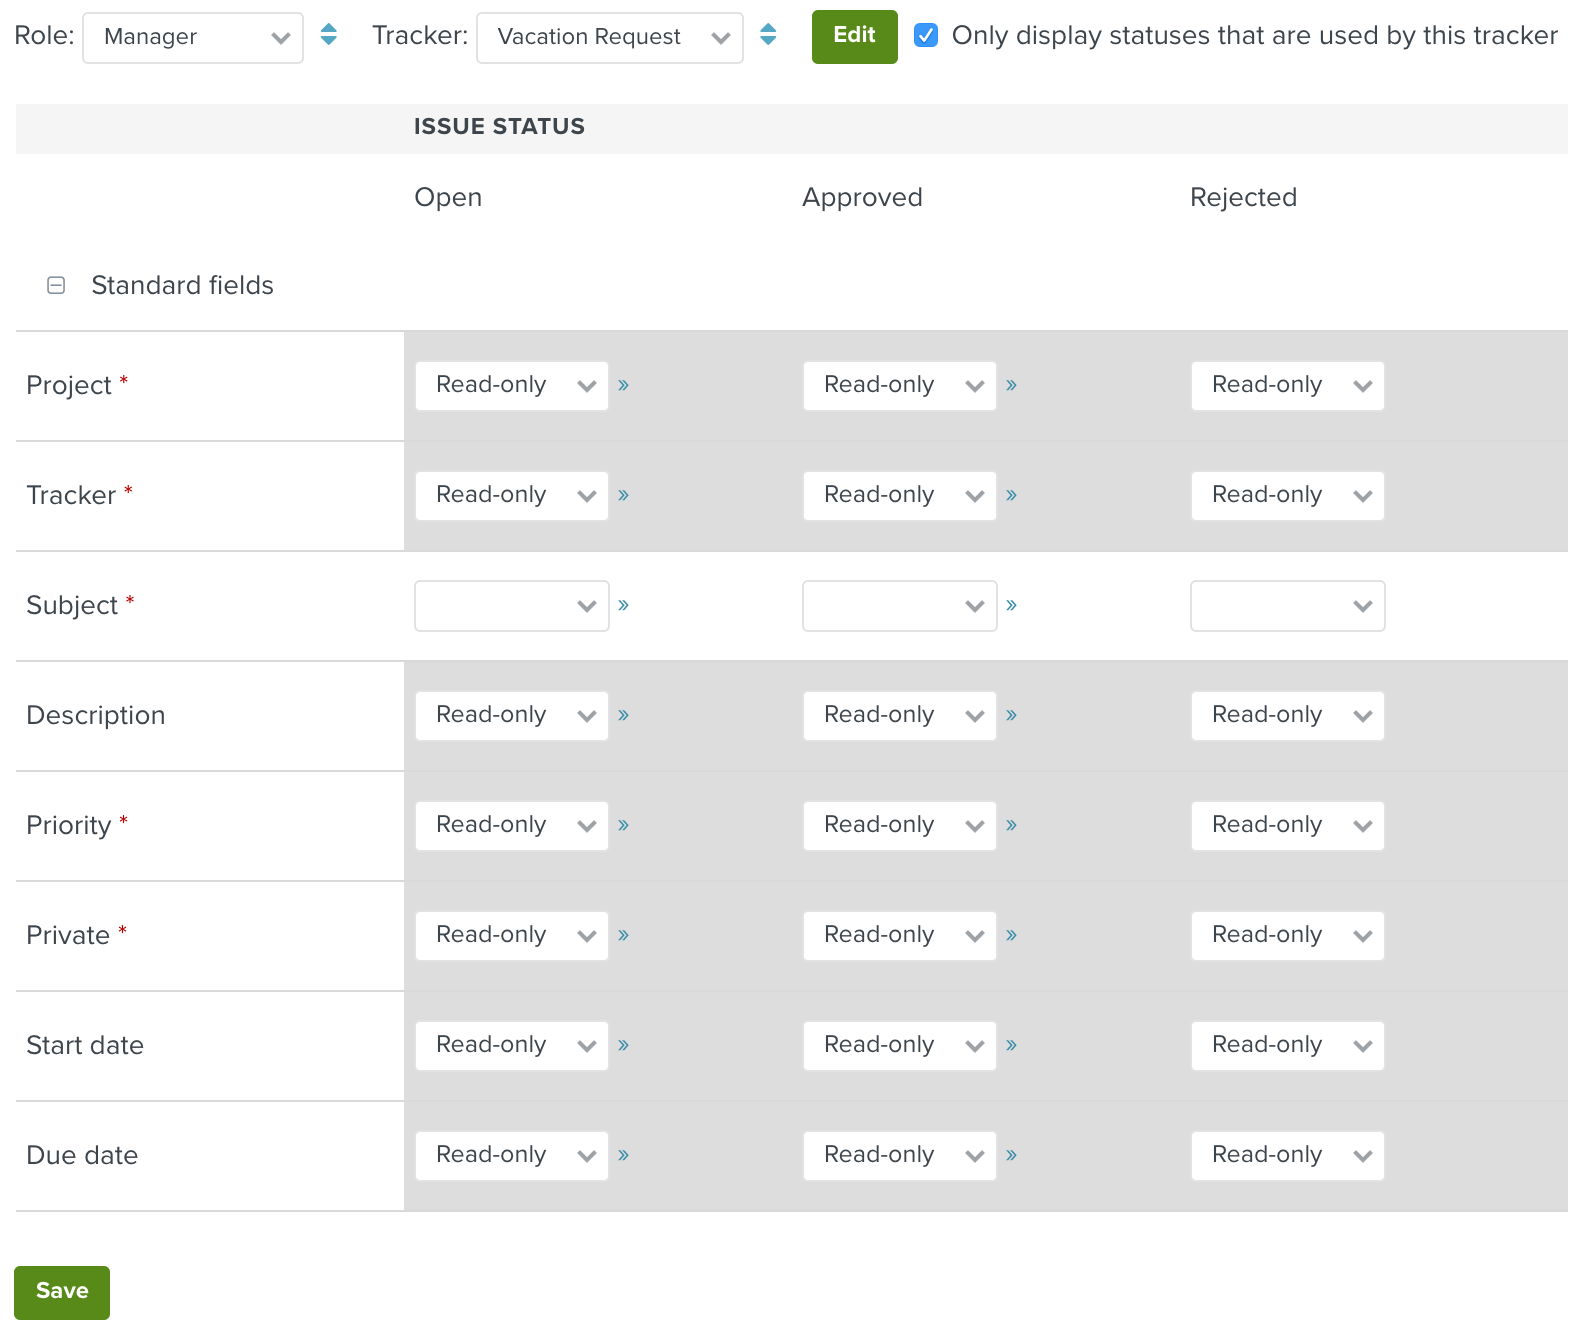
Fields permissions for Manager role - For Staff, do the same except for the Start date and Due date fields:
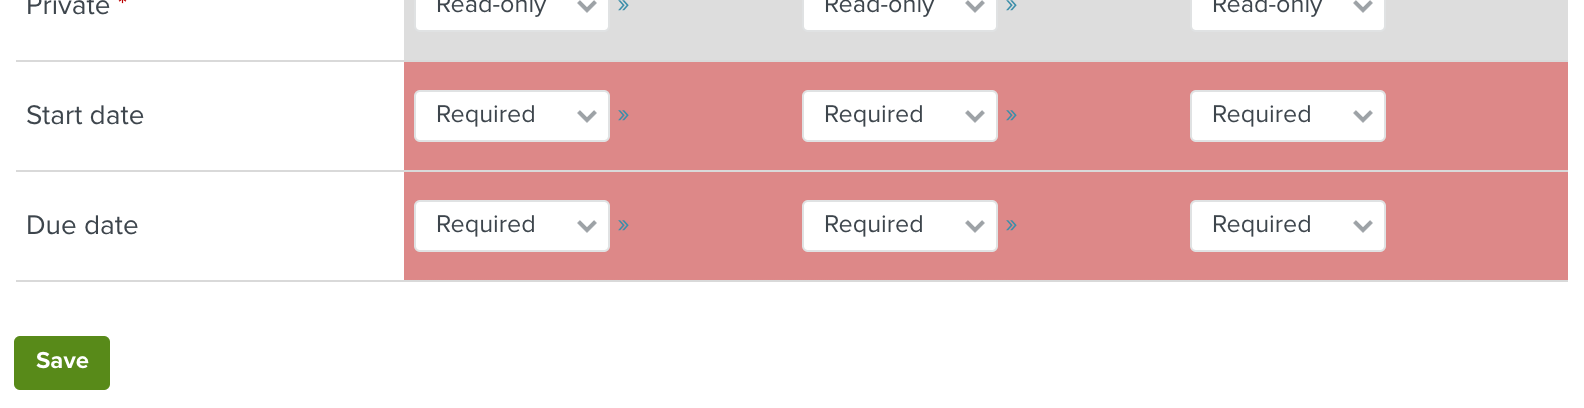
Fields permissions for Staff role
This makes sure only Staff can actually set the dates for a vacation request and that those dates cannot be changed anymore, once approved.
4. Put it all to work in an actual project
That's enough of prep work. Let's try it out.
- Start by creating a new project via Projects → New project...
- Give your project a name, e.g. Vacation planning.
- Disable all apps but Issue tracking and Calendar.
- Select only your Vacation request tracker and nothing else.
- Click Create.
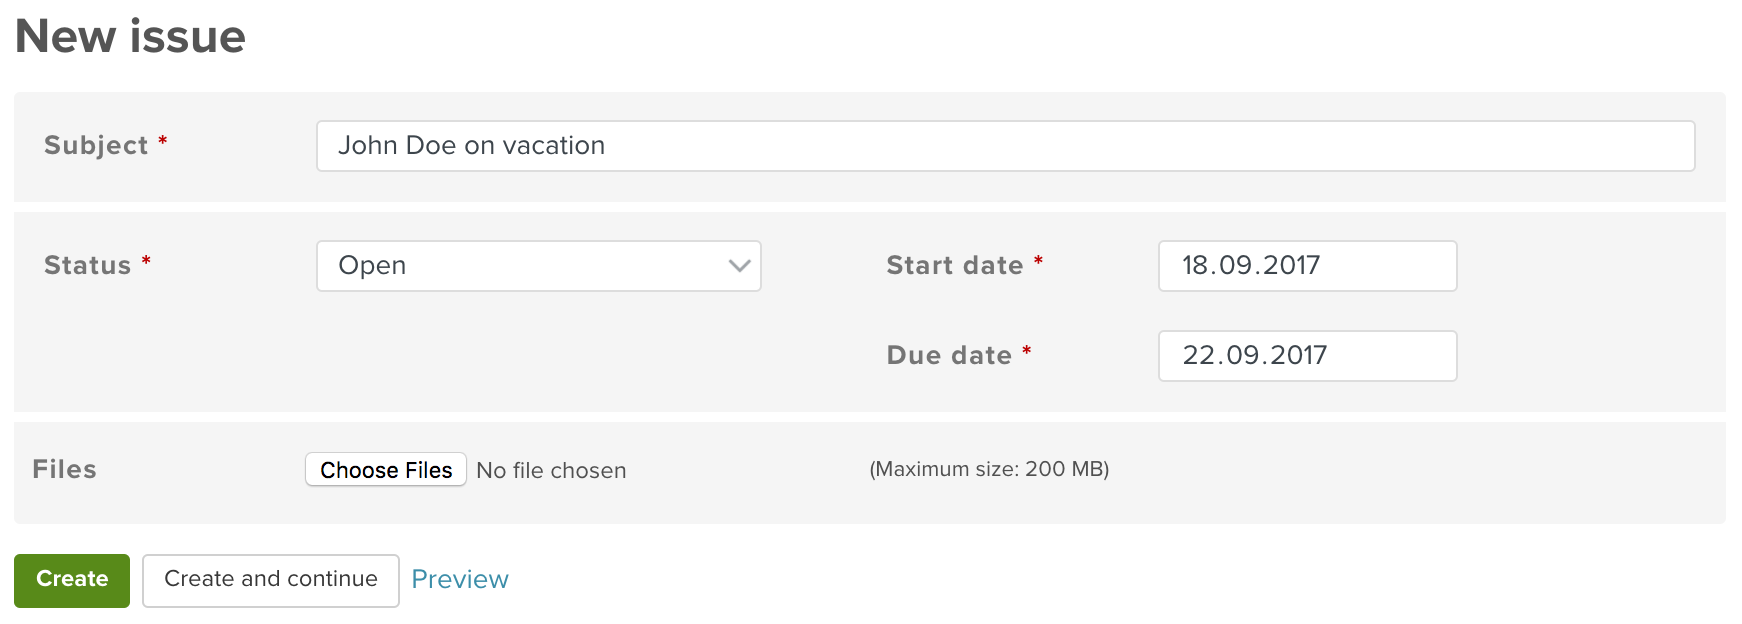
That's it, you're done. Your users can now use this project for your new vacation request planning workflow. In order to submit a vacation request, all they'd have to do is create a new issue. Selecting a start date and a due date will be required when creating vacation request issues and all other useless fields will be hidden.
In order to try it out for yourself and play around with it, we recommend you create two users via your avatar → Administration → Users that have no administrator privileges and add them as Staff and Manager to your project respectively.
(If you try it out as an administrator, don't be alarmed by the fact that you can always choose from all statuses when updating an issue. That's normal if you're an admin. Regular users will only see the statuses as defined by their workflow.)
Bonus: The calendar view
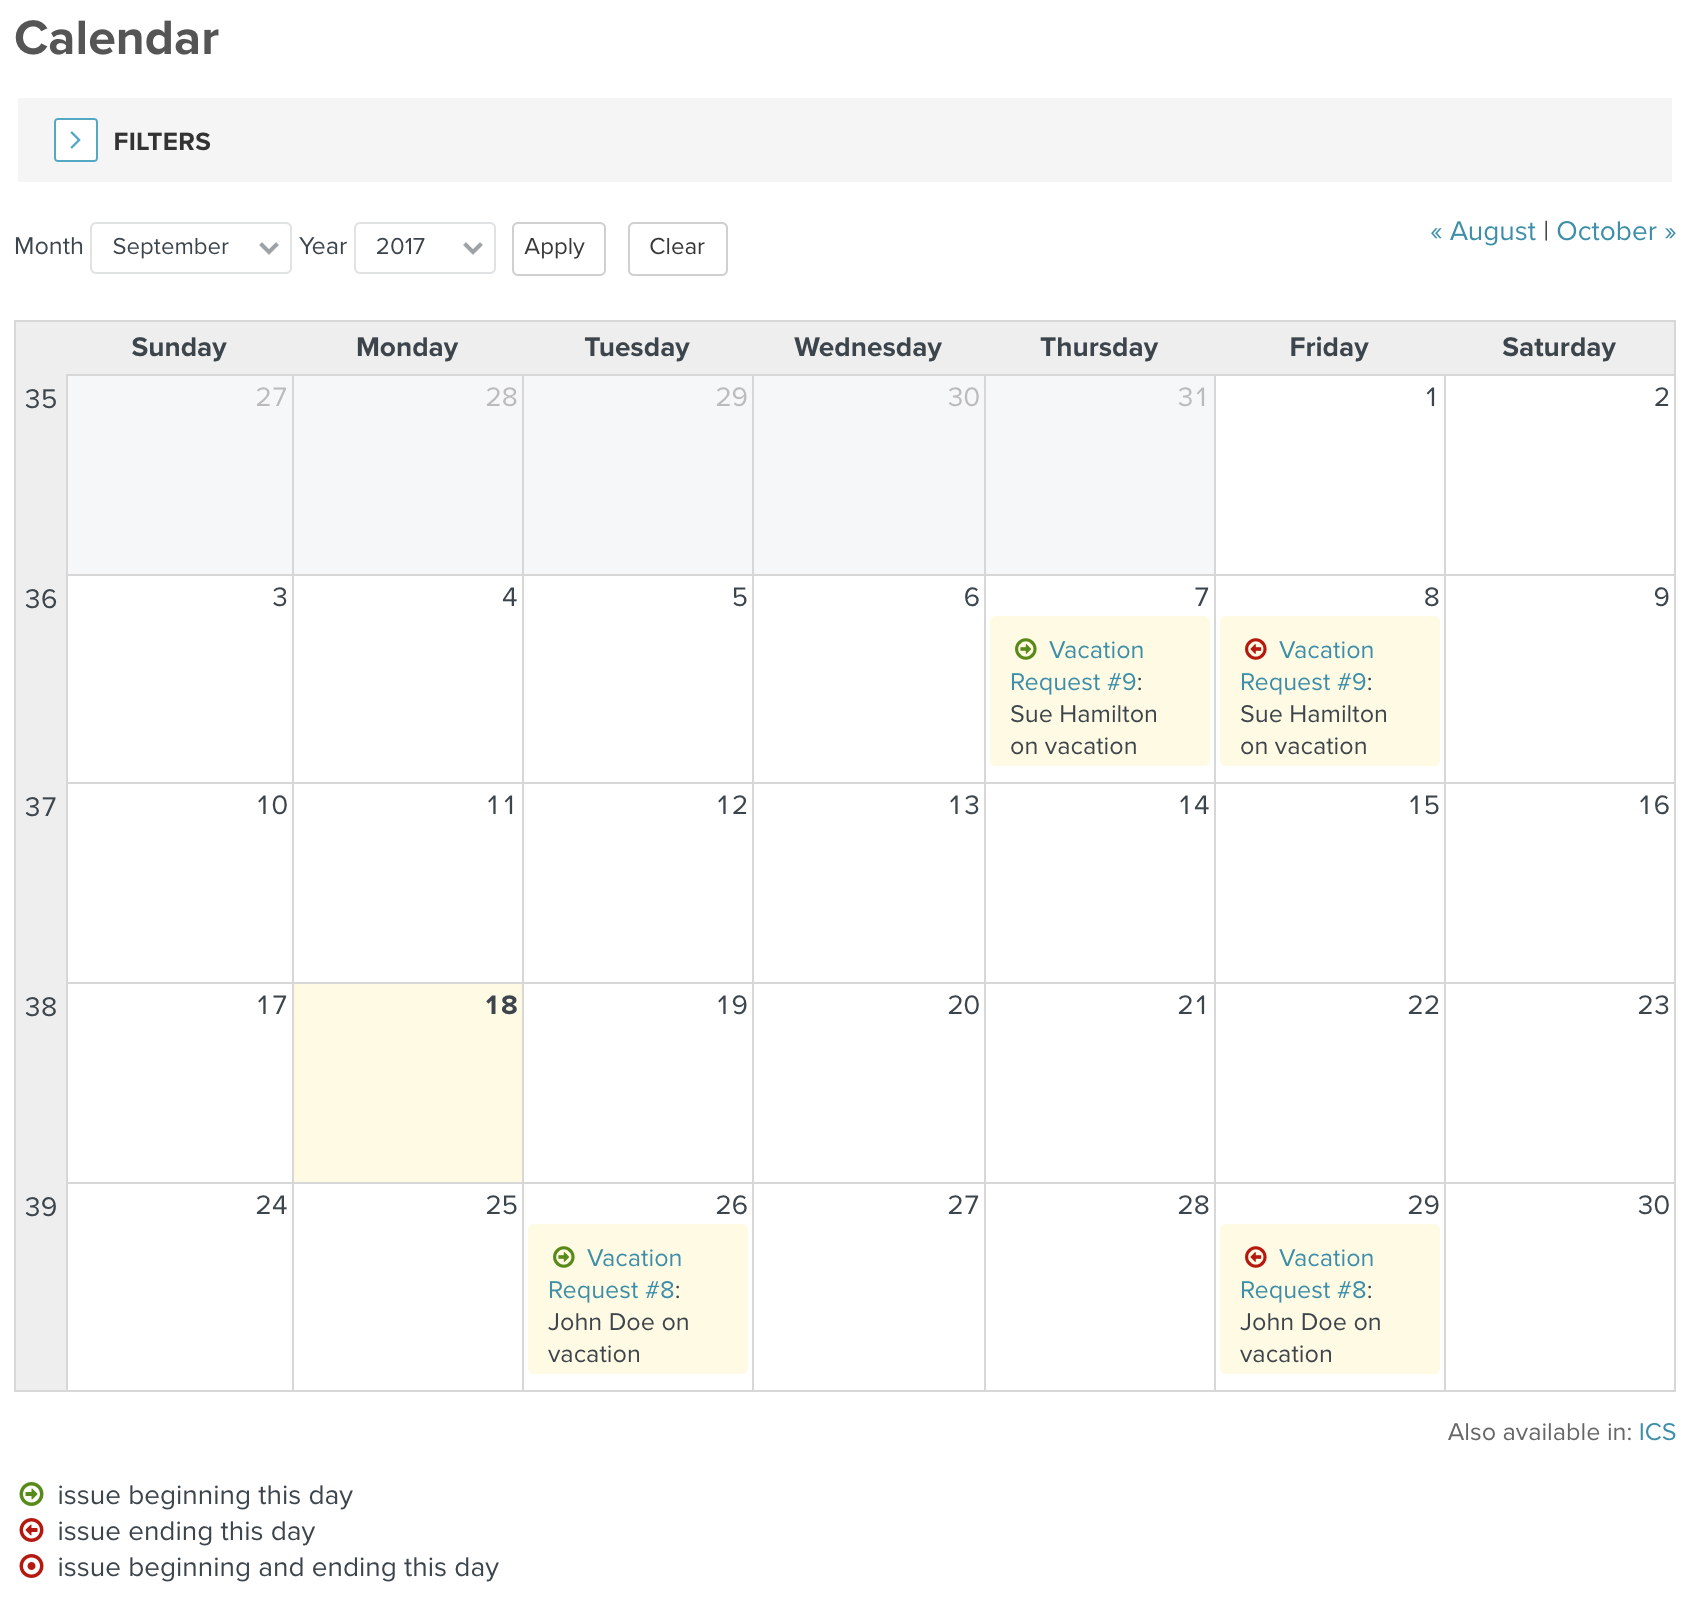
What's up with the Calendar module we've enabled in the roles and your project, you ask yourself? Well, after adding a couple of vacation requests, check out the Calendar tab in your project. The Planio calendar will give you a nice monthly overview of all vacation requests which have been tracked.
By using a custom query, you can even create a calendar view that displays only approved vacation requests. Or create a query for your managers that shows only Open requests that have to be approved still.
No credit card required. Sign up only takes 60 seconds.